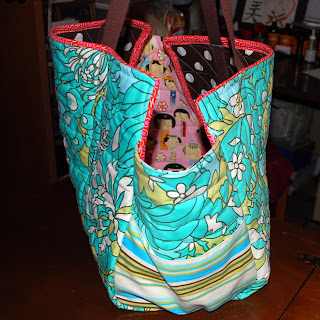
Stitching on the handle was not easy. If I ever make another bag like this, I am certainly going to try attaching the handles earlier - after the panel is quilted, but before the side panels are attached. Stitching it on after the bag took on a more dimensional shape required a bit of trickery in turning the bag partly inside out and squeezing it through the machine.
Here's a shot of the floral inside - taken during the process of attaching the handles:
If you look carefully, you can see a single line of stitching running across the handle near the binding. This - along with a line of stitching along the edge of the handle pieces all the way along the outside - is enough to hold the handle in place, but not enough to risk putting anything with much weight in the bag.
Once the handles were attached, I turned the line of stitching near the binding into a rectangle - stitching several times across each needed line - then fitted an X across the rectangle. Again, with several layers of stitching. I did the same across the center of the base, concentrating mostly where the strap fabric overlapped. I hope that holds it. I really don't want to stitch this down again.
So what's with the 99% finished thing? My plan is to add one more piece to give just a bit more structure to the base - probably a piece of wood or plastic just to give a bit more support in the base.
There's room for my sewing machine - and room for a little more too.
I think this is going to make taking the machine along on trips a little easier. Sure, I'll need something a little sturdier if I should ever happen to fly with the machine (not a plan) or take a ride in a carpool (more likely, but still not exactly a plan). So it's not a forever fix, but I think it'll do nicely for now. And even if it doesn't, I still had a blast with it - and I can at least carry my other tools and the baby quilt I'm working on at the moment in it - which makes it a win win win in my book!


No comments:
Post a Comment