Showing posts with label bag. Show all posts

15 December 2014

Drawstring Bags Everywhere

I feel like I'm a drawstring bag making machine. The assembly is going pretty well -- though I need a little more white ribbon to finish the last of the black ones. I do wish I was a little better at determining sizes. I think I have small, large, and massive, with not much in the medium-this-will-hold-a-dvd size range. That's probably why most people use patterns instead of winging it off free tutorials...

At least Momo's enjoying the pile.


25 November 2013

A Glimpse...

Work is still running me at record hours -- which of course is great, except that I'm not managing to keep up with that and anything else. It seems like everything else, from hanging out with friends to looking at houses to keeping up with housework, has been falling aside. I've got a friend in town for the holidays - and I've only managed to sneak off to see her twice for only a couple hours.

Every time I have a chance to reflect on my day - or week, or month - I want to make changes toward having a more balanced life. You know, time for work, time for housework, time for social things, time for hobbies. It sounds great. But unrealistic right now.

Since I can flip on my sewing machine any hour I'm free - unlike my poor friends who do not want to hear an invitation to meet for tea at 11 pm on any given night - I've been doing a little sewing. Nothing big, nothing from plans, just playing around and seeing what happens.


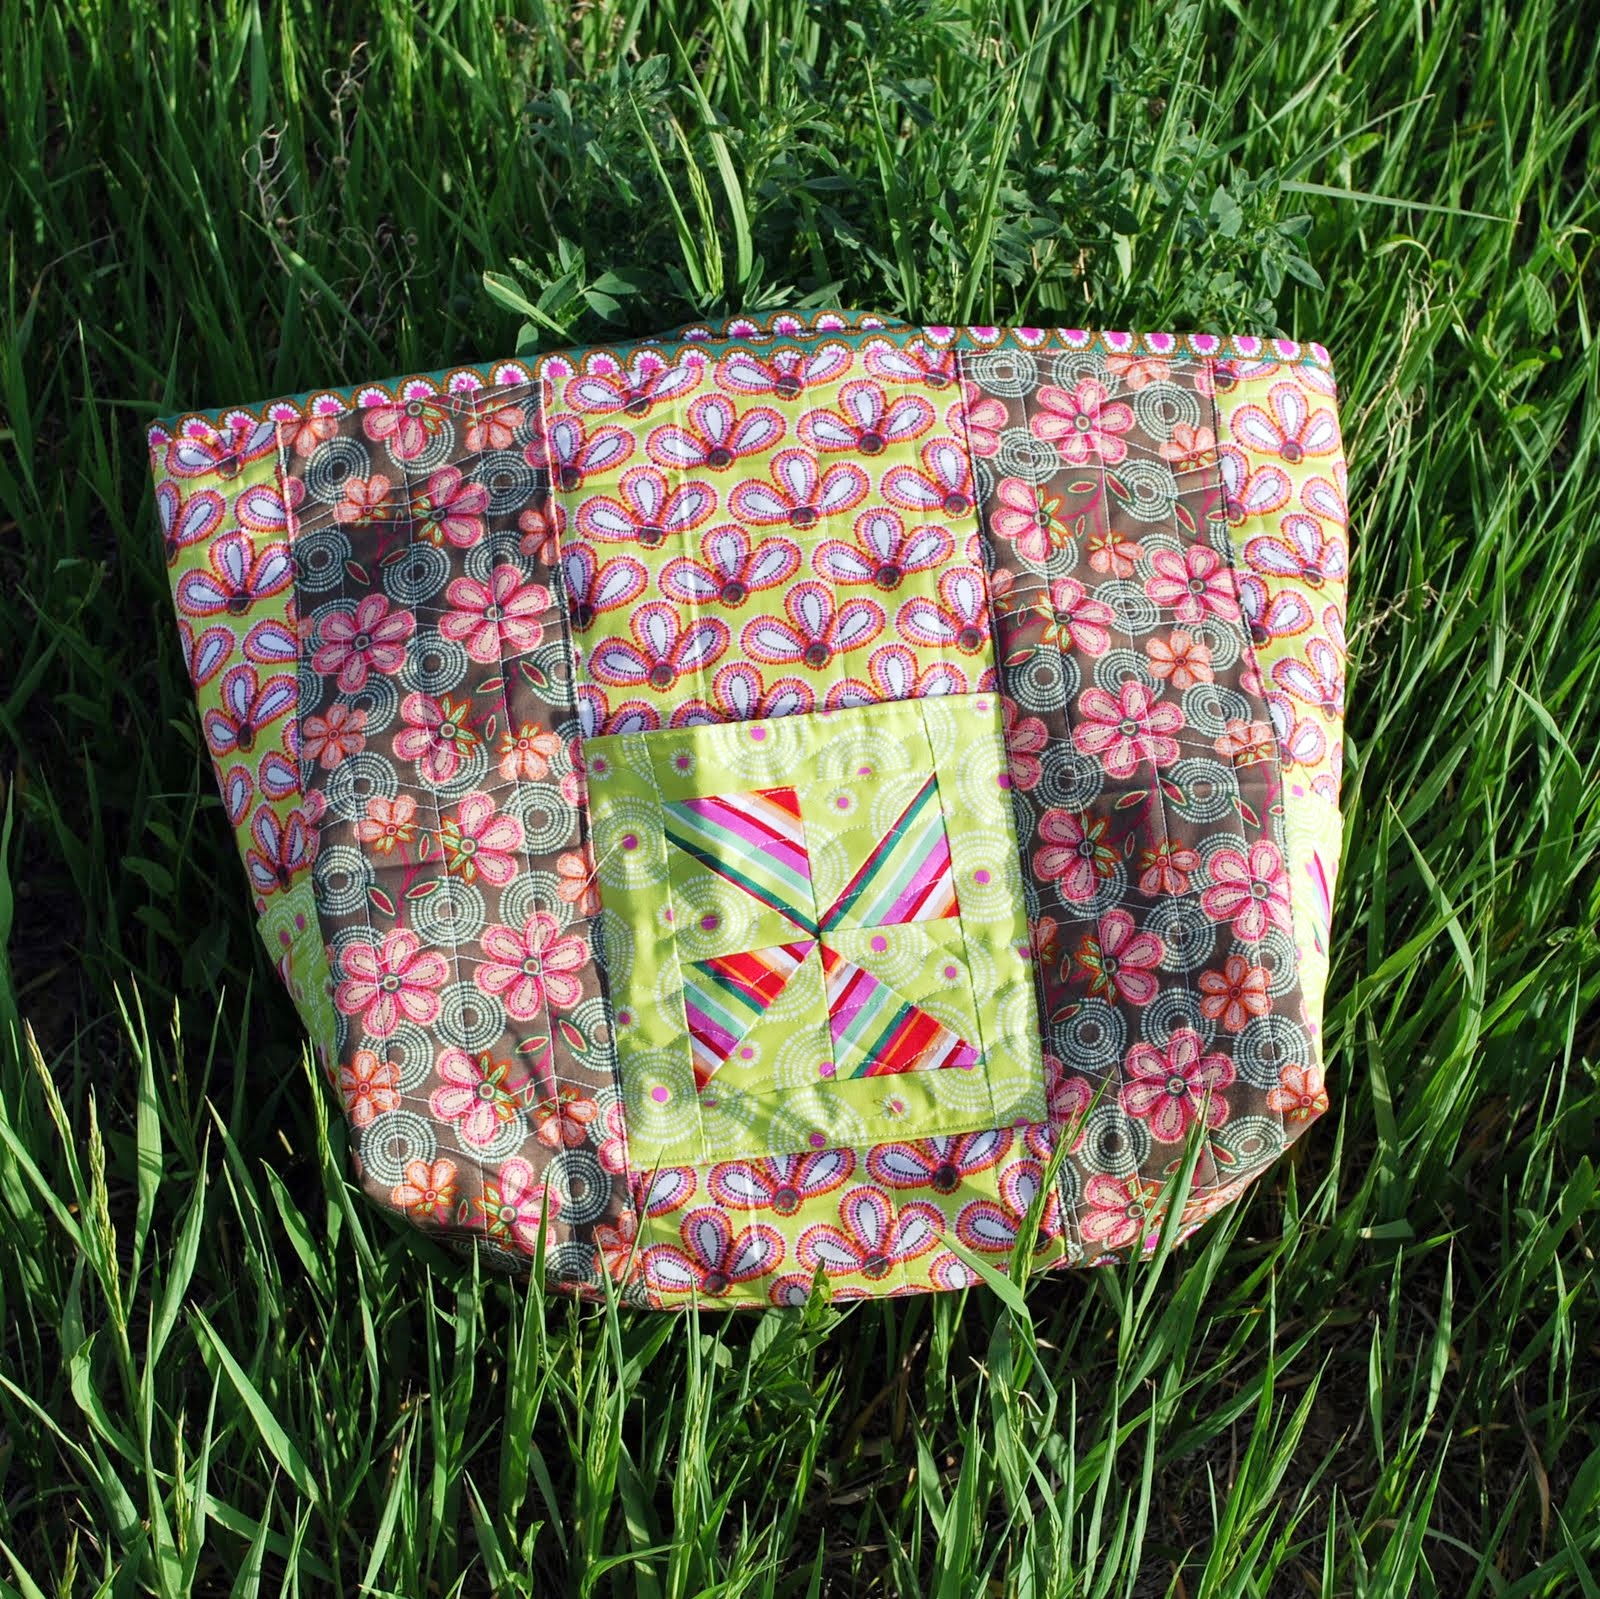
This are my two attempts at a case for my work tablet. Attempt number two is just a little bigger than I'd hoped - but attempt number one wound up less than half-an-inch too small (a sad error when putting it together), so I went a little bigger on attempt two. Still, I am looking forward to using it in the next week. Since I'm free to carry whatever kind of purse I want over the holidays (instead of the cross body I need for work days), I'm looking at my few options, all of which have open tops. Without the security of a closed top purse, I felt like I needed a little more protection on my most important work tool.

I really prefer the contrast zipper on attempt number one - which also looks a little better in terms of zipper installation - but it is just a little too small. Oh well, I'm sure I'll find some way of using it.
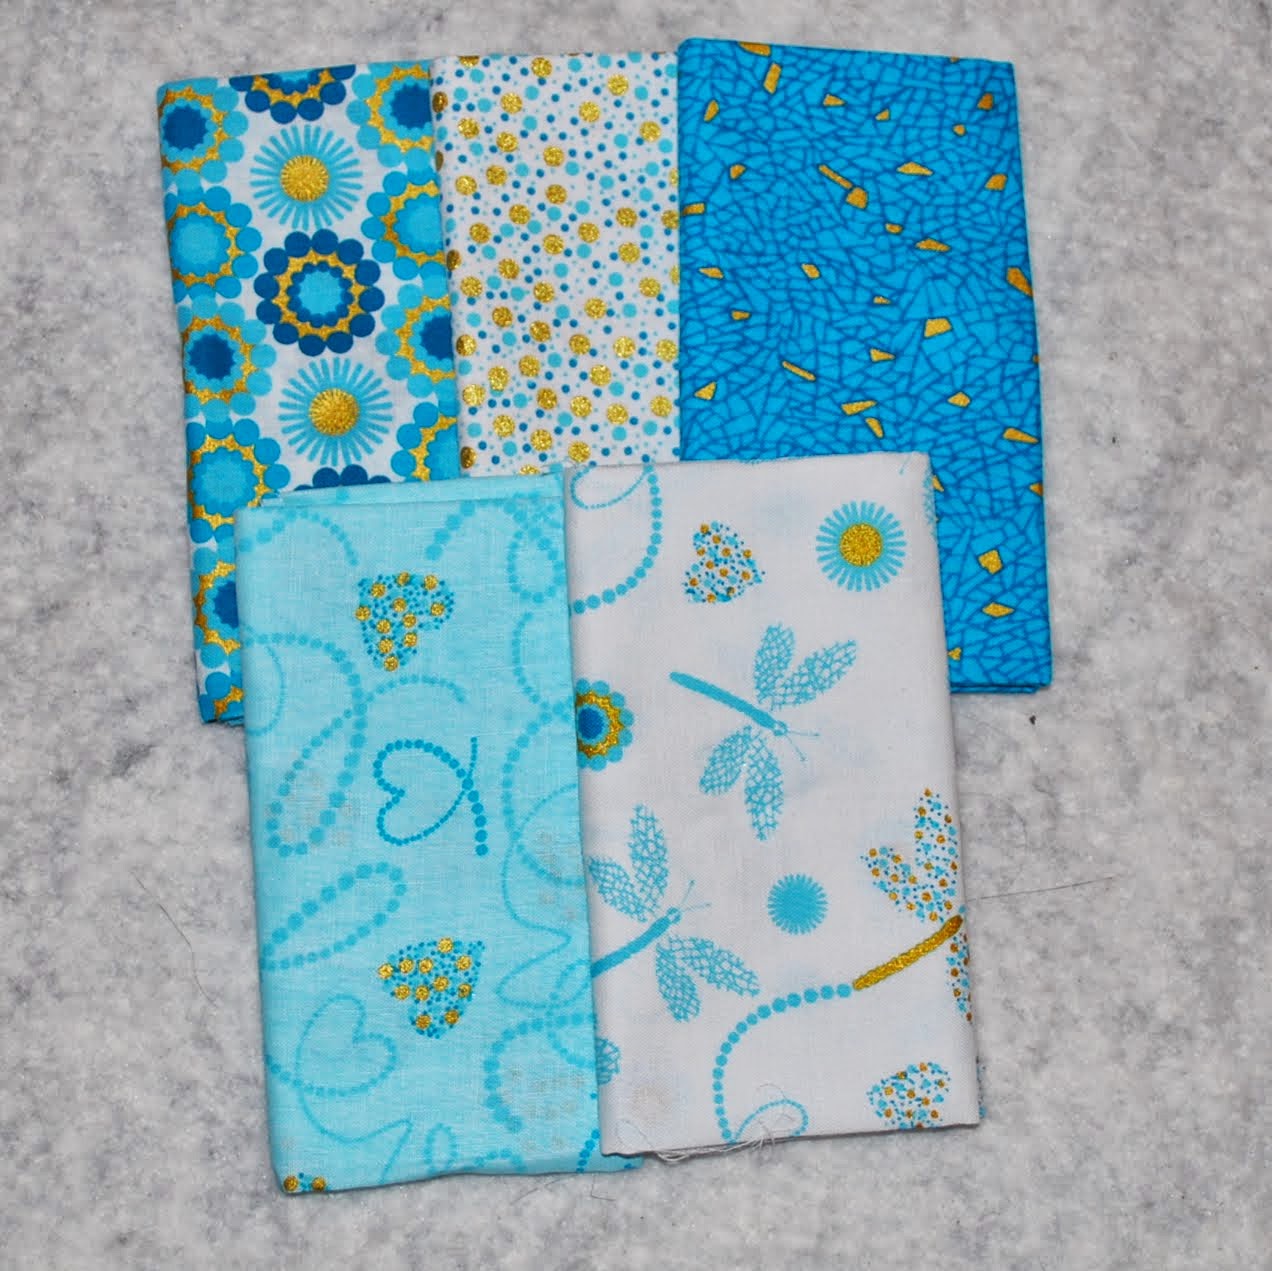
Can you tell I've got storage and travels on my mind? I'm not a good traveler, but having lots of cute little bags in my luggage might help. (Yes, that picture is incredibly blurry. If I were a good blogger, I would probably retake it. But right now I'm not feeling up to the effort.)

I don't know what it is about traveling, but the moment I hear I'm going on a trip, I start wanting a new purse. I would guess that probably means I have a tendency to settle for 'good enough' on purses, and later it turns out it wasn't 'good enough' after all... But, looking through my stash - even smaller now that I've sent more than half my supply off to charity - I still didn't find anything I really wanted to take.

Long story short, I am not one of those people who is comfortable mixing dark neutrals - like navy with black or brown with black. I see it happen for other people and think it's okay, but I haven't been able to embrace it yet. So, trying to pick a black or brown purse to go with both navy and black outfits... well... it was a losing battle. Since black and brown are about all I have left, I just wasn't feeling it.

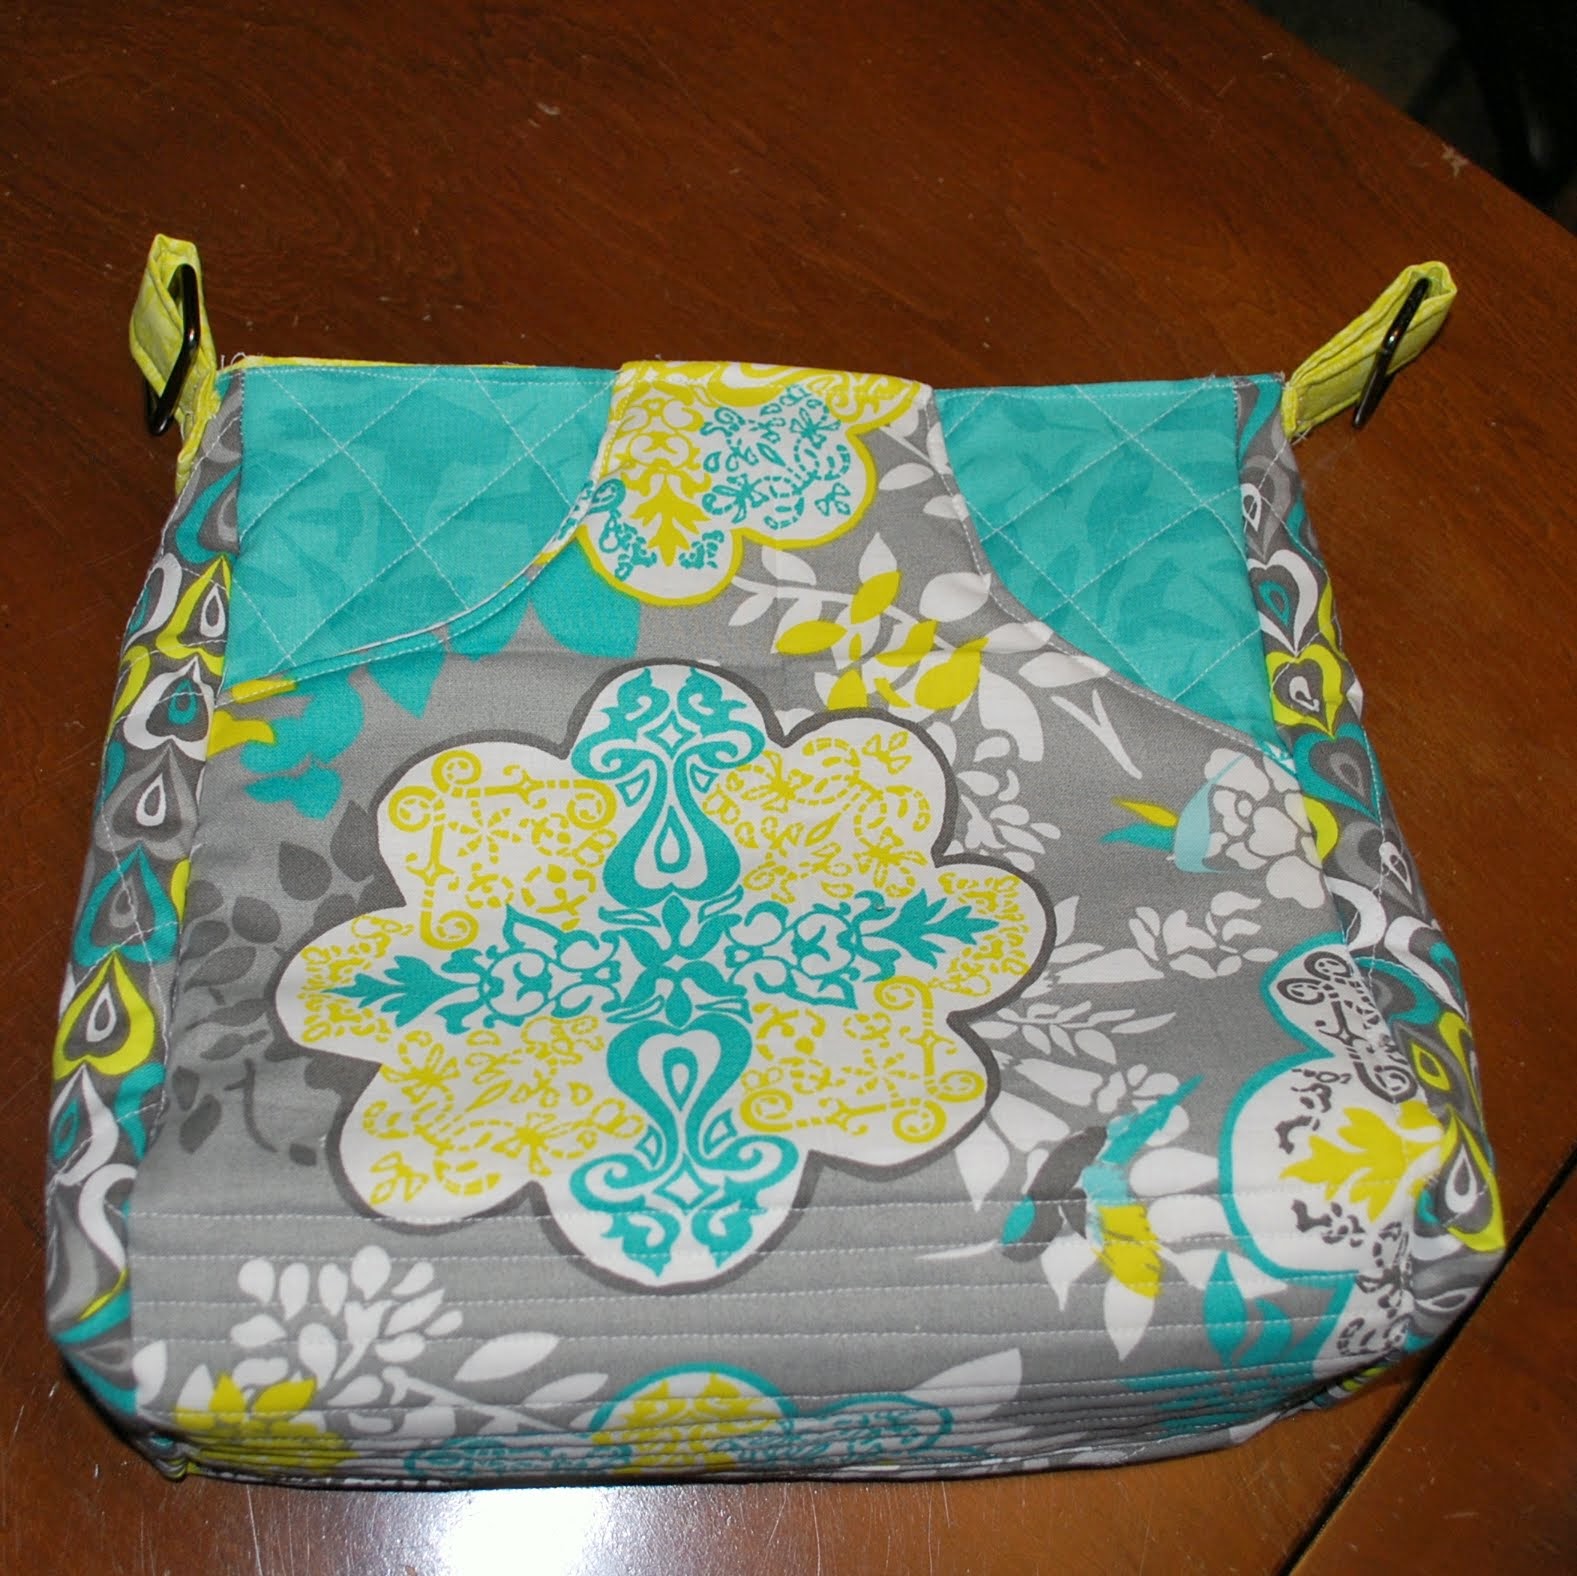
Several days worth of plotting and a few hours of sewing and I have something like this:
Not quite finished yet
A quilted and lined purse with one big exterior pocket. I've added an over the shoulder strap that can clip on or off, and I'm hoping to eventually make a longer cross body option - but not this week. This is my first time working with any kind of hardware, and still working without a pattern. I'm sure there were better ways to do almost everything I did, but so far I'm liking it. I'm really looking forward to taking it on a test drive tomorrow.

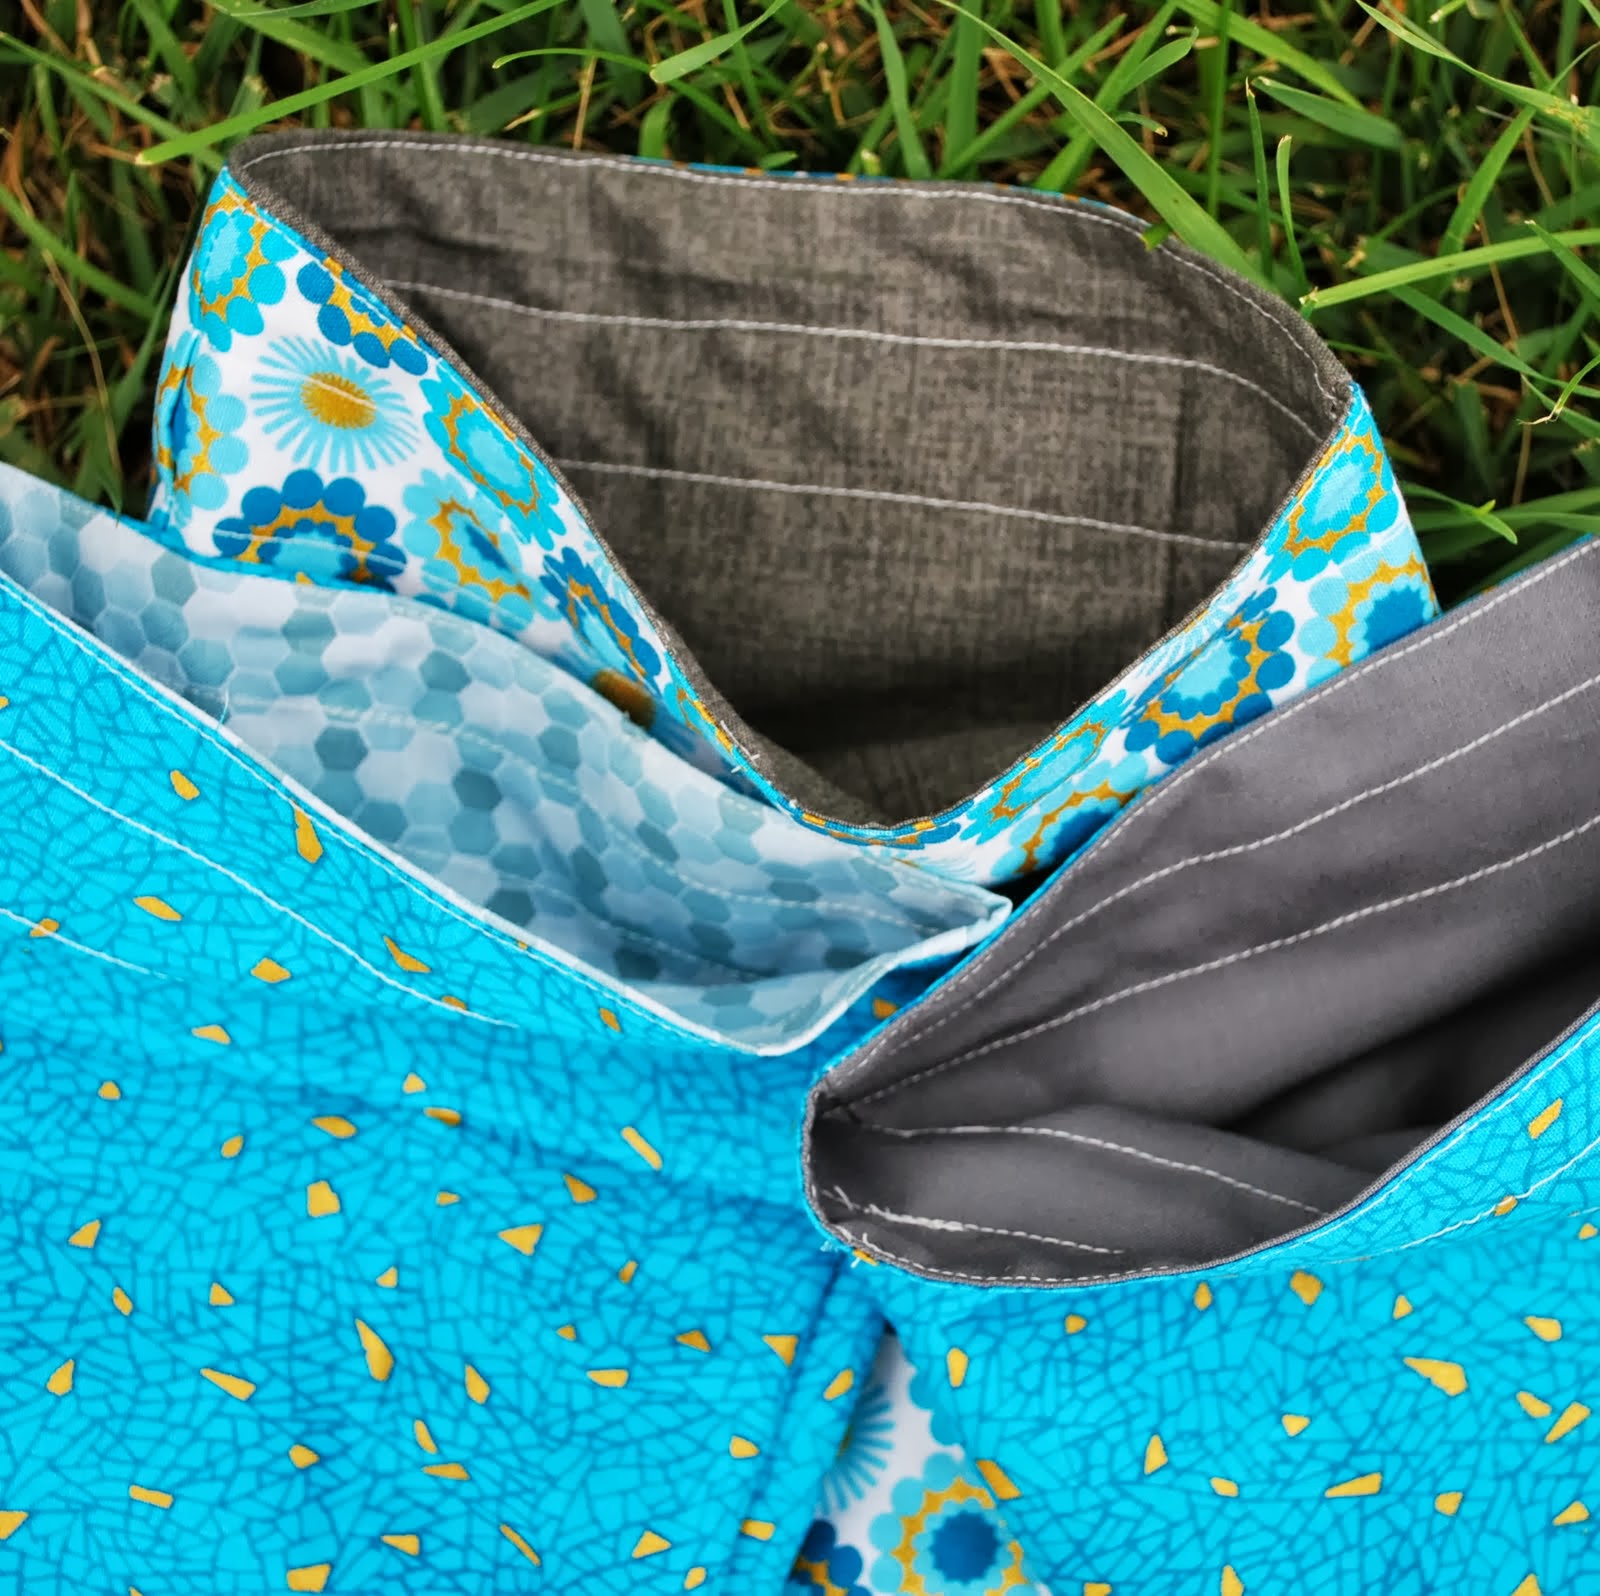
Since I didn't add any interior pockets to my lining, I wanted to use the scraps I had leftover to make a coordinating little zipper bag that I could put my mobile in as protection.
Front (Whoops! I see I missed clipping a piece of thread)
Back
Again, I was just making it up as I went along - but I think it turned out well. I did have a coordinating turquoise zipper (that was supposed to go on the purse) but I so loved the contrast zipper on the tablet bag I made that when I saw I had one more of that color left (and in a size better suited to cell phone carriers than anything else), I went with it. I am not disappointed.

Looking at them together, I'm fairly pleased with how they turned out - especially for having absolutely no real pattern or tutorial to follow. I think that they are going to perform fairly well for me - but I am glad to have some time before my trip to test drive them before I take off.

If pops of fun fabric are going to help me through this trip, I think I am about as set as I'm going to get.

I've just got to hand over the key to the house sitter - make it through tomorrow - and it's vacation here we come!

09 October 2013

Little Bags Toward Holidays

I am well aware that the holiday season is still months away - but yes, I  am joining the diy-ers who are getting a little jump on the holiday projects.

This little stack of fat quarters is joining the pile of 'wrapping' bags.
Not exactly traditional Christmas colors, but - that's kind of the thing around here. Our stockings are green/blue/brown (yes, the cat gets one), and most of our other between Thanksgiving and Valentine's decoration items are on a similar 'winter-ish' color scheme.

The collection of wrapping bags - in a variety of qualities as I get better at sewing - has been growing since I started sewing. I can't say it's been an inexpensive collection, or particularly cost saving yet - though that was the long term goal. At this point, I do it because it makes me happy, and because I hate seeing the waste of wrapping paper after presents are done...

I don't always take the time to line my wrapping bags, though I think that makes them look nicer and last longer. I expect that adding a line of zig-zag stitch or a trip through the overlock machine could lengthen the life of the unlined ones - and I probably should give that a try before the unlined ones start wearing too much... But so far my all time favorite way to make bags is to generally follow the In Color Order Lined Drawstring Bag tutorial.

I managed to pull together the majority of six bags in a little over an hour:
The bags themselves are completely lined and stitched, but I haven't yet made the drawstrings for any of them. I'm still toying between fabric drawstrings or going with ribbon instead.
I did go for a little bit of embellishment with the largest of this set. Initially I rejected the idea but the other two-fabric bag just felt like it needed a little something extra - and with a huge pile of laces and embellishments waiting to be used, there was really no reason not to give it a try! So far it's probably my favorite one, but the drawstrings might change that yet, depending what I do.

I used three different kinds of grey fabrics for the lining, simply because those were the other fat quarters and scraps I had lying around waiting for a use. The solid is a little darker than ideal - and now I'm wishing I'd saved it for other things - but I love the other two. I can't decide if I like the honeycombs better or the textured-look. I do have exterior fabric for at least one more (hopefully two more), but I ran out of easy choices for lining and turned my attention to practical matters (patching two pairs of jeans, one of which I need for work tomorrow) instead of searching through the stash for another appropriate lining.

04 June 2013

Quilted Pillow & Bag (In Progress)

If you've been watching my Progress reports, you may have noticed those random pink and green blocks that have been a growing pile with no real plan? Well, this weekend I sat down determined to turn them into something other than a pile of blocks. The results were... mixed...

First up was some progress on what my initial plan was for them:

front with exterior pocket (love it)

It's going to be another quilted bag. Yeah, for the girl who only carries one purse throughout the week, I have a bag making problem.
back - a little wilder than intended... 
The exterior turned out great, almost exactly as I imagined.

Side pocket (love it again)
The interior... well... can we agree that it exists but leave it at that? I really do not want to talk about how poorly it turned out. I'm tempted to rip off the binding and remove it and start over... but that is a lot of ripping...

Assuming I don't rip it... all that's left to do is find/make/buy some straps for it. I had intended to make quilted straps from the grayish fabric, but I'm not sure if I have enough. (Also, if I do end up redoing the lining, I'll almost certainly need to use all of it and then some on the new lining.)

Then there was a secondary plan

Using a few more of these odd blocks, and some scrappy fabric I had laying around from earlier projects, I replaced one of my earliest pillow cover making experiments with a quilted pillow cover.


Yes, it wound up a little too small and got some additions to make it large enough. And yes, the pillow is absolutely sewn in there. It will require a lot of work with the seam ripper on the day I want that pillow back out of there. Which will hopefully be a day far in the future. The pillow is one of two in the house that is actually stuffed with feathers - feathers which tend to come out through all the previous covers pointy end first. I'm hoping a layer or two of batting will help reduce the number of pointy ends and improve the chances of this pillow actually getting used (even Momo won't touch it). There is not much room in my house for things that don't get used.


This is my favorite view of it, even if it was using the smallest of my strange little pinwheels. But my absolute favorite thing? It took my husband almost a week to realize it was something different. I guess the crazy look blends right in with the rest of the collection. (And yes, that's a good thing.)

Oh, and it's also gotten a lot more use now than it ever did before. I haven't felt any feathers working their way out yet, so I'm hopeful this will be a long term solution for this sad little pillow.


30 May 2013

A Prettier Library Bag

For the last two years, I've been using a heavy duty reusable grocery bag for my library runs. It's sturdy and durable - and it was free! - but I've been wanting something a little more fun for the days I make a lighter library run.

After finishing the Twin Quilts, I had four jelly roll pieces left over (the four colors of the print I didn't think was particularly baby friendly). I more or less started sewing on them without much of a plan...

and while you can certainly tell there wasn't much of a plan going on here...
Front side of bag
I'm still pretty happy with how it turned out!
Back side of bag (my favorite)
I made a couple serious blunders and wound up having a 'make it work' kind of moment - thus the lovely job with the binding...
Looks good now, but nearly impossible to sew
Hopefully this means I've learned what not to do ever again in future.

Interior pocket 
I sewed up the strips into blocks of various sizes using Quick Fun Strip Block tutorial I found via Pinterest (and used a couple times before). I have one more small block that I'm trying in something else, then I'll be completely out of the pieces from this jelly roll.

The flower print lining is most of a king size pillow case (the rest of the set went into my Giant Star a while ago), and the grey flannel is the last of a scrap I bought a couple years ago and have loved for making bags (three of my four zipper clutches are made with this fabric).

And yes, I took it to the library within an hour of finishing it. Even better, it performed perfectly - though I left with only five books, which is about half the usual haul for the two of us.


04 April 2013

Bag Addict!

Three of the four March bags

Any surprise I hadn't made much quilt progress in most of March?


I very much like my two (three) gray bags with the bright blue thread work, but I wanted something a little more spring-y to take with me to band at the end of March. So, I took some of my absolute favorite scraps and tried my hand at making a scrappy quilt as you go method. I need some more practice at that, but I'm going to try to work on other things for a while first.


There are a couple interior pockets, just enough to hold my two phones, my keys, and a couple cards. On top of that, the bag is the perfect size to hold a small paperback novel. Another thing I really wanted to bring with me to the band practices because I am - and have always been - the kind of person who would rather pull out a book than run around for the 10 minute break.

Between dragging my feet on unpicking the error in the top of Quilt B and finding a new and addicting project, I'm really going to be hard pressed to push myself back to quilting -- which is what I need to be doing!


09 March 2013

Pinterest Challenge: Clutch

I've been working hard to empty my closet of things I simply don't use. Going through the clothes was fairly easy, though I could go through with a fiercer attitude and still cut a few more items. Going through purses and bags has been harder. It's hard for me to get rid of a bag - partly because it's just about impossible for me to find one I want to buy - but there's just no reason to keep things like the purse I've used once in two years of owning it.

So, I'm down six purses - and I'm still arguing with myself over whether to part with one more or not. seven purses at last count.

But getting rid of purses makes me want to buy more.

I could beg legitimate need on this one. I mean, everything I have left could be used as a suitcase by some people. That's not quite what I want to take to a wedding...

But instead of spending time searching stores for the perfect clutch or small bag, I turned to Pinterest. After following a few dud links (either leading to no information or turning out not to be what I wanted after all), I found a Perfect Tutorial. I love that this clutch is more than just a bag with a zipper on the top - it's got a little flap to cover the zipper too (and an option for a secondary closure there). I'm not a huge fan of exposed zippers, so that flap sold me.


Gray flannel I bought with the hope of turning into a couple bags. Gray with dots that I never managed to turn into a baby dress. Navy with pink doodle swirls left over from a baby skirt. And my first ever zipper. Yeah. That's not intimidating at all...

I tried to follow the directions while accomplishing what I wanted - which worked most of the time... But I probably should have just followed the directions on the first time through. The major difference was that instead of using sew in stabilizer (which I do not have), I used thin batting and did some decorative stitching on the outer layer/batting to add some stability. That made my project a bit fatter than I expected, but it wasn't impossible to handle.


The doodle stitch took about 3 minutes per line, so I went with something way faster when it came to the panel that would be seen the least (covered by the flap).

I wasn't careful enough when it came to working with the zipper. Not only did I break a needle, my seam allowance wasn't quite large enough when I put in my basting stitch - so I didn't quite have enough fabric to sew the zipper to! My fault for not following the directions closely enough. I think I fixed it, but it's not quite as pretty as I'd like at the close-end of the zipper.


The outside however is as pretty as I'd hoped. So much so that I'm debating getting another zipper and trying for a slightly larger version...


Hand stitching on the snap was not beautiful. I'm not thrilled with the outcome of the snap - the placement doesn't seem right to me and my stitching leaves a lot to be desired. If I do this again, I will probably look for another solution. Especially after stabbing my knuckle while finishing up the last stitch.

I don't have a good picture of the interior but I used the pink/navy to make three credit card size pockets and two larger pockets. I'd hoped these would hold my phone, but it doesn't quite work (the bag is too short for the phone to be vertical, and my pockets are too narrow for the phone to be horizontal). After unpicking a line of stitching, it works now. I'm still attempting to find a way to cover the batting or maybe serge the open ends though...

So, there was blood and there was a broken needle, but I will absolutely be doing this again. I will probably cut things a little larger next time - if not enlarge the whole thing slightly - and I now know I need to be way more particular about seam allowance and accuracy on this. But, my first clutch - and my first zipper - and I survived both experiences!

Now to convince myself to do the things I need to do instead of making another.

06 December 2012

99% Finished Quilted Bag

Stitching on the handle was not easy. If I ever make another bag like this, I am certainly going to try attaching the handles earlier - after the panel is quilted, but before the side panels are attached. Stitching it on after the bag took on a more dimensional shape required a bit of trickery in turning the bag partly inside out and squeezing it through the machine.

Here's a shot of the floral inside - taken during the process of attaching the handles:


If you look carefully, you can see a single line of stitching running across the handle near the binding. This - along with a line of stitching along the edge of the handle pieces all the way along the outside - is enough to hold the handle in place, but not enough to risk putting anything with much weight in the bag.

Once the handles were attached, I turned the line of stitching near the binding into a rectangle - stitching several times across each needed line - then fitted an X across the rectangle. Again, with several layers of stitching. I did the same across the center of the base, concentrating mostly where the strap fabric overlapped. I hope that holds it. I really don't want to stitch this down again.


So what's with the 99% finished thing? My plan is to add one more piece to give just a bit more structure to the base - probably a piece of wood or plastic just to give a bit more support in the base.


There's room for my sewing machine - and room for a little more too.


I think this is going to make taking the machine along on trips a little easier. Sure, I'll need something a little sturdier if I should ever happen to fly with the machine (not a plan) or take a ride in a carpool (more likely, but still not exactly a plan). So it's not a forever fix, but I think it'll do nicely for now. And even if it doesn't, I still had a blast with it - and I can at least carry my other tools and the baby quilt I'm working on at the moment in it - which makes it a win win win in my book!

05 December 2012

Coming Together

I think I'm just about finished with my quilted bag - and I've still been grinning away with every step.

I did end up making bias tape for the binding to cover the raw outer edges of the bag.


I went with my usual machine stitch application (stitching on then folding over), which meant feeding the bag through twice. I worried it would be difficult, but compared to attaching the side panels (pink) to the edges (brown), it was actually fairly straight forward and only very slightly more difficult than putting binding on a quilt.


I remembered to take a slightly better picture of the kind of quilting I applied to the side panels.


Even though it doesn't show much of the whole, I love this picture of the details - both the binding on the outer edges and the clean fold on the side panel, and a little bit of the diamond-ish quilting from the aqua floral side. Okay, it also shows the continuing battle with bobbin tension (I met with a Janome expert who found a little problem with the machine, but said that overall my particular machine is probably just a little finicky and needs a slightly higher tension setting than standard. Sigh.)

After the binding was added, I had a fairly finished bag, ready for handles. I have a feeling this is going to be the most difficult part.


I debated adding the handles after the quilting but before much else. That might have made adding the binding a little more challenging, so I didn't. I may yet regret that...

24 May 2012

Bagging


With several birthdays and the end date for adding to Welcome Baby C Package coming up in the next two months, I've spent my nights stitching up bags as quickly as I can. 


This huge, lined elephant print bag is headed to Baby C. I made it intentionally large with the hope that it'll temporarily hold the two hooded towels. After that? Well, it's a little large for carrying around - except as a pool/beach type bag - so I don't know that it will get a lot of use. If I were planning to keep it, I'd probably use it as a laundry bag for socks and such - or cut it down a bit to use as a farmer's market bag.


Most of the small bags started as a reason to use some pre-cut fabrics I had in my stash - remains of fat quarter bundles and some abandoned projects I picked up on craigslist and garage sales. The two larger bags, in animal print and giraffe print, are also headed to Baby C. The exteriors coordinate with the Wonky Stacked Coin quilt (which I'll be revealing in full soon). I'm crossing my fingers the bags and quilt will at least semi-coordinate with Baby C's nursery - green and brown from what I've been told.

A few of the larger pre-cuts from my stash were turned into something a little more than drawstring bags with the addition of some handles.


The blue/brown bag started as a squat drawstring bag, with the addition of a single long handle. It's a little too wide for me to comfortably carry. With no interior pockets, it's more likely to become a library bag, shopping bag, or a snack bag for road trips than a purse. I had intended it to function as a gift bag as well - and it might yet - but first I'm giving it some gentle use to see what it's capable of and if it'll work as I want it to for giving away.

Immediately after finishing my fight with the brown/blue bag, I started on this pink/green. Did I need another bag? No. But I had the precut fabric to use, and I was determined to correct some of the issues I'd had in the blue/brown one. 


With two handles instead of one, and some interior pockets, this one happily functions a great deal more like my favorite purses. Again, this one is receiving some gentle use while I make up my mind if it's worthy of being given to someone or if it's only another draft to be kept while I keep fighting bobbin tension and pattern making to come up with something more worthy.