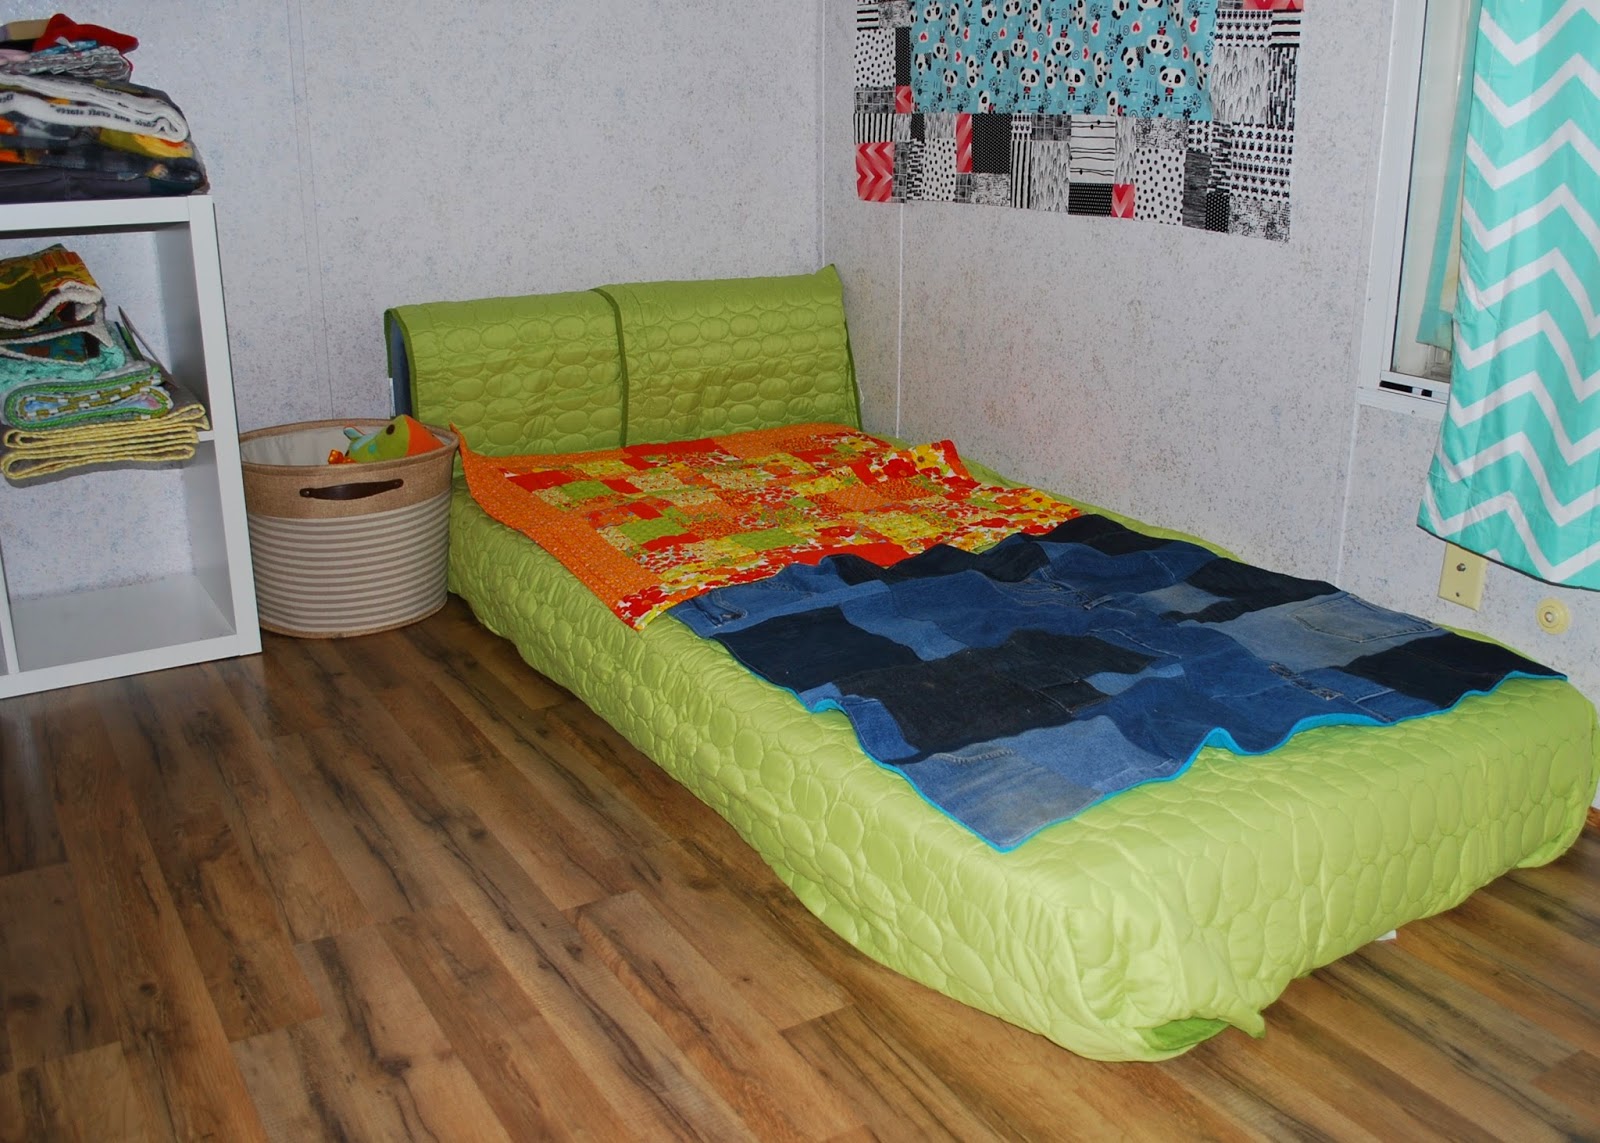
In theory, we are taking turns going 'to bed' with the baby so we both get nights off. In practice, this doesn't work quite as well it should. Still, it has worked a few times -- each of which gives me about 2 hours to work uninterrupted.
I used one of these sessions to finish up the Panda-monium mini quilt.
Sadly, the weather has been completely uncooperative for getting natural lighting pictures of it, so this afternoon I snatched a quick shot while the baby was sleeping.
The most obvious quilting is the exterior echo I did in the background, but I also did some tracing around the white part of the body, the eyes, nose, and on the inside and outside of the bamboo. It's easier to see in person, but I think it looks pretty good. I really like the way the bamboo 'pops' in person.
The scrap I chose for the backing doesn't do much to show off that extra quilting either. I should have chosen something with a smaller pattern, but I was in the get-it-done mindset.
Straight-cut binding to finish it -- and the perfect color and pattern I think.
As with my previous pattern based mini (Hazel Hedgehog) there's certainly a little room for improvement in my precision work... but I love this panda. Not just for sentimental reasons either.
I still need to find a good way to safely display these in the nursery. Everything I've tried seems unsafe for grabby little hands. I'm beginning to think I should hang them from the ceiling or on the closet door or something to keep them farther away -- unless I come up with a really child friendly option. Maybe snaps or Velcro to a bigger 'board' that can be safely wall mounted? Hmmm...
Showing posts with label mini quilt. Show all posts
23 January 2016
19 October 2015
Part 2: Mini Quilt : Panda-monium
The number of pieces in this pattern -- 26 sizes, totaling pieces is 79 (I think) -- is a little overwhelming. And I don't have the greatest history of keeping things straight when I follow a pattern this complex -- but I am not going to let this pattern intimidate me.
My experiences with Hazel Hedgehog did teach me I do better if I have this complex a patter printed off instead of trying to keep track of everything on the computer. It also helps to read the entire pattern before you start. Maybe that's obvious... but I usually like to start working right away. So for this mini, I made myself slow down and take my time.
Those are all the pieces (I hope!) cut and labeled. It's still a little overwhelming... but unless I made a mistake, I should be ready to proceed with caution.
-- much later --
Some of the top assembly was actually accomplished back in July, the night before I went to the hospital to have the baby, but most of it happened in very small, one or two seams at a time chunks during tiny baby naps.
I thought I had been very careful, but this afternoon proved that I need some work on that level. Or I suppose we could put some blame on pregnancy and/or post-pregnancy brain... There were a few issues, some with cutting (I was a few pieces short, and at least one was the wrong size by a significant part) and of course the usual issues with imperfect seam allowances. Ugh. I need to make permanent guides on my machine!
But --all imperfections managed and included, I finished the little top at last!
Yes, this was a lot of work, and a lot of pieces, but I kind of want to do it again. Someday when I have a lot more time that is! It was very time consuming for me, and the kind of block that requires a pressing station near by, but I love my wonky little panda.
My experiences with Hazel Hedgehog did teach me I do better if I have this complex a patter printed off instead of trying to keep track of everything on the computer. It also helps to read the entire pattern before you start. Maybe that's obvious... but I usually like to start working right away. So for this mini, I made myself slow down and take my time.
Those are all the pieces (I hope!) cut and labeled. It's still a little overwhelming... but unless I made a mistake, I should be ready to proceed with caution.
-- much later --
Some of the top assembly was actually accomplished back in July, the night before I went to the hospital to have the baby, but most of it happened in very small, one or two seams at a time chunks during tiny baby naps.
I thought I had been very careful, but this afternoon proved that I need some work on that level. Or I suppose we could put some blame on pregnancy and/or post-pregnancy brain... There were a few issues, some with cutting (I was a few pieces short, and at least one was the wrong size by a significant part) and of course the usual issues with imperfect seam allowances. Ugh. I need to make permanent guides on my machine!
But --all imperfections managed and included, I finished the little top at last!
Yes, this was a lot of work, and a lot of pieces, but I kind of want to do it again. Someday when I have a lot more time that is! It was very time consuming for me, and the kind of block that requires a pressing station near by, but I love my wonky little panda.
14 October 2015
Part 1: Mini Quilt : Panda-monium
This is another post that I intended to share in July and never managed to come back to hit 'publish' on. I thought about deleting the time-specific comments, but I kind of like having the record of how things were going there towards the end of the pregnancy. For what it's worth, this was written on a Wednesday night and I checked into the hospital on that Friday morning. So, you all can ignore those comments -- because baby is already long here -- but indulge me in my moments of sentimentality.
Okay, I know I'm supposed to be finishing up projects I already have in motion.
Or possibly getting ready to have a baby. You know, like any day now?
And I really was going to work on something. Or sleep.
But then a picture of the Fat Quarter Shop's free pattern called Panda-monium came through my feed...
Seriously, check out how cute it is here (links through to the free pattern on the Fat Quarter Shop site) and here (a blog hop example I found via pinterest, seriously, adorable version).
How can I resist?
So, since I was supposed to go to bed early last night, I only let myself look at fabric choices -- and I'm only going to let myself use stash fabrics.
Obviously that's more greens than I'll need for the few tiny pieces of bamboo... but I thought I'd start with a short list and narrow it down as I work. Two of the greens were used in the Hazel Hedgehog mini hanging in the nursery -- and the coordination might be nice. That tiniest scrap of green is leftover from one of the co-sleeper mattress covers, and it could be a sentimental inclusion as well. Then again, I might need something really dark for contrast, and well... the other one is just cute and has never been used (it does have little silver butterflies though, so that might not work in such tiny cuts). I like options.
I would really like to use the brighter/bolder orange as the background -- but I don't think I have enough. I'll measure in the morning, but if not, I have more than enough of the lighter orange. Or I might do something a little off-pattern and use both since it looks like part of the background is just a 'frame' -- I could do that in one and the rest in the other. We'll see tomorrow!
Um... unless I go into labor...
It's nowSeptember October. And I'm still picking away at this mini quilt, but I'll share where I am next time I can carve out enough moments to get on the computer!
Okay, I know I'm supposed to be finishing up projects I already have in motion.
Or possibly getting ready to have a baby. You know, like any day now?
And I really was going to work on something. Or sleep.
But then a picture of the Fat Quarter Shop's free pattern called Panda-monium came through my feed...
Seriously, check out how cute it is here (links through to the free pattern on the Fat Quarter Shop site) and here (a blog hop example I found via pinterest, seriously, adorable version).
How can I resist?
So, since I was supposed to go to bed early last night, I only let myself look at fabric choices -- and I'm only going to let myself use stash fabrics.
Obviously that's more greens than I'll need for the few tiny pieces of bamboo... but I thought I'd start with a short list and narrow it down as I work. Two of the greens were used in the Hazel Hedgehog mini hanging in the nursery -- and the coordination might be nice. That tiniest scrap of green is leftover from one of the co-sleeper mattress covers, and it could be a sentimental inclusion as well. Then again, I might need something really dark for contrast, and well... the other one is just cute and has never been used (it does have little silver butterflies though, so that might not work in such tiny cuts). I like options.
I would really like to use the brighter/bolder orange as the background -- but I don't think I have enough. I'll measure in the morning, but if not, I have more than enough of the lighter orange. Or I might do something a little off-pattern and use both since it looks like part of the background is just a 'frame' -- I could do that in one and the rest in the other. We'll see tomorrow!
Um... unless I go into labor...
It's now
23 June 2015
Make it Work!
Hahaha -- a few days ago I showed the finished product, talking about how I forgot to come back and show the finish. Turns out I never shared the beginning!
I have been drooling over Elizabeth Hartman's Hazel Hedgehog pattern for ages, and I bought it for myself / baby projects over the winter holidays. Then, it just kind of sat around and waited for me to get back to it. Honestly, it was a little overwhelming and life was just too busy.
Over the weekend, we managed to get out the last of the excess furniture and bring in the mattress for the nursery, so the room is beginning to come together.
We'd planned to put up some prettier wall paper over the mobile-home-standard splotches I hate so much, but after the first application of removable sticker style wall paper had so many issues I was about to scream, we're back to bare walls. on both sides of the mattress. That just doesn't seem fun.
My goal is to keep the lower area clear so it can be safe for sleeping, and so I can put up pictures for him to look at during awake time, but I want some art work at a slightly higher level for color, interest, and... well, my sake. We'd been looking at various art pieces and debating what would work when suddenly I remembered Hazel Hedgehog. A few mini quilts as over the bed decor seem like the perfect solution. In theory, I have time and supplies. I might even have a few already made that would work. And, no worries about weight, falling, or clean up as life invariably happens to the room.
So, last night I pulled out Hazel Hedgehog's pattern and got to work.
Tip #1 -- I should have printed the pattern, or at least some pages of it, rather than thinking I could just scroll through the digital version. Flipping pages on the computer was confusing.
Tip #2 -- I should have labeled all my cut pieces. I grabbed what I thought was the right piece, only to later learn it was the wrong one, but by then it was too late to un-do my mistake -- more so because I was working with really limited pieces of fabric than because it took me that long to figure it out!
So, I had a make it work moment in which I trimmed down the hedgehog's face to match the improperly made legs. Which later meant I had to trim down each of the spines to make them the "right" size.
In the end, my hedgehog has slightly chubby legs, and is a little taller than wide rather than being something closer to square, but I think it turned out adorable anyway. Right now it's about 21 x 17, but I think it'll lose a little more size after quilting and squaring up. I've got it basted and ready for quilting -- as soon as I figure out what is going on with my machine's tension.
There were some horrible noises last night as I was piecing the block, and I finally opened up the machine to search out the problem.
I've never seen this before, but apparently the thread company just ties on a new piece and keeps going when the thread isn't long enough for their requirements. Unfortunately, this really changed the tension I was sewing with, and even after cutting out the knot and re-threading my machine, things are still unhappy. I don't know if it is my freshly wound bobbin (from the thread before the knot) or if the thread after the knot is really that different in tension, but things just aren't right. I'm hoping to figure it out yet today. I want this hedgehog finished and up on the wall!
I have been drooling over Elizabeth Hartman's Hazel Hedgehog pattern for ages, and I bought it for myself / baby projects over the winter holidays. Then, it just kind of sat around and waited for me to get back to it. Honestly, it was a little overwhelming and life was just too busy.
Over the weekend, we managed to get out the last of the excess furniture and bring in the mattress for the nursery, so the room is beginning to come together.
We'd planned to put up some prettier wall paper over the mobile-home-standard splotches I hate so much, but after the first application of removable sticker style wall paper had so many issues I was about to scream, we're back to bare walls. on both sides of the mattress. That just doesn't seem fun.
My goal is to keep the lower area clear so it can be safe for sleeping, and so I can put up pictures for him to look at during awake time, but I want some art work at a slightly higher level for color, interest, and... well, my sake. We'd been looking at various art pieces and debating what would work when suddenly I remembered Hazel Hedgehog. A few mini quilts as over the bed decor seem like the perfect solution. In theory, I have time and supplies. I might even have a few already made that would work. And, no worries about weight, falling, or clean up as life invariably happens to the room.
So, last night I pulled out Hazel Hedgehog's pattern and got to work.
Tip #1 -- I should have printed the pattern, or at least some pages of it, rather than thinking I could just scroll through the digital version. Flipping pages on the computer was confusing.
Tip #2 -- I should have labeled all my cut pieces. I grabbed what I thought was the right piece, only to later learn it was the wrong one, but by then it was too late to un-do my mistake -- more so because I was working with really limited pieces of fabric than because it took me that long to figure it out!
So, I had a make it work moment in which I trimmed down the hedgehog's face to match the improperly made legs. Which later meant I had to trim down each of the spines to make them the "right" size.
In the end, my hedgehog has slightly chubby legs, and is a little taller than wide rather than being something closer to square, but I think it turned out adorable anyway. Right now it's about 21 x 17, but I think it'll lose a little more size after quilting and squaring up. I've got it basted and ready for quilting -- as soon as I figure out what is going on with my machine's tension.
There were some horrible noises last night as I was piecing the block, and I finally opened up the machine to search out the problem.
I've never seen this before, but apparently the thread company just ties on a new piece and keeps going when the thread isn't long enough for their requirements. Unfortunately, this really changed the tension I was sewing with, and even after cutting out the knot and re-threading my machine, things are still unhappy. I don't know if it is my freshly wound bobbin (from the thread before the knot) or if the thread after the knot is really that different in tension, but things just aren't right. I'm hoping to figure it out yet today. I want this hedgehog finished and up on the wall!
14 June 2015
Hedgehog
I think I forgot to come back and show my completely finished Hazel Hedgehog mini quilt.
I did an absolute minimal stitch in the stitch in the ditch kind of quilting around the outside of the hedgehog, as well as an outline around the face. If this mini quilt were going to be in use as something other than a wall hanging -- a pillow or quilt -- I would have quilted more heavily to ensure it would really hold up to washing, but I don't intend to wash this one -- famous last words? I hope not!
I pulled two scraps of binding from my stash, one of which happens to match the hedgehog body perfectly, and even happened to arrange them with green on the 'ground' and blue on the 'sky' so I'm feeling pretty pleased with myself.
The mistakes and fixes I made turned out not to be too noticeable -- hurrah!
For the sake of having the nursery looking a little more 'finished' when people were here for the baby shower, I hung the hedgehog and a few other mini quilts on the wall over the twin floor bed. It was great positioning --until we had to rearrange! One of our friends made a beautiful but massive toy chest for the baby's room. For the moment, we're keeping it in the 'headboard' area of the floor mattress (with two thick cushions between the mattress and the chest) and filling it with all the 'too big' baby clothes -- but I haven't been in to rearrange the mini quilt wall since we rearranged the furniture.
I'd probably better come up with a better way of hanging them too. Straight pins in the corners doesn't seem 'baby safe' and certainly isn't 'toddler safe' as we learned when the toy chest maker and his daughter came to visit!
I did an absolute minimal stitch in the stitch in the ditch kind of quilting around the outside of the hedgehog, as well as an outline around the face. If this mini quilt were going to be in use as something other than a wall hanging -- a pillow or quilt -- I would have quilted more heavily to ensure it would really hold up to washing, but I don't intend to wash this one -- famous last words? I hope not!
I pulled two scraps of binding from my stash, one of which happens to match the hedgehog body perfectly, and even happened to arrange them with green on the 'ground' and blue on the 'sky' so I'm feeling pretty pleased with myself.
The mistakes and fixes I made turned out not to be too noticeable -- hurrah!
For the sake of having the nursery looking a little more 'finished' when people were here for the baby shower, I hung the hedgehog and a few other mini quilts on the wall over the twin floor bed. It was great positioning --until we had to rearrange! One of our friends made a beautiful but massive toy chest for the baby's room. For the moment, we're keeping it in the 'headboard' area of the floor mattress (with two thick cushions between the mattress and the chest) and filling it with all the 'too big' baby clothes -- but I haven't been in to rearrange the mini quilt wall since we rearranged the furniture.
I'd probably better come up with a better way of hanging them too. Straight pins in the corners doesn't seem 'baby safe' and certainly isn't 'toddler safe' as we learned when the toy chest maker and his daughter came to visit!
23 July 2014
Modern Mini
I've been seeing mini quilts of beautiful retro style houses pop up all over my Pinterest feed for a couple years now. It seems like all the links go to flickr, which is good because it usually gets even more examples of what I'm drooling over, but seems strange to link to (especially when I'm not always certain who to give credit to).
One of my long term goals is to get the pattern and learn how to make this mini quilt thing. I love it so. But, for today, I thought I'd just use my favorite as inspiration to make one of my own.
I turned on one of my favorite audio books ("Leviathan" by Scott Westerfeld, performed by Alan Cumming - which not only is an amazing book, but seriously one of the best audio book performances I've heard), grabbed a stack of fat quarters that mysteriously leaped into my hands recently, and spent a happy hour or so cutting and sewing.
And ultimately, I wound up with a little something like this:
Already basted and ready to quilt!
I just love the fabric I chose for the house itself. It's kind of an olive/avocado color scheme, but it really works - and I guess I have a little thing for circles and dots...
I decided against making any of the accompanying houses, or trees, but just to concentrate on this little retro/modern house.
Well... I guess I did try one tree...
I almost like the back better - at least for showing off the quilting.
It isn't quite as cute as the ones I've been drooling over (probably because those people are using paper piecing and/or patterns and I was just winging it). And as much as I like my fabrics, when I do this again I'm going to have to go with something less patterned for the 'sky' pieces. The disconnected way the pattern meets up is a little distracting here. I knew I was taking a chance, as this kind of thing has always bothered me, but I had hoped the finished piece would distract me from it. No such luck. I still like it, but I've learned something for next time. Which is probably the number two reason I make these minis.
One of my long term goals is to get the pattern and learn how to make this mini quilt thing. I love it so. But, for today, I thought I'd just use my favorite as inspiration to make one of my own.
I turned on one of my favorite audio books ("Leviathan" by Scott Westerfeld, performed by Alan Cumming - which not only is an amazing book, but seriously one of the best audio book performances I've heard), grabbed a stack of fat quarters that mysteriously leaped into my hands recently, and spent a happy hour or so cutting and sewing.
And ultimately, I wound up with a little something like this:
Already basted and ready to quilt!
I just love the fabric I chose for the house itself. It's kind of an olive/avocado color scheme, but it really works - and I guess I have a little thing for circles and dots...
I decided against making any of the accompanying houses, or trees, but just to concentrate on this little retro/modern house.
Well... I guess I did try one tree...
I almost like the back better - at least for showing off the quilting.
It isn't quite as cute as the ones I've been drooling over (probably because those people are using paper piecing and/or patterns and I was just winging it). And as much as I like my fabrics, when I do this again I'm going to have to go with something less patterned for the 'sky' pieces. The disconnected way the pattern meets up is a little distracting here. I knew I was taking a chance, as this kind of thing has always bothered me, but I had hoped the finished piece would distract me from it. No such luck. I still like it, but I've learned something for next time. Which is probably the number two reason I make these minis.
03 July 2014
Pinterest Challenge: Wild Hearts
It's only been two months since I mentioned wanting to try my hand at the Scrappy Little Heart Block tutorial from Kristan Kremer at Doodle Do Designs - and this week I finally went for it.
It wasn't great timing to start a new project - I have so much already on my table - but I only have five bobbins that fit my machine (the shop told me that all the bobbins that came with it were wrong), and all five were filled with the wrong kinds of thread. One pink, one brown, one bright blue, one green, and one purple/aqua/pink. With an eye to emptying some of the bobbins from the ghosts of projects past, I pulled up the tutorial and went digging through my scrap piles.
The tutorial was easy to follow - so easy that I didn't stop to take a single photo until the mini quilt I made with the blocks was done!
Although I do get a little twitchy looking at the places where the prints don't line up at all (so almost all of these hearts), I do like the 'big picture' view. But the solid purple is by far my favorite, despite being the one that didn't come from the scrap pile -- and I'm certain that a big part of that is because I don't get distracted by the pattern being so clearly interrupted. If the other hearts had been less obviously interrupted pattern I would have done additional quilting on each one, but as it looks now, I thought that only the solid heart could really take that much more attention. I also figured the pink quilting thread might work on some of the hearts, but it was not going to look very good against the green/aqua/orange or the red/yellow/orange blocks. If I had made each heart scrappy (as in the tutorial), this would probably all have been less of an issue. Next time I'll try it that way and see if my twitches are a little less for that.
The backing didn't come from scraps - but it did come from my stash. I have several yards of pink/skull fabric that I picked up in an early craigslist purchase (someone else cleaning out their stash). I have no idea what to do with any of it - but this one had pink and black, so I went for a little piece of it. Mini backs don't really have to coordinate since they're usually too small to really fold over or ever see the two sides together, but I wanted to bring together the black and pink since I knew I was still using up pink thread and would do the quilting in pink. I did throw in the purple/pink/aqua bobbin for the heart in-lining I did on the solid purple, then switched back to finish up the pink for the binding (the last remains of the binding I used on the Bluebird Park Star quilt).
I enjoyed making the blocks - the tutorial makes it very easy, and very fast - but if I were going to do a larger scale project with these blocks I'd be more careful about my fabric choices. This is that kind of pretty/ugly a mosaic or collage can be, where the whole is kind of chaotic but pretty in a way that the individual pieces may not be when compared against each other. It's a little strange, but I think I like it. The fabrics were mostly chosen by what was around in the right sizes, but I like the usual combination of colors - especially the black background with an almost pastel green binding.
Note: although none of these links lead to Pinterest, it was following links from Pinterest that brought me to this tutorial, and I did pin it to remind me to get back to it. Much as I love Pinterest, and oh do I, I am trying to make sure my links go to the appropriate material rather than to the pin (when possible).
It wasn't great timing to start a new project - I have so much already on my table - but I only have five bobbins that fit my machine (the shop told me that all the bobbins that came with it were wrong), and all five were filled with the wrong kinds of thread. One pink, one brown, one bright blue, one green, and one purple/aqua/pink. With an eye to emptying some of the bobbins from the ghosts of projects past, I pulled up the tutorial and went digging through my scrap piles.
The tutorial was easy to follow - so easy that I didn't stop to take a single photo until the mini quilt I made with the blocks was done!
Although I do get a little twitchy looking at the places where the prints don't line up at all (so almost all of these hearts), I do like the 'big picture' view. But the solid purple is by far my favorite, despite being the one that didn't come from the scrap pile -- and I'm certain that a big part of that is because I don't get distracted by the pattern being so clearly interrupted. If the other hearts had been less obviously interrupted pattern I would have done additional quilting on each one, but as it looks now, I thought that only the solid heart could really take that much more attention. I also figured the pink quilting thread might work on some of the hearts, but it was not going to look very good against the green/aqua/orange or the red/yellow/orange blocks. If I had made each heart scrappy (as in the tutorial), this would probably all have been less of an issue. Next time I'll try it that way and see if my twitches are a little less for that.
The backing didn't come from scraps - but it did come from my stash. I have several yards of pink/skull fabric that I picked up in an early craigslist purchase (someone else cleaning out their stash). I have no idea what to do with any of it - but this one had pink and black, so I went for a little piece of it. Mini backs don't really have to coordinate since they're usually too small to really fold over or ever see the two sides together, but I wanted to bring together the black and pink since I knew I was still using up pink thread and would do the quilting in pink. I did throw in the purple/pink/aqua bobbin for the heart in-lining I did on the solid purple, then switched back to finish up the pink for the binding (the last remains of the binding I used on the Bluebird Park Star quilt).
I enjoyed making the blocks - the tutorial makes it very easy, and very fast - but if I were going to do a larger scale project with these blocks I'd be more careful about my fabric choices. This is that kind of pretty/ugly a mosaic or collage can be, where the whole is kind of chaotic but pretty in a way that the individual pieces may not be when compared against each other. It's a little strange, but I think I like it. The fabrics were mostly chosen by what was around in the right sizes, but I like the usual combination of colors - especially the black background with an almost pastel green binding.
Note: although none of these links lead to Pinterest, it was following links from Pinterest that brought me to this tutorial, and I did pin it to remind me to get back to it. Much as I love Pinterest, and oh do I, I am trying to make sure my links go to the appropriate material rather than to the pin (when possible).
17 March 2014
Pansy Patch Update - At Last!
Well, I found it again last night while trying to use the scanner - so I made myself work on it instead of shoving it in a corner again.
It's still rough - but I refused to put it down, or go to bed, until I'd made some progress on it.
It isn't the quality I'd hoped for when I started, but honestly, I'm just tired of this one hanging over my head!
I did a little quilting, inspired by -- but by no means as involved -- as a pin I ran across (completely by accident) of some amazing quilting on a much nicer version of these blocks (seriously, go drool, amazing)
For having feed dogs I had to fight, I think it turned out pretty well actually.
I was so excited to have it finished, I took a few photos last night the moment it was bound.
It's not great and I won't pretend I'm thrilled with it - but I am happy to be finished with it. And even though I'm very tempted to toss the directions and never think of it again, I still like it - so I'm going to file the directions and come back to it in another year or two. It'll be interesting to see how a little more practice, patience, and maturity changes the blocks I make. Hopefully for the better.
Update - Okay, so this whole thing got started because I knew this would be perfect for my mother for her birthday. Sadly, the pattern has been so hard on my limited skills that it wasn't done that year. And by the time I finished it, I was certain it was too imperfect to give. The other day she walked into my house, saw it, and let out an absolute squeal. She loves it and thinks it looks great. Now I'm kicking myself for not holding off and giving it to her anyway. Guess my own perfection tendencies got in the way again. Oh well, more incentive to try again sooner rather than later - and maybe a set of 6 if they go smoothly? Hmm....
21 February 2014
Flora Starburst Mini - Chair Recover in Progress!
I only discovered the 'starburst' pattern in January but since then it has become one of my favorite blocks. Despite my busy schedule and/or being more or less on creative burn out, I've managed to make four in the first six weeks of 2014 - and I've cut half the blocks for three more; I just need to dig through my stash for another background fabric to go with them.
I've been spending quite a few hours digging around in my stash, attempting to reorganize and/or shop my stash, and I came across a scrap I'd been holding on to for a couple years. I can't really say why I'd been holding on to it; there wasn't much of this little scrap, less than half a fat quarter, and really the little plants on taupe were cute, but seemed more botanical/country than my usual taste runs. That said, there was something about it that kept me from using it up earlier. This time, I pulled it out, thinking I might be able to use it in the multi-starburst quilt. Nope - but completely by accident the already chopped up pieces wound up sitting on my desk as I went through another project and my favorite olive/avocado green dots landed right next to the botanic print. I tell you it was fate. They were meant to be together.
Seriously, the green could not be a better match for the botanical print. The purple would have been better with a bit more red/pink to it, but it's not a bad match either (especially in person).
After piecing the outer eight blocks, I had three squares leftover from my cutting - two of the floral and one of the purple. I had thought about making the center block all the green dot, but it seemed a shame to add those three leftover squares to my scrap pile. So, I made the center a little scrappier than I'd intended. I'm still debating whether that was a good choice or not, but it's really too late to do anything at this point!
While my first block became the mini-quilt that started this obsession, and my second and third are the beginning of a quilt, my fourth one had a different home in mind. With the help of a little extra fabric, a scrap of batting, and some quick quilting, it's in place and looking amazing!
My sad, old office chair which has seen way too many years (probably even too many decades) since it's last recover finally has a pretty new recover!
Well - almost.
I'm currently just holding everything in place with four safety pins while I try to get my hands on a staple gun (or another way to attach the new miniquilt to the seat). I think I should probably remove the three wooden pieces that lock the seat into the small storage compartment, staple in place, then cover with another piece (just like the last recover did) before reattaching the wooden pieces. It seems like that would be a more professional looking finish.
Ugly underside or not, the top is looking amazing. The path to recovering this chair wasn't easy, but now that it is finally (almost) done, I'm so thrilled. I should have done this right away instead of putting it off - but then again, I didn't discover this pattern -- or the way chopping up a 'too country' print could change it -- until this year.
Now I'm wondering what else in my stash could completely change with a little chopping, the right block pattern, and the right partnering fabrics. Hmm...
I've been spending quite a few hours digging around in my stash, attempting to reorganize and/or shop my stash, and I came across a scrap I'd been holding on to for a couple years. I can't really say why I'd been holding on to it; there wasn't much of this little scrap, less than half a fat quarter, and really the little plants on taupe were cute, but seemed more botanical/country than my usual taste runs. That said, there was something about it that kept me from using it up earlier. This time, I pulled it out, thinking I might be able to use it in the multi-starburst quilt. Nope - but completely by accident the already chopped up pieces wound up sitting on my desk as I went through another project and my favorite olive/avocado green dots landed right next to the botanic print. I tell you it was fate. They were meant to be together.
Seriously, the green could not be a better match for the botanical print. The purple would have been better with a bit more red/pink to it, but it's not a bad match either (especially in person).
After piecing the outer eight blocks, I had three squares leftover from my cutting - two of the floral and one of the purple. I had thought about making the center block all the green dot, but it seemed a shame to add those three leftover squares to my scrap pile. So, I made the center a little scrappier than I'd intended. I'm still debating whether that was a good choice or not, but it's really too late to do anything at this point!
While my first block became the mini-quilt that started this obsession, and my second and third are the beginning of a quilt, my fourth one had a different home in mind. With the help of a little extra fabric, a scrap of batting, and some quick quilting, it's in place and looking amazing!
My sad, old office chair which has seen way too many years (probably even too many decades) since it's last recover finally has a pretty new recover!
Well - almost.
I'm currently just holding everything in place with four safety pins while I try to get my hands on a staple gun (or another way to attach the new miniquilt to the seat). I think I should probably remove the three wooden pieces that lock the seat into the small storage compartment, staple in place, then cover with another piece (just like the last recover did) before reattaching the wooden pieces. It seems like that would be a more professional looking finish.
Ugly underside or not, the top is looking amazing. The path to recovering this chair wasn't easy, but now that it is finally (almost) done, I'm so thrilled. I should have done this right away instead of putting it off - but then again, I didn't discover this pattern -- or the way chopping up a 'too country' print could change it -- until this year.
Now I'm wondering what else in my stash could completely change with a little chopping, the right block pattern, and the right partnering fabrics. Hmm...
18 February 2014
A Tiny Mini
I made this little bitty mini quilt just for me, and just for the fun of it.
I've been collecting up scraps that'll work for a larger bookshelf style quilt ever since I made my first one last year. The pile is growing, but not quickly enough to really begin working on it yet. I'm still saving up scraps towards making a larger version, but last night I just wanted to play and do something fun -- this month I seem to be very interested in immediate gratification projects -- so I pulled a few favorites and got to work.
It's not much bigger than a large post card or picture, maybe 5 x 8. I bound it in a remnant bias tape from the Twin Quilts last year - one of my favorite orange prints. It sat on my sewing table just long enough for me to grab this photo before I scurried off to rearrange the art on my bedroom wall and incorporate it in. I sacrificed one of my basting safety pins to use in hanging it (the pin is working like a picture hanger on a small headed nail that had already been holding something else on the wall). It's probably not technically the right way to hang a little quilt, but I wasn't thinking of how to display it when I was making it!
I probably say this about everything I make, but I think this is my favorite thing...
I've been collecting up scraps that'll work for a larger bookshelf style quilt ever since I made my first one last year. The pile is growing, but not quickly enough to really begin working on it yet. I'm still saving up scraps towards making a larger version, but last night I just wanted to play and do something fun -- this month I seem to be very interested in immediate gratification projects -- so I pulled a few favorites and got to work.
It's not much bigger than a large post card or picture, maybe 5 x 8. I bound it in a remnant bias tape from the Twin Quilts last year - one of my favorite orange prints. It sat on my sewing table just long enough for me to grab this photo before I scurried off to rearrange the art on my bedroom wall and incorporate it in. I sacrificed one of my basting safety pins to use in hanging it (the pin is working like a picture hanger on a small headed nail that had already been holding something else on the wall). It's probably not technically the right way to hang a little quilt, but I wasn't thinking of how to display it when I was making it!
I probably say this about everything I make, but I think this is my favorite thing...
06 January 2014
January Starburst Mini Quilt
Not yet having a mini quilt to hang on my fridge for January - between my December mini and my February mini - I thought I should take a look at snowman quilts, figuring I could expand on the winter/snowman theme started by my January kitchen towels.
The search wasn't going particularly well - but on my way, I found unexpected inspiration when I ran across this incredible Giant Starburst Quilt from Canoe Ridge Creations (found thanks to Pinterest). I fell in love with the pops of saturated colors, as well as the overall design. Finding no snowmen quilts that spoke to me nearly as loudly, I pulled a few large scraps from my piles and got to work cutting squares.
I started with 32 squares at 2.5" (16 grey, and 4 of each color) - then later cut a larger square for the center-most piece. It came together quickly and with hardly any trouble.
I backed it with a scrap of dark purple that coordinated to the grey 'neutral' on the front and got to quilting. While the inspiration piece was quilted in all-over straight lines, I wanted to do something a little less overall. I began with just outlining the internal star shape, then built out from there until it felt like another stitch would be too much.
My mini quilt finished around: 11.5 x 11.5 - a good size for hanging.
The aqua/green with gold swirls fabric in particular looks great - the print works well in the various angles. The blue heart fabric is less than ideal in that respect, something that usually makes me a bit twitchy, but I'm trying to learn to overlook that - and this one is a good start. I wasn't certain the colors were going to work together - I very nearly used a citron yellow/green instead of the aqua/green. I'm so glad I didn't. I've been drooling over it all day - and I'm looking forward to putting it up in place as soon as possible.
The search wasn't going particularly well - but on my way, I found unexpected inspiration when I ran across this incredible Giant Starburst Quilt from Canoe Ridge Creations (found thanks to Pinterest). I fell in love with the pops of saturated colors, as well as the overall design. Finding no snowmen quilts that spoke to me nearly as loudly, I pulled a few large scraps from my piles and got to work cutting squares.
I started with 32 squares at 2.5" (16 grey, and 4 of each color) - then later cut a larger square for the center-most piece. It came together quickly and with hardly any trouble.
I backed it with a scrap of dark purple that coordinated to the grey 'neutral' on the front and got to quilting. While the inspiration piece was quilted in all-over straight lines, I wanted to do something a little less overall. I began with just outlining the internal star shape, then built out from there until it felt like another stitch would be too much.
My mini quilt finished around: 11.5 x 11.5 - a good size for hanging.
The aqua/green with gold swirls fabric in particular looks great - the print works well in the various angles. The blue heart fabric is less than ideal in that respect, something that usually makes me a bit twitchy, but I'm trying to learn to overlook that - and this one is a good start. I wasn't certain the colors were going to work together - I very nearly used a citron yellow/green instead of the aqua/green. I'm so glad I didn't. I've been drooling over it all day - and I'm looking forward to putting it up in place as soon as possible.
30 December 2013
Mini Quilt Finish - the Koi/April/May Mini
Although I'd initially thought I could use this little top as a chair cover for my ugly office chair,
once I got it put together I began to suspect I couldn't possibly sit on that.
It sat in the pile of things needing my attention, taunting me, until a few days ago. I spent several hours working on deep cleaning and organizing the office in case of holiday visitors, and once I got everything I didn't need out, it quickly became clear that the office's attached bathroom could benefit from a little more color. Since it already has green/orange/yellow valance decorations, I immediately thought of this little top.
I was working under a real time crunch - people were coming over in less than two hours - so I didn't get overly complicated, and I settled for some left over binding instead of looking for something that better matched the blue of the koi print fabric. That's a little issue I may change in the future, but for the moment, I'm thrilled with how it brightens up the space.
Even though I don't love some of my green centers, I went with outlining them instead of trying to walk my way around the 'webs' of color. Although it was a little time consuming, it's just about the only quilting on the piece, so it isn't overwhelming and didn't eat up all my time.
Taking pictures of it was a challenge - I really should have taken some outside this morning before the wind hit instead of settling for pictures of it in place, but for now, these are going to have to do.
once I got it put together I began to suspect I couldn't possibly sit on that.
It sat in the pile of things needing my attention, taunting me, until a few days ago. I spent several hours working on deep cleaning and organizing the office in case of holiday visitors, and once I got everything I didn't need out, it quickly became clear that the office's attached bathroom could benefit from a little more color. Since it already has green/orange/yellow valance decorations, I immediately thought of this little top.
I was working under a real time crunch - people were coming over in less than two hours - so I didn't get overly complicated, and I settled for some left over binding instead of looking for something that better matched the blue of the koi print fabric. That's a little issue I may change in the future, but for the moment, I'm thrilled with how it brightens up the space.
Even though I don't love some of my green centers, I went with outlining them instead of trying to walk my way around the 'webs' of color. Although it was a little time consuming, it's just about the only quilting on the piece, so it isn't overwhelming and didn't eat up all my time.
Taking pictures of it was a challenge - I really should have taken some outside this morning before the wind hit instead of settling for pictures of it in place, but for now, these are going to have to do.
31 October 2013
Before They Go Back in Storage
Just a few pictures of my fall/halloween decor before things move more towards fall/Thanksgiving and these mostly find their way back to storage.
A clearance find last year that I've been waiting all year to use. Filled with tea lights someone gave me. I think the scent is Halloween Night or something like that.
A quick very little mini I threw together from the few leftover blocks after finishing the holiday runner. I still have four more blocks to find something else to do with, but I wanted a quick item to hang on the fridge (where I almost always have something decorative hanging) and this was easy enough. Especially since I was able to use binding I had already made (and removed when that project needed reworked and then never used when I fixed that project). It's nothing much, but it matches the runner - which spends weekends over the back of the chair the cat likes to scratch - so there's some coordination throughout the house. (We're rarely in the living room unless we have people over, so that's the only time the cat attacks the chairs. That I know of.)
(I'm thinking that for next year I need to make one of these barn bat quilts - or possibly just because. Way too cute!)
The only cute spider I've ever seen.
Tomorrow, these are all going away in exchange for 'harvest' and Thanksgiving decor - even though harvest is long past...
And as cold as it is right now, I suspect the winter/Christmas decor might come out a little earlier than usual too...
A clearance find last year that I've been waiting all year to use. Filled with tea lights someone gave me. I think the scent is Halloween Night or something like that.
A quick very little mini I threw together from the few leftover blocks after finishing the holiday runner. I still have four more blocks to find something else to do with, but I wanted a quick item to hang on the fridge (where I almost always have something decorative hanging) and this was easy enough. Especially since I was able to use binding I had already made (and removed when that project needed reworked and then never used when I fixed that project). It's nothing much, but it matches the runner - which spends weekends over the back of the chair the cat likes to scratch - so there's some coordination throughout the house. (We're rarely in the living room unless we have people over, so that's the only time the cat attacks the chairs. That I know of.)
(I'm thinking that for next year I need to make one of these barn bat quilts - or possibly just because. Way too cute!)
The only cute spider I've ever seen.
Tomorrow, these are all going away in exchange for 'harvest' and Thanksgiving decor - even though harvest is long past...
And as cold as it is right now, I suspect the winter/Christmas decor might come out a little earlier than usual too...
24 October 2013
Runner: Finished
Fresh from the wash - and two photos grabbed on the way out the door.
The places where I should have basted more do blend in a bit more now that everything has been washed and softened up a bit - which makes me happy.
And all in all, the whole thing makes me happy. I love both sides and would be hard pressed to choose which one I prefer. Yes, it's a little chaotic and intense in areas, and certainly imperfect in areas as well - but I think that pretty well sums up my life too!
I've already remade the bed - which I only do in the morning if I'm expecting company or changing the sheets - and placed it in a position ofhonor best use at the bottom. I guess tonight's the first test to see if Momo will sleep on it or spurn it. He loved sitting on the unfinished pieces, so I'm really hoping that continues now that it's done and ready for use.
The places where I should have basted more do blend in a bit more now that everything has been washed and softened up a bit - which makes me happy.
And all in all, the whole thing makes me happy. I love both sides and would be hard pressed to choose which one I prefer. Yes, it's a little chaotic and intense in areas, and certainly imperfect in areas as well - but I think that pretty well sums up my life too!
I've already remade the bed - which I only do in the morning if I'm expecting company or changing the sheets - and placed it in a position of
10 October 2013
Busy Work
I've been trying to cram a few smaller projects into my limited sewing time - because some of the things that I should be doing require way more energy than I actually have.
Really, most of these smaller projects started because of this:
This is my desk and sewing chair. Not the most beautiful little thing. In fact, it certainly looks better in this picture than in real life. The wood isn't quite that luster, more a dull brown, which isn't so bad. What's really a problem is the fabric on the seat. It's a textured neutral that has seen better days. It's beginning to wear out, and it's quite grimy looking in places. It's done well for three years - especially for a free craigslist chair - but I'm ready for something a little more fun around here.
I started by looking at my collection of oddblocks to see if there was anything I could expand into being a chair cover. And initially, I thought there was.
Remember this little guy? It was just about the very first pieced block I ever made. Of all the pieces I have hanging out waiting for a home, I thought this might be my best choice - and I even have some of the coordinating fabric left in my stash.
So, after doing a little repair work to fix a couple areas where my seam allowance wasn't where it should have been (which really means where I didn't manage to grab one layer of fabric at all!), I built it out a little, first with coordinating pieces, then eventually with a scrap from another project, until it was about big enough for what I had in mind.
Okay, so, this picture isn't the greatest. But it's what I've got and it's too dark and rainy to fight over it now!
It's ... okay.... The browns of the fabrics and the wood go fairly well in real life. But it also makes me feel a little cat lady ish. Which, don't get me wrong, I am a cat lady, I'm just not sure it's quite what I wanted to go for.
So, then there's attempt number two. Which got started the first time I decided this was possibly too cat lady chic (prior to adding the intensely green pieces).
I pulled some of my very favorite and very hoarded pieces out, the last scraps of the fabric that matches my April Flowers/May Showers quilts and a few more pieces I've decided probably coordinate, and started making something completely different.
Which I love.
But I'm not sure I can use as a seat cover.
If I use it on the chair, at least some of the colors will be lost as it wraps around the edges of the seat (unless I really stuff it, which might be advisable?), and that's just too tragic to think on.
But I'm not sure it's quite perfect enough to use as a mini-quilt/wall hanging kind of thing. Some of the wonky got a little more wonky than I'd planned, and I'm not sure if I see 'intentionally wonky' when I look at it, or 'whoops!' But the colors and patterns are things I love. It would be a shame to hide it away somewhere...
I also hate to think of making a third attempt at what was supposed to be a quick and easy solution. But I'm beginning to suspect I'd be better off just choosing a remnant or a nice fat quarter and using it as one piece instead of attempting to do something more quilt-y...
Decisions, decisions!
I've got time - and I've got to find a staple gun before I get much more invested... But... any input?
06 September 2013
Books Mini
Alright, in my process of grudgingly releasing 'summer' into 'autumn' I am very slowly moving from summery items around the house to ones that are slightly more autumnal - though anything to do with harvest or leaves is going to have to wait a bit longer. This week, I'm embracing sort of a 'back to school' feel (though school is not currently a part of life around here) by inviting some more books into the house -- and as I went to display them, I realized I don't think I ever shared them here!
I'm sure if you've spent any time on Pinterest, or looking at very many sewing or quilting blogs, that you've seen some of the cool bookshelf looking quilts that so many people have been making. Well, in early 2013, I wanted to try my hand at making something similar. Since then, I've lost the link I followed as a tutorial, and I'll admit (but not show you) that the first attempt didn't work at all (they were more like magazines than books, and rather wonky in a stretched fabric kind of way). Although I'm still not sure what I did wrong, I did try again and that time I wound up with something I'm willing to share!
I took a few rectangular scraps from my stash, and a few interesting pieces of selvage I had laying around, and wound up with an adorable bookshelf's worth of quilted books!
My binding job is a little awkward. I really should have removed it after the first issue and re-bound, but instead I ran around and stitched the binding down three or four times until I was fairly determined it wasn't going anywhere.
I absolutely adore these books. I've been very careful all spring and summer to keep any interesting selvage print, and to guard my larger rectangle scraps so that sometime in the future I can do a larger version on this idea.
I'm sure if you've spent any time on Pinterest, or looking at very many sewing or quilting blogs, that you've seen some of the cool bookshelf looking quilts that so many people have been making. Well, in early 2013, I wanted to try my hand at making something similar. Since then, I've lost the link I followed as a tutorial, and I'll admit (but not show you) that the first attempt didn't work at all (they were more like magazines than books, and rather wonky in a stretched fabric kind of way). Although I'm still not sure what I did wrong, I did try again and that time I wound up with something I'm willing to share!
I took a few rectangular scraps from my stash, and a few interesting pieces of selvage I had laying around, and wound up with an adorable bookshelf's worth of quilted books!
My binding job is a little awkward. I really should have removed it after the first issue and re-bound, but instead I ran around and stitched the binding down three or four times until I was fairly determined it wasn't going anywhere.
I absolutely adore these books. I've been very careful all spring and summer to keep any interesting selvage print, and to guard my larger rectangle scraps so that sometime in the future I can do a larger version on this idea.
08 August 2013
Happy Birthday Mini Quilt
Oh, this is so hardly worth talking about, but as it's the little item currently hanging out on my fridge, I'm going to go ahead and share it anyway.
It's a little scrappy mini that I made when I was finishing the binding on a quilt over the winter (the binding and colorful thread were leftovers from the bigger quilt), and all the scraps were just things I had laying around. Everything was freehand - which didn't quite work out as I'd planned... Still, I had a blast making it and I'm enjoying looking at it this week.
And yes, this means there's a birthday in the house this month.
It's a little scrappy mini that I made when I was finishing the binding on a quilt over the winter (the binding and colorful thread were leftovers from the bigger quilt), and all the scraps were just things I had laying around. Everything was freehand - which didn't quite work out as I'd planned... Still, I had a blast making it and I'm enjoying looking at it this week.
And yes, this means there's a birthday in the house this month.
05 July 2013
Momo Mini Quilt
Whoops - I actually made this a couple months ago and never got around to sharing it. Okay, it's not super exciting, but since I hung it up as part of this month's decorations, I figured it deserved a little attention here as well.
Inspiration: Cat's Cradle quilt pattern
Using the quilt top cats as inspiration, I made one of my own - just eyeballing pieces until they came together how I wanted. I knew I wanted mine to be a little less rectangular, coming in between the shoulders and the cheeks - which was an easy adaptation to make.
My attempt at front legs could still use some improvement - I think I should have gone more in the direction of my inspiration with something a bit more organic. Fortunately, the lines show up with less intensity without flash photography or photo editing. I still love the overall shape/size/design of the cat - and the added button on the collar is just too cute!
It came together quickly - and I imagine with a pattern it would be even faster - but I don't know that it's something I could see myself making several of for a quilt top. Then again, some day I'm going to have to do one with repeating blocks... Probably soon!
I attached the button only with a spare basting pin (bent safety pin) just in case I ever need to wash this thing or something. This was also made from the very last few scraps of grey flannel. While this was a remnant bin pick up from somewhere, it's been some of my favorite fabric so far this year. I'm usually not so good at picking up neutrals (so guilty of jumping for the cute character type prints and skipping the foundational neutral or single color pieces), but this one has been absolutely perfect. I'm going to have to look for some kind of replacement.
Inspiration: Cat's Cradle quilt pattern
Using the quilt top cats as inspiration, I made one of my own - just eyeballing pieces until they came together how I wanted. I knew I wanted mine to be a little less rectangular, coming in between the shoulders and the cheeks - which was an easy adaptation to make.
My attempt at front legs could still use some improvement - I think I should have gone more in the direction of my inspiration with something a bit more organic. Fortunately, the lines show up with less intensity without flash photography or photo editing. I still love the overall shape/size/design of the cat - and the added button on the collar is just too cute!
It came together quickly - and I imagine with a pattern it would be even faster - but I don't know that it's something I could see myself making several of for a quilt top. Then again, some day I'm going to have to do one with repeating blocks... Probably soon!
I attached the button only with a spare basting pin (bent safety pin) just in case I ever need to wash this thing or something. This was also made from the very last few scraps of grey flannel. While this was a remnant bin pick up from somewhere, it's been some of my favorite fabric so far this year. I'm usually not so good at picking up neutrals (so guilty of jumping for the cute character type prints and skipping the foundational neutral or single color pieces), but this one has been absolutely perfect. I'm going to have to look for some kind of replacement.
29 April 2013
Spring-y Mini...
Alright, after all this snow - broken porch lights, icy steps, digging through over a foot of snow to take off a flat tire - and now a lovely mud patch (one of the joys of dirt roads), I am ready for something pretty and springy. The baby blooms of tulips, daffodils, and other early spring flowers that had started being seen a couple weeks ago are long frozen and smashed by this snow. I've been promised they'll be all the stronger for it, but it's still a little depressing to see mounds of snow and ice where there were yellow and red blooms just a few days earlier. Sure, we've had two days now of leaving the windows open - and nearly 80 degree temps - but I've been promised there's a good chance of more snow yet this week! Outside may not be done snowing yet, but inside, it's going to be spring if I have any say in the matter!
Several months ago Pinterest brought my attention to the Tulip Tutorial over at A Bee in my Bonnet (it's part of the Bee in my Bonnet row along).
Now, I'm not yet the kind of quilter who sits down and makes several copies of the same block - and on the two occasions where I have, they've been incredibly simple blocks. So making a whole row of tulips is still a long ways off - as is making a whole quilt of such rows. Someday, just maybe not this year.
But - when I wanted just a little something springy to bring a smile to my kitchen, I came back to the tutorial.
I didn't get any 'in progress' photos of my single tulip, but I will say that the tutorial was completely clear, easy to follow, and I never felt overwhelmed or lost. I'd like to say some of that is due to me getting a little better, but I really think it was the great mix of clear instructions and pictures. It also helped that the font was large enough I could read it without leaving my sewing machine.
It wasn't a fast block for me. Those triangles still give me trouble - though today was a lot smoother triangle-ing than in the past. And I'm still not convinced I could stand to make several of them...
On the other hand... it is super adorable.
I did a little more time consuming quilting that I would have for a larger project - but it was fairly mindless, fun work and I love the way it looks all finished.
It was also a great way to use up some scraps. The pink butterfly fabric is just about the end of one of my very first fabric purchases (when I was picking up a few remnants for learning on, prior to my first quilt). This very mini quilt is only the second thing I've made with this fabric that had a finish to show for my efforts instead of a failure (the first is is another mini quilt). And by failure, I mean cut it apart to save the tiny scraps and throw the rest away... So it's nice to get something worth keeping out of that remnant!
It's even nicer to smile every time I walk into the kitchen.
Several months ago Pinterest brought my attention to the Tulip Tutorial over at A Bee in my Bonnet (it's part of the Bee in my Bonnet row along).
Now, I'm not yet the kind of quilter who sits down and makes several copies of the same block - and on the two occasions where I have, they've been incredibly simple blocks. So making a whole row of tulips is still a long ways off - as is making a whole quilt of such rows. Someday, just maybe not this year.
But - when I wanted just a little something springy to bring a smile to my kitchen, I came back to the tutorial.
I didn't get any 'in progress' photos of my single tulip, but I will say that the tutorial was completely clear, easy to follow, and I never felt overwhelmed or lost. I'd like to say some of that is due to me getting a little better, but I really think it was the great mix of clear instructions and pictures. It also helped that the font was large enough I could read it without leaving my sewing machine.
It wasn't a fast block for me. Those triangles still give me trouble - though today was a lot smoother triangle-ing than in the past. And I'm still not convinced I could stand to make several of them...
On the other hand... it is super adorable.
I did a little more time consuming quilting that I would have for a larger project - but it was fairly mindless, fun work and I love the way it looks all finished.
It was also a great way to use up some scraps. The pink butterfly fabric is just about the end of one of my very first fabric purchases (when I was picking up a few remnants for learning on, prior to my first quilt). This very mini quilt is only the second thing I've made with this fabric that had a finish to show for my efforts instead of a failure (the first is is another mini quilt). And by failure, I mean cut it apart to save the tiny scraps and throw the rest away... So it's nice to get something worth keeping out of that remnant!
It's even nicer to smile every time I walk into the kitchen.
07 February 2013
Valentine
Inspired by a pin of Kelby Sews' little wall hanging, I did a little pre-Valentine's Day sewing/quilting.
The inspiration piece is fairly scrapy, with each letter of the word 'love' in a different color - which I loved.
I didn't think about the idea of paper piecing - actually, I didn't even click through the pin to the source - I just grabbed a few favorite scraps in favorite colors, my scrap of remaining white material, and went to town improvising.
I ought to practice this kind of sewing a little more. There were a few too many attempts at angles that turned out to be exactly backwards of what I wanted... That said, eventually I got it all pieced together more or less how I'd envisioned.
Since it was the perfect size, I backed it with the third piece from my Aunt (here are the other two pieces from her), added a thick scrap batting, and did just a little bit of quilting.
I debated doing a little more, but ultimately I liked the simplicity of outlining the letters. A little left over binding and it was ready to hang.
I may have danced around the kitchen squeeing for the next hour or so. Fortunately, my husband (an artist) understands the happiness when it comes to finishing something that turned out 'right.' Unfortunately, Momo didn't quite appreciate my enthusiasm.
This also signaled the end of my winter themed decorations - I put away the snow flakes and the snowmen, and the last of the Christmas decorations. February will be mostly hearts and love elements (no surprise there). After that I'll be pretending it's spring - although right now it already feels like it is! - with flowers and the like.
Subscribe to:
Posts (Atom)