Well, I won't pretend it's going to be the most exciting quilting of my life, but I think I've finally stumbled upon what I'm going to do for the Chocolate Covered Cherries quilting: semi-wiggly lines.
At least I hope that's what I'm doing - since I'm more than halfway done!
It's not as clear of a photo as I'd like, but I think you can see a little bit of the difference between the quilting and the basted area.
It's going well - though I think it is probably my densest quilting yet, and certainly it uses more thread than just about anything I've done before. It's also taking a lot of time - which makes me wonder all the more if I should re-think my initial plan to make these squiggly lines cross the quilt in both directions. I'm beginning to suspect that would be too much.
Overall, I'm happy with the way it's looking on the blocks, but I think I should have done something simpler on the border; I just feel like that much thread, in such a high contrast, is fighting with the fabric's design/print a little more than I'd like. But no, I will not be ripping it out of all the border to try that part again. It's going to be what it's going to be. And I'm just going to push through and hope that once it's fully quilted, bound, and washed, the fabric still shines as much as it did before.
I think it will. I think this is just one of those 'try not to question during the process' moments where the beginning and end are good, but the middle is awkward.
Now, I'm off to buy more thread so I can finish this up. Between ripping out a previous mistake, and the rather confusing mess of having a few feet of additional thread (not attached to the rest) wound on backwards (compared to the rest) in the middle of the process, I've fallen a bit shorter than I planned.
30 August 2013
29 August 2013
Green Food
1) I raided the garden last night and grabbed a little bit of what I found to throw in to this salsa/salad:
The avocado and black beans came from the store, but the corn, cilantro, jalapeno, and zucchini all came from the garden. I added a little lime juice and some salt and wound up with a bright, spicy salad/salsa to go with our burritos. (I had intended to add one of the onions the elk spared this time around, but the jalapeno was so hot I didn't need the extra heat - and yes, our onions are hot!)
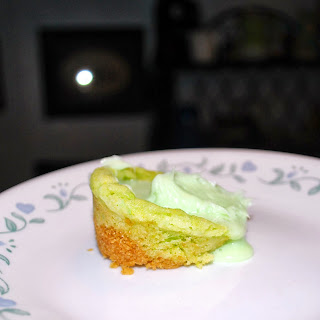
2) Okay, mine didn't turn out nearly as cute as the ones I pinned, but I tried to follow the general recipe from ShakenTogetherLife.com for Key Lime Cookie Cups.
I guess I didn't let that one cool long enough before frosting it... or removing it from the pan...
These two look less melty - but no where near as appetizing as the ones I pinned!
Looks aside, they were delicious. I could hardly get them out of the oven, slightly cooled, and frosted quickly enough to suite myself (or the company I had over for movie night). Next time, I think these might be a cook in advance kind of thing so I have no excuses and will let them cool first.
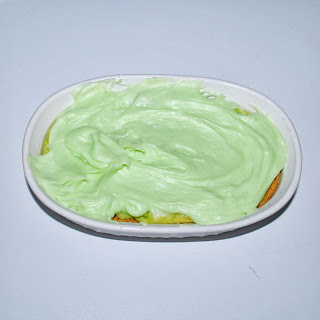
I got a little tired of working with only 16 at a time (the size of my mini muffin tin), so toward the end of the evening I took the left over ingredients and super sized it:
Again, I know it doesn't look like much, but it was delicious. Don't take my word or my pictures for it, click over to the recipe, buy the ingredients, and give it a try yourself. If you like key lime, you will not be sorry.
27 August 2013
Lucky - Ready to Wash!
After quilting what I'm calling my Happy Go Lucky quilt, I started on the long and disappointing process of choosing a material for binding. My hope was to find something in the purple/lavender spectrum - but no luck. I always thought blues were supposed to be the most challenging colors to match, but after the last few days I'm thinking it might be purples!
So, when failure met me at every turn, I started looking for yardage of the Good Fortune fabric line (the charm pack I used in the top). It didn't take much looking to learn that these fabrics are on their way out. Shopping online, I had about three options - none of which were quite what I had in mind. I left my browser open to the best of the three, and set out to check my local shops for any yardage - starting at my favorite place.
Where I had success. Whew! Alright, it wasn't quite what I'd have chosen if I had a pick of every piece in the line... but it would have been my third choice, so I think that's still pretty good...
The aqua floral isn't a great match with the back (you can see why I was leaning toward lavender), but it's not bad either.
It looks better against the front - although I still think purple or lavender would have been a better fit, and I would love to at least had an option of looking at a different print. (Most of what was left in my favorite store was of the green and/or coral variety - which would certainly not have worked with the back.)
I'm still just drooling over this one. Although I'm usually big on a quilt not being finished until it's been washed, I'm hesitating to drop it in the wash. Partly because, despite pre-washing the backing fabric, I am a little worried about colors running (I don't think I've ever worked with this much white before). And partly because I love it so much just how it is, I'm not sure if washing it will improve it or not... Since there's no one lined up to get it (in fact, I'm leaning strongly towards keeping this one), I'm in no rush to decide to wash it. I think I'll let it hang out and decorate the house for a while first - and get around to washing it in a little bit.
Probably...
So, when failure met me at every turn, I started looking for yardage of the Good Fortune fabric line (the charm pack I used in the top). It didn't take much looking to learn that these fabrics are on their way out. Shopping online, I had about three options - none of which were quite what I had in mind. I left my browser open to the best of the three, and set out to check my local shops for any yardage - starting at my favorite place.
The aqua floral isn't a great match with the back (you can see why I was leaning toward lavender), but it's not bad either.
I'm still just drooling over this one. Although I'm usually big on a quilt not being finished until it's been washed, I'm hesitating to drop it in the wash. Partly because, despite pre-washing the backing fabric, I am a little worried about colors running (I don't think I've ever worked with this much white before). And partly because I love it so much just how it is, I'm not sure if washing it will improve it or not... Since there's no one lined up to get it (in fact, I'm leaning strongly towards keeping this one), I'm in no rush to decide to wash it. I think I'll let it hang out and decorate the house for a while first - and get around to washing it in a little bit.
Probably...
22 August 2013
Lace + Shirt
I'm not a big fan of shopping. I suppose it would be more fun if I could reliably find what I want or like in things that fits that worked for me, but that rarely happens. It's been a problem most of my life for one reason or another and I suppose I've kind of given up on spending too much time hunting for things. Now days I tend to settle for what I can find in a few minutes - especially since I rarely do more than work or run errands in it anyway. So, I have a drawer full of fairly basic shirts. Usually, that's all I need. But sometimes, I want to be a little dressier than jeans and basic shirts without going for the performance/event/church section of the closet.
I've recently been given a stash of laces and other trims, so it seemed like an obvious solution to use one of the pieces to dress up my plain shirt.
I often find it easier to make decisions from pictures rather than the actual samples, so I took a few photos of my favorite pieces auditioning against the chosen shirt:
I actually wound up going with the very first piece I tried (the upper left side image). Some of the others seemed too large (lower right image), and I knew I was going to have to sew along the top and bottom of the lace, so the less straight lined ones (like the top on the right) were thrown out as well.
I wanted the lace to wrap all the way around the neck, so I chose a spot in the back to be my start/stop point, where the two ends of the lace overlapped a little, then pinned the lace in place.
Stitching along the top line was easy - I had a very straight line to follow both in the lace and the line of the shirt's collar.
Stitching the other edge of the lace was a bit more time consuming - but absolutely necessary to keep the lace against the shirt. Again, I used a lot of pins, and just did my best to keep the line of stitching hidden in thicker trim near the edge.
Fortunately, this is a shirt that goes over my head with no need for any stretch, so all I needed to think about was a straight stitch. There were a few places, especially on the outer edge of the lace, when I had to allow the lace to 'gather' under itself in order to make the curve nicely. These areas were a little trickier to sew, but nothing going slowly couldn't handle.
It's not a huge difference, but I think it made the shirt a little less basic than it was before. I certainly enjoyed wearing it more than I did before - and while I think it could still be layered or worn with accessories, it felt more 'finished' without them than it did before.
My husband likes it, but my brother's first comment was 'ew, grandma shirt.' So, outside opinions are tied, but I like it, and since I'm the one wearing it, I figure my vote carries the most weight!
20 August 2013
How (not) to Quilt
My machine and I have yet to come to an agreement on how to work without the feed dogs up, which puts things like the 'typical' meandering free motion quilting out of my reach right now. Which was a little disappointing (again) when it came to trying to figure out how to quilt my Chocolate Covered Cherries quilt. I really thought something like the meandering free motion style would have worked well to help blend my franken-blocks, as well as not clashing with the on-point blocks (like I think straight line quilting in any direction would have).
It was difficult to decide what to do - because while I wanted to go with a fairly dense amount of quilting, I also wasn't certain how I could quilt over the textured pieces. Initially, I thought I would do thin stripes around the borders, as well as outlining each block, thin stripes in the solids, and then something patterned in the triangles (leaving the center blocks, the ones likely to be textured) alone.
I got about this far:
a full outline of the first block, as well as a few lines into the solid before determining that this was simply not going to do what I wanted.
And yes, although I often choose to make do instead, this time I really did spent over an hour ripping out that quilting error until I was looking at a blank slate again.
So I've set it aside again for the night. Maybe inspiration will hit while I'm sleeping and tomorrow I'll have an idea what to do.
19 August 2013
My 17th Quilt: Monkey Whack
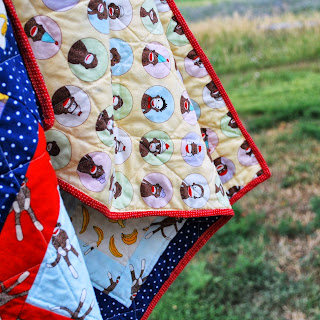
It's taken me much longer than I anticipated, but the simple stack & whack, stash busting "Monkey Whack" quilt is finally finished - and joining my 'done' stack as number seventeen.
Although I didn't use up all of my stash of this sock monkey fabric, I made another large dent in it - and I did come very close to using up the two mugshot style prints (a completely un-child-friendly name for them, I know, but I don't know how else to describe them) as well as the yellow/pastel bubble fabric that makes up the entire back.
I think that the only purchase I made for this one was the red dot for the binding material. If I recall correctly, even the batting came out of my stash.
As usual (sadly), this will be joining the stash of ready to go baby gifts - but (more happily) this is certainly going to give me a non-pink, non-floral option. And that doesn't hurt.
I think it's come a long ways from the beginning stacks of fabric - with the surprise addition of sash (possibly the best choice I made on this), the surprise addition of quilting (no, wait, maybe this is better), and the bright pop of red for binding.
15 August 2013
Slow Cooker Korean BBQ
The only Korean food I've had (so far) has been cooked at home with the help of seasoning packages - so I admit, I have no idea what the 'real deal' should taste like. But last week, we happened upon a package of Campbell's Slow Cooker Sauces in Sweet Korean BBQ and knew we wanted to give it a try.
Since I spent most of the day at work while Greg got the day off, the effort involved, and the photos, are all his.
Following the directions on the packaging, he added some stew beef that we'd picked up just for trying with this, covered in it sauce, and left it to cook for several hours.
By the time I got home, dinner was waiting for me!
Yes, you might notice, it cook just a little long, which led to some of the pieces being a little black - but they weren't yet burned, and still tasted great. We ate it over quinoa (having burned rice the last several times we've tried to make it) and with a large side of broiled broccoli. It was delicious. Sweet/savory enough to appeal to his taste buds, but not so sweet that I was unhappy.
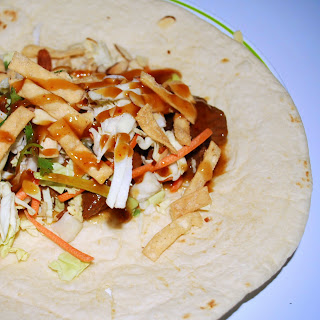
Again, following the lead of the package, we packed up the left overs for the next night - tacos with cabbage. I didn't feel like picking up a whole head of cabbage just for this, so I grabbed a bag of 'Asian Chopped Salad' kit - cabbage, cilantro, wonton pieces, and a ginger dressing.
And as I was working again, once again the photos and credit for fixing dinner go to Greg.
Oh My! Honestly, the burritos/tacos/whatever was even better than the previous night (with the quinoa). I especially loved the bites of cilantro against the sweet bbq flavors. And we are always happy to find a new way to eat cabbage - so this is another win win win!
So, slow cooker win and taste bud win? Absolutely doing it again!
Note: I am not in cahoots with Campbell's or anyone else. I was not asked to talk about this nor do I get anything for doing so. Again, if that's ever the case, I'll say so. This really was us just finding something, trying it, and wanting to talk about it a little bit.
13 August 2013
Sampler Progress
Does it seem like forever since I've made any progress on my sampler style blocks?
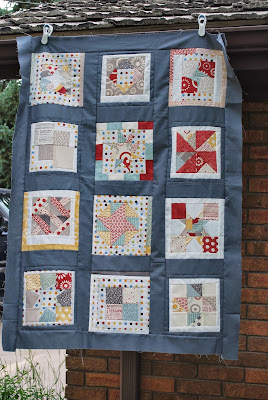
I finally got tired of staring at them wondering what I should do - so I did exactly what I've been threatening to do. I took apart my two least favorite blocks and used them as borders to beef up some of the smaller blocks I did like. That wasn't enough to make them all close to the same size, but it was a start.
Then, while I was out looking at possible binding materials, I picked up a solid grey to use as sash between the blocks and really got to work.
I trimmed the blocks to the nearest inch - which gave me five blocks at 7 inches square and seven blocks at 8 inches square. I then used some of the solid grey to up the smaller blocks to a matching 8 inch square size.
Once all the blocks were the same size, I chose a layout I liked and got to work piecing them together.
The wind didn't help me get any great pictures of it, but it's a big improvement over the stack of strange blocks I had a few hours earlier!
The current size is only about 32 by 42 - a little too small for a baby quilt and a little large for a wall hanging quilt. So, I'm back to debating what to do.
I could finish it up as is and make it a wall hanging anyway. I do have a wall space that would hold it. But I could add another border - either more solid grey or I could look for a little yardage and do something like flying geese style triangles around - and aim for a baby quilt. Neither the colors nor the blocks scream 'baby quilt' to me, but something so neutral-ish and less babyish might be more appropriate for a boy* (and let's face it, my stash of quilts to give away is a little more slanted toward 'girly' things at the moment).
So, one step forward - but a long ways from finished. I'm going to have to think quickly too; it looks like the line of fabric the majority of these prints came from (Sweetwater's Hometown) is getting scarce!
* I don't put a lot of stock into segregating colors or designs into girls or boys, but I also try to be sensitive to people who do. Right now, most of my 'ready to give' quilts feature floral prints or pink fabric which I would hesitate to give away to a baby boy unless I knew his parents were of a similar mindset (and even then I might hesitate a little).
I finally got tired of staring at them wondering what I should do - so I did exactly what I've been threatening to do. I took apart my two least favorite blocks and used them as borders to beef up some of the smaller blocks I did like. That wasn't enough to make them all close to the same size, but it was a start.
Then, while I was out looking at possible binding materials, I picked up a solid grey to use as sash between the blocks and really got to work.
I trimmed the blocks to the nearest inch - which gave me five blocks at 7 inches square and seven blocks at 8 inches square. I then used some of the solid grey to up the smaller blocks to a matching 8 inch square size.
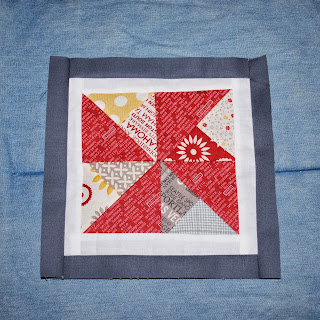 |
| Better already |
The wind didn't help me get any great pictures of it, but it's a big improvement over the stack of strange blocks I had a few hours earlier!
The current size is only about 32 by 42 - a little too small for a baby quilt and a little large for a wall hanging quilt. So, I'm back to debating what to do.
I could finish it up as is and make it a wall hanging anyway. I do have a wall space that would hold it. But I could add another border - either more solid grey or I could look for a little yardage and do something like flying geese style triangles around - and aim for a baby quilt. Neither the colors nor the blocks scream 'baby quilt' to me, but something so neutral-ish and less babyish might be more appropriate for a boy* (and let's face it, my stash of quilts to give away is a little more slanted toward 'girly' things at the moment).
So, one step forward - but a long ways from finished. I'm going to have to think quickly too; it looks like the line of fabric the majority of these prints came from (Sweetwater's Hometown) is getting scarce!
* I don't put a lot of stock into segregating colors or designs into girls or boys, but I also try to be sensitive to people who do. Right now, most of my 'ready to give' quilts feature floral prints or pink fabric which I would hesitate to give away to a baby boy unless I knew his parents were of a similar mindset (and even then I might hesitate a little).
12 August 2013
Flexible Menu Planning
You might have noticed that one of my goals for August was to plan menus for at least one week this month. After several months of unofficially having that as a goal, and failing, this time I've jumped completely in and made some changes that I hope will make the process easier.
One of the greatest issues with our menu planning is that we eat lunch out almost every (work) day, and have little control over where we go on those trips. In all honesty, what we have for lunch is determined by what's nearest when we get our chance go break. So I might end up having pasta for lunch on the same day I planned to have pasta for dinner. I'm not the best when it comes to eating pasta, a little bit goes a long ways for me, so that doesn't work.
So, this time around I'm making more of a guideline than a plan.
I bought six of these Rubbermaid boxes with lids (some have been scrubbed out already, but I didn't have time to attack all of them) and filled them with most or all of the ingredients for one meal. It's my goal to find a way to label the boxes (at least with what other ingredients go with that box), but I haven't put much effort into that yet.
Also, you might have noticed the box containing pickles and sugar cookie mix? Those are going to be used on the same day, but they are not going together.
Five of the boxes are sitting in the fridge, holding the tools for Slow Cooker Korean BBQ Tacos (2 days worth), Stir fry with spicy basil chicken, bbq pizza, buffalo chicken pizza, smothered burritos (2 days worth), plus the box with pickle dip ingredients and the beginnings of the birthday dessert ingredients. The sixth box is sitting in the pantry with our 'I cannot cook today' options: a couple soups and a pasta idea.
So, in theory, we've got at least ten meals and some snacks in the fridge, hopefully divided up into ways that will be easy for us to make a choice, grab and go. I'm hopeful this will be useful - especially after spending for the boxes (though to be fair, they were less than $1.50 each, which is why I went with the purple ones, rather than the clear which were more).
Feedback to come!
08 August 2013
Happy Birthday Mini Quilt
Oh, this is so hardly worth talking about, but as it's the little item currently hanging out on my fridge, I'm going to go ahead and share it anyway.
It's a little scrappy mini that I made when I was finishing the binding on a quilt over the winter (the binding and colorful thread were leftovers from the bigger quilt), and all the scraps were just things I had laying around. Everything was freehand - which didn't quite work out as I'd planned... Still, I had a blast making it and I'm enjoying looking at it this week.
And yes, this means there's a birthday in the house this month.
06 August 2013
Got A Back...
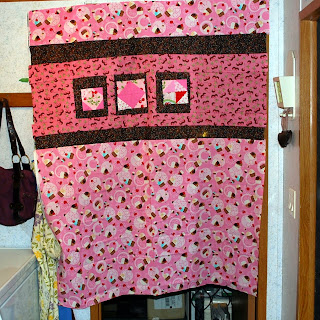
It's not quite what I had in mind, but I've made some progress on the back of my Chocolate Covered Cherries quilt (a.k.a. Pink Project). I had some inspiration, but things didn't quite work out quite as well as I'd hoped...
It's still about 4.5 inches too small, so I guess I'd better pick through the selection of pinks (not an issue) to find another print to add. The biggest problem will be deciding how/where to add it.
The little diamonds/half squares are my few remaining scraps from trimming the top blocks. I was hoping to do a little more with them, but since my other backing fabrics were such busy patterns, I chose to consolidate them into larger blocks rather than spreading them out.
My continued struggle to be happy with my quilt backs led me to start a board on Pinterest just for studying backs. And yes, I'll be clicking through on all those pins that promise to share the math of making a great back - even though I tend not to do much math in my quilting (which makes me a bad quilter). I'm going to get better at this... but probably not on this back...
On a happier note - how cute is the chocolate covered cherry fabric! I know the pink in it doesn't quite coordinate with my other pinks, but once I saw it I knew I had to include it somehow.
And while I still don't love it, I actually like it a lot more after spending some time looking at it and trying to write about it. It's not perfect, but it's growing on me. Let's hope whatever addition I come up with only improves my feelings for it!
05 August 2013
August Around Here
While some parts of the yard are looking like it's still spring:
And others are looking like summer:
Other parts of the yard are beginning to think about autumn:
While I'm happy to see more of our garden ready to be used - I am not ready for yellow leaves on any of our trees!
I'm also on the look out for a good watermelon. Leaves are already turning yellow and watermelons haven't even peaked around here - this is just not right. Hoping I can find some yet this week - but all I'm seeing are little bitty seedless ones. That's not what I want. I've yet to find a seedless melon that satisfies. I'm searching for the big, ripe, seeded kinds I grew up on. If all else fails, I may just have to go over and raid my grandfather's garden - he's bound to have a few!
02 August 2013
Ahhh....
My house and I may not be the best of friends right now, but I have to say, I really love where I live.
I have lived other places, and I just never got views like this anywhere else.
And yes, within three minutes of taking these photos it was raining. Not a lot, but enough to make me glad I had taken the camera inside!
I have lived other places, and I just never got views like this anywhere else.
And yes, within three minutes of taking these photos it was raining. Not a lot, but enough to make me glad I had taken the camera inside!
01 August 2013
August Goals
August Goals:
Read 5+ Books (Including 1+ nonfiction)
Go on a bike ride
Practice piano and clarinet twice a week
Try a new recipe
Attend the quilt expo
Social outing with friend/s
Plan trip to visit the C family
Start planning for Christmas shopping
Start working on the quilts that accompany all that math
Set up meetings with permit/building depts.
Sell the old car
Make time for doing fun stuff
Plan at least one week of menus and groceries
July Wrap Up
I can't believe it's already August! What happened to July!? I guess spending most of my weekends traveling and out of the house really made the month fly. I can't believe the summer is basically over already - we should only have another week or less of having irrigation water, and the local schools are getting ready for classes, and I for one am so not ready for any of that!
July
Read 5+ Books - And this is where most of this month's progress was made. Because these do travel well.
Bind Monkey Whack
Find and work on Pansy Patch
Try a new-to-me Recipe (Pinterest or otherwise) - For what it's worth, I've got a new thing in the crock pot today, so I think this one passes on a technicality. Again, I haven't really been home to grocery shop or cook anything special. More on the new thing later.
Family trips: birthday party trip, family reunion trip,
Get together with friends - at least one weekend (in addition to the people we'll see at the family trips)
Shopping for new work clothes
Clean and organize the office
Practice piano and clarinet twice a week (which isn't nearly enough, but I'm trying to work up to more) - No and no. Neither one travels well (okay, the clarinet does travel fine, it's just no one on the other side of hotel walls wants to listen to me for 30 minutes, at 11 p.m. or when ever my free time would have been), so while I did a little practicing, it wasn't nearly as much as I'd hoped. I am going to have to keep working on this one though, I've been given warning that I'm expected to perform at the next family reunion. (I took three years off since last time I performed anything for this group.) With no teacher or anything, I'm a little nervous about trying to come up with something on my own...
Go for a bike ride
Give the roses some attention
July
- "Sacrifices" Mercedes Lackey & Rosemary Edghill
- "The Nightmare Affair" Mindee Arnett
- "The Different Girl" Gordon Dahlquist
- "The Fault in Our Stars" John Green
- "The She-Hulk Diaries" Marta Acosta
- "The Language Inside" Holly Thompson
- "Let the Sky Fall" Shannon Messenger
- "Thousand Words" Jennifer Brown
- "Wild Magic" Tamora Pierce
- "Invisibility" Andrea Creamer & David Levithan
Find and work on Pansy Patch
Practice piano and clarinet twice a week (which isn't nearly enough, but I'm trying to work up to more) - No and no. Neither one travels well (okay, the clarinet does travel fine, it's just no one on the other side of hotel walls wants to listen to me for 30 minutes, at 11 p.m. or when ever my free time would have been), so while I did a little practicing, it wasn't nearly as much as I'd hoped. I am going to have to keep working on this one though, I've been given warning that I'm expected to perform at the next family reunion. (I took three years off since last time I performed anything for this group.) With no teacher or anything, I'm a little nervous about trying to come up with something on my own...
Go for a bike ride
Subscribe to:
Comments (Atom)


