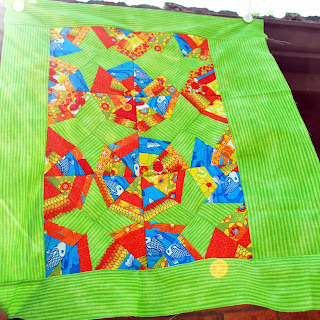
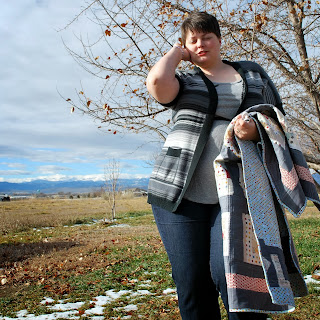
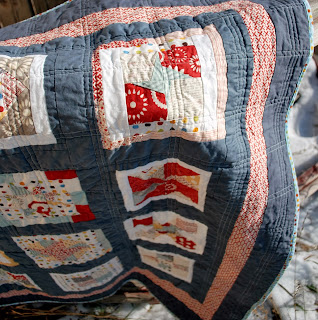
Although I'd initially thought I could use this little top as a chair cover for my ugly office chair,
once I got it put together I began to suspect I couldn't possibly sit on that.
It sat in the pile of things needing my attention, taunting me, until a few days ago. I spent several hours working on deep cleaning and organizing the office in case of holiday visitors, and once I got everything I didn't need out, it quickly became clear that the office's attached bathroom could benefit from a little more color. Since it already has green/orange/yellow valance decorations, I immediately thought of this little top.
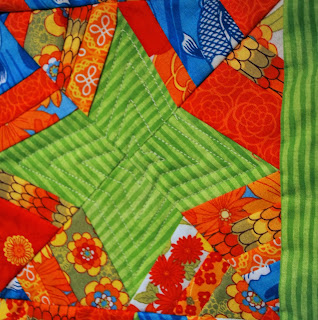
I was working under a real time crunch - people were coming over in less than two hours - so I didn't get overly complicated, and I settled for some left over binding instead of looking for something that better matched the blue of the koi print fabric. That's a little issue I may change in the future, but for the moment, I'm thrilled with how it brightens up the space.
Even though I don't love some of my green centers, I went with outlining them instead of trying to walk my way around the 'webs' of color. Although it was a little time consuming, it's just about the only quilting on the piece, so it isn't overwhelming and didn't eat up all my time.
Taking pictures of it was a challenge - I really should have taken some outside this morning before the wind hit instead of settling for pictures of it in place, but for now, these are going to have to do.
30 December 2013
26 December 2013
Only 'Afters'
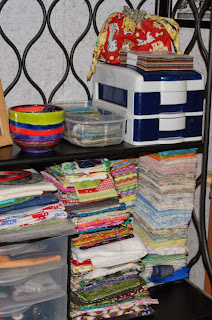
I'm skipping any photos I have of the 'before' areas of my office/craft organization. It just wouldn't be fair to frighten you all with the amount of dust I had going on a few hours ago. Or the lack of organization.
I also sorted out my latest button haul from a full shoe box into the larger, but emptier, glass jar on the top shelf. It's not completely functional - but again, a big improvement over what I had going on yesterday. When I'm short on inspiration, I love twisting the jars like an eye-spy game, searching the buttons or colors for some ideas or inspiration. That was one of my favorite things to do when I used to sit in my mother's sewing room, so whether there's a more organized way of keeping buttons or not, the jars stay.
24 December 2013
Little Finishes 2
I know I have a couple quilts I ought to be making progress on - and I'm very aware of all the books waiting for my attention yet this month - but really I'm just picking away at a few little projects and accomplishing very little. I feel like I haven't yet recovered from my Thanksgiving vacation - and it's nearly Christmas!
Now that I've officially reached out on finding a home for my Semi-Sampler quilt, I had a few leftover little scraps that were just crying out to be turned into something to go along with the quilt. One extra fat-quarter of grey fabric later, and a little bit of time, and I am ready to install closures in two coordinating bibs.
The patchwork-y bib used a few scraps from recent projects, including the quilt I'm trying to coordinate with as well as a few other projects. The other is just a large scrap of the text-heavy print that I used on the back of the quilt. They've been stitched to some terry cloth - so far I prefer to use pieces of towels rather than terry cloth fabric I could buy by the yard - and even have a little top stitching (most noticeable on the patchwork one) to finish them off. I wanted to get a little more finished without getting to fussy.
Now I have a pile of about six waiting for closures, probably snaps. I'm not particularly gifted at installing snaps, so I often make a pile until it feels worth it to dig out the tools. I suspect I also need to pick up a few more snaps before I get started. But these bibs - unlike the others I have on hand - do have a 'due date' so I guess I'd better move that up the priority list.
Oh - and although I did follow a pattern for both, they do look very different in size. I guess following directions is still something I should be working on!
The other little finish I have to share is really late... but again, it needed just a little more fabric - and the scraps left over from these bibs turned out to be perfect for my needs!
I have a couple more four-blocks of favorite prints left over from the 'October' side of my bed runner project, but these four black and whites were just screaming to be made into a tiny pillow cover. I won't be stuffing it until next year when it's ready to go up - though I think I have a little pillow it'll just fit over - but I'm pleased as punch with how the fabrics worked together.
Honestly, I wish I knew a little more about this little fat quarter I picked up. It's been amazing to work with and the perfect texture/color for so many little projects, it seems like I ought to have more of it... But all I have left is a tiny scrap to add to the scrap heap. I'll be keeping my eye out for more though!
23 December 2013
Pinterest Challenge: Spinach Artichoke Bubble Bake
The Inspiration Pin: Spinach Artichoke Bubble Bake
The Reaction:
I swear I followed the directions - but not only did mine not look like the inspiration recipe, it can't have tasted like it. All three of my taste testers said that it was rich (the cream cheese probably) and a little too much spinach. The artichoke, cheese, and seasoning basically disappeared under the spinach. Extra disappointingly, most of my pieces of biscuit didn't bubble up - even after an extra 20 minutes in the oven. The edge pieces that had bubbled up were pretty delicious, even with some (about half of what wanted to be there) of the spinach artichoke mixture on them - but the majority of the dish was a soggy spinach flavored disappointment. We did eat half the pan, but no one was interested in seconds or keeping the leftovers.
Probably some of the problems would have been avoided if I had taken the time to really press the fluid from the defrosted spinach instead of assuming that since I didn't see that line in the directions that it was okay to skip putting much effort into that.
The recipe really had promise, but the result was highly disappointing. I may try it again - with some serious changes and reduction in the spinach amount - but it'll be a while before I'm feeling that brave again.
20 December 2013
Pinterest Challenge: Lace Candle Jars
Still haunted by mountains of lace I don't really know what to do with, but don't really want to toss or put in the giveaway pile, I spend about 15 minutes a week dedicated to searching Pinterest for ideas on turning the piles into anything more interesting or functional.
Along with November's lace trees, I found some cute looking lace candle jars that I knew I immediately wanted to use as inspiration.
Inspired by both Annaboo's House (home of the original inspiring image) as well as Another Nicole (who I found while attempting to search out the correct link for the pinned image), I broke out some of the chunks of lace, and a little glue. Lacking any tea lights or other loose candles, I picked an older glass votive holder and two oldish glass jar candles from Bath & Body Works.
The mid-sized container on the right most is very freshly glued, which is why you can see some of the glue. After a couple hours of drying, the glue is basically invisible, as you can see in the two others which had dried overnight.
Since I started with decent jars to begin with, rather than recycled pickle jars - which I could certainly use, if I could figure out how to get the masses of old label glue off of them! - the improvement isn't quite as large as it might have been. I can't decide if I think these look romantic or spooky. Either way, I like it.
My only regret so far is that the lace on the largest candle is thick enough that the lid won't go back on properly. Fortunately, this is a winter scent I'm happy to use at the moment, so that's a minor issue. But next time I will be paying more attention and either use a thinner lace (like I did with the mid-sized one) or drop down far enough to let the lid seal cleanly.
Along with November's lace trees, I found some cute looking lace candle jars that I knew I immediately wanted to use as inspiration.
Inspired by both Annaboo's House (home of the original inspiring image) as well as Another Nicole (who I found while attempting to search out the correct link for the pinned image), I broke out some of the chunks of lace, and a little glue. Lacking any tea lights or other loose candles, I picked an older glass votive holder and two oldish glass jar candles from Bath & Body Works.
 |
| Unlit |
 |
| Lit |
Since I started with decent jars to begin with, rather than recycled pickle jars - which I could certainly use, if I could figure out how to get the masses of old label glue off of them! - the improvement isn't quite as large as it might have been. I can't decide if I think these look romantic or spooky. Either way, I like it.
My only regret so far is that the lace on the largest candle is thick enough that the lid won't go back on properly. Fortunately, this is a winter scent I'm happy to use at the moment, so that's a minor issue. But next time I will be paying more attention and either use a thinner lace (like I did with the mid-sized one) or drop down far enough to let the lid seal cleanly.
18 December 2013
Little Finishes 1
I haven't really been up to much big work lately - just a few little things at a time...
A small purple and black zipper bag:
Lined in dark purple, and almost ready. I just need a zipper pull - which I picked up last night.I also used an old scrap block to make a tiny clutch:
It's just big enough to carry my mobile and a chap stick. That's not enough for most days - but it's all I need when I'm performing, and this is small enough to hide on a music stand. I used it less than an hour after finishing it, as well as the next day, and was very pleased. I do wish it had a strap or something for easier carrying, but for now it's working well.
This little 'bag' is also supposed to carry my mobile.
I had hoped it would fit inside the purple and black bag so I could carry my phone without worrying that it would get scratched by my keys if they were both in the same bag. Sadly, it doesn't quite work as hoped. I'm trying to figure out if I can make it work with a little more thread ripping, or if I should cut it apart and add the scraps to my future book quilt pile.
17 December 2013
Fashion Challenge Check-In #1
The Goal: To use 4 different fashion looks from my Pinterest Fashion Stuff, Shoes, or the accessories on my Window Shopping boards as inspiration in creating a look for me to wear in November or December.
The Budget: $10 (specifically for tights)
The Inspirations:
1) Dress + Shirt
2) Dress + Cardigan 1, 2, 3, 4,
3) Shorts + tights 1,
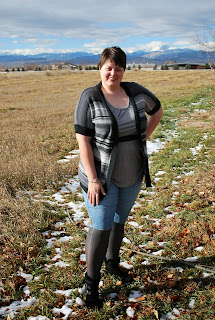
So... I tried this.
1) I am not comfortable posing in front of a camera. I knew this, but wow. Awkward.
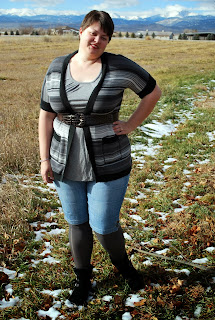
2) Those shorts do not work. I had hoped if I went grey (instead of black like my inspiration) I could make the lighter wash and longer cut work. No. Different shorts fall outside the budget for this project. I did not wear this outfitoutside the house to anywhere farther away than my back yard. Does that count as a fail?
3) I also tried it without the belt. My pose is slightly better - but I'm not sure it helped the outfit at all...
4) Immediately after seeing the results of this pictures I changed into something more comfortable:
(A special thank you to my husband/photographer for this candid and completely unexpected shot.)
Not exactly part of the challenge, but...better.
I think the look requires dark wash jeans and dark or black tights. I have black tights, but I figured they'd look really wrong against the light shorts. Maybe next year...
4) Statement shoes 1, 2, 3, 4,
5) Accessories
On the other hand, I did try to do some more accessories and layering.
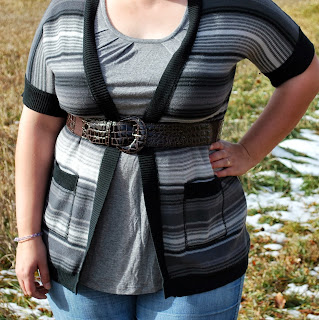
Layers, a belt (which should really count as a layer and an accessory), and a little more bling than usual. It's a start... and although I'm giving up on the belt and shorts and tights today, I'm at least going with layers and accessories. It's a slow start - but a start.
The Inspirations:
1) Dress + Shirt
2) Dress + Cardigan 1, 2, 3, 4,
3) Shorts + tights 1,
So... I tried this.
1) I am not comfortable posing in front of a camera. I knew this, but wow. Awkward.
2) Those shorts do not work. I had hoped if I went grey (instead of black like my inspiration) I could make the lighter wash and longer cut work. No. Different shorts fall outside the budget for this project. I did not wear this outfit
4) Immediately after seeing the results of this pictures I changed into something more comfortable:
(A special thank you to my husband/photographer for this candid and completely unexpected shot.)
Not exactly part of the challenge, but...better.
I think the look requires dark wash jeans and dark or black tights. I have black tights, but I figured they'd look really wrong against the light shorts. Maybe next year...
4) Statement shoes 1, 2, 3, 4,
5) Accessories
On the other hand, I did try to do some more accessories and layering.
Layers, a belt (which should really count as a layer and an accessory), and a little more bling than usual. It's a start... and although I'm giving up on the belt and shorts and tights today, I'm at least going with layers and accessories. It's a slow start - but a start.
13 December 2013
Quilt #20: Semi-Sampler Quilt DONE!
Although I haven't yet shared my excitement over finally washing quilt #19 (the photos I took at the same time as these are hardly worth looking at) - I figured I'd go ahead and celebrate this one being finished. Especially since (as you may have noticed yesterday), I am getting serious about trying to find it (or one of the others) a good home.
I had to wait for the temperatures to climb above zero before I was willing to wander out into the snow to take pictures of my freshly washed Semi-Sampler quilt. Taking pictures against that much snow made for a new lighting challenge, but I just couldn't wait any longer on this one.
It might not look any different from the pre-washed photos, but it is so much softer now. I just want to snuggle up with it. I'm resisting. For now.
It's come a long way from a few scrappy little blocks last January...
This really started with no plan more than to push myself to complete some blocks that I otherwise wouldn't have attempted - but about three blocks into the project I really fell in love with it.
Even though this is one I started with the hope of keeping, as I pieced the top together, I began to feel like this was really meant to go to someone else. I'm still working on seeing if the person I've chosen is a possibility - as much as I'd like for that to happen, it isn't always possible.
Whether this one finds a home sooner, or later, or ends up staying with me forever, I am just thrilled with the way it turned out. I have a couple favorites, but I just love the blocks I used -- enough so that I am going to have to make using more blocks in the future a priority. I'm not sure if that will mean another sampler, or if I am going to take on the challenge of doing a one block repeated quilt... Of course washing it was scary - red and white with no prewash possible - but so worth it in the end. Washing it has made it so much more soft and lovable.
I had to wait for the temperatures to climb above zero before I was willing to wander out into the snow to take pictures of my freshly washed Semi-Sampler quilt. Taking pictures against that much snow made for a new lighting challenge, but I just couldn't wait any longer on this one.
It's come a long way from a few scrappy little blocks last January...
This really started with no plan more than to push myself to complete some blocks that I otherwise wouldn't have attempted - but about three blocks into the project I really fell in love with it.
Whether this one finds a home sooner, or later, or ends up staying with me forever, I am just thrilled with the way it turned out. I have a couple favorites, but I just love the blocks I used -- enough so that I am going to have to make using more blocks in the future a priority. I'm not sure if that will mean another sampler, or if I am going to take on the challenge of doing a one block repeated quilt... Of course washing it was scary - red and white with no prewash possible - but so worth it in the end. Washing it has made it so much more soft and lovable.
12 December 2013
"Shopping" Options
Option 1)
Mostly monkeys, blue, red and yellow are predominant. Same fabric line as some of the fabrics used in another baby quilt you're familiar with.
Options 2)
It's hard to see, but I promise there are animals in there, and some kind of abstract geometric/nature shapes. Mostly orange, brown, and a little aqua. Some of the small squares are flannel, so there's a little bit of texture difference but not a lot.
Option 3)
I'd say this is mostly blue and red on grey. Some of the prints are text (city names mostly). It's the least traditionally-baby-looking one, but I don't think that's a bad thing...
Mostly monkeys, blue, red and yellow are predominant. Same fabric line as some of the fabrics used in another baby quilt you're familiar with.
Options 2)
It's hard to see, but I promise there are animals in there, and some kind of abstract geometric/nature shapes. Mostly orange, brown, and a little aqua. Some of the small squares are flannel, so there's a little bit of texture difference but not a lot.
Option 3)
10 December 2013
A Little Holiday Decorating
Although we sometimes like to pretend to have a say in things, the hard truth is that Momo makes the vast majority of our decorating decisions. Things that exist in his house need to be sturdy - or out of his reach. Having a pretty good idea of his abilities for destruction - intentional or not - we've never found the idea of a traditional tree particularly reasonable.
I've spent the last few years shopping around for something that seemed sturdy enough to serve Momo's attentions while being attractive enough to warrant bringing home. I've found a few things that look like they meet both criteria - only to realize they fail an even more important one: my budget.
Last year we went with a Pyramid - which I loved using. My parents had a similar, one level, nativity themed pyramid that they would put on the dining table throughout most of December, and to me, the arrival of the pyramid always signified the beginning of Christmas. So I was thrilled when we were given one - and I absolutely loved using it as our 'tree' for the year.
Although I liked it, and it worked well, we both wanted a chance to display the ornaments we've been collecting over the last few years (though neither of us have yet brought the ones from our parents' places). I'm still on the lookout for something larger and more likely to work in the long run, but when we found a 4 foot lighted tree on sale this year, I wanted to give it a try.
Ultimately, I'm hoping to lose the square base and instead somehow wedge it - along with some serious weight - into the vase you can see sitting behind it. Thanks to the coldest weather we've had this year, I wasn't about to head out to look for a way to do that, but I was ready to start decorating. That might work out in my benefit - since that desired base will probably make the whole thing more difficult to store and my storage space is very, very limited.In addition to needing - I think - some kind of glue and some weights or rocks, putting the base in the vase will require dealing with the tree's cord. I could just drape it out of the top of the vase, putty it to the exterior of the vase and cover that part of it in white tape, but it would be more ideal to put an 'exit' hole in the side/bottom area of the vase so the cord is more out of sight. That sounds like more work than I'm ready to take on this year - and maybe like I should make sure I have a back up vase on hand in case things go wrong! If I'm not going to get it into the vase this year, I think I may go ahead and whip up a little 'skirt' of some kind to cover the square base that came with the tree. It is not particularly attractive.
The branches vary in strength, though only of our ornaments is particularly heavy right now. It didn't get put up, since keeping some kind of balance - both in looks and actual weight - is important to keeping the tree from falling. Adjusting the branches isn't difficult, but I do wonder how many times I'll be able to rearrange them before the branches, or more likely the "bark" covering them, get too worn out to recover. I'm certain this isn't going to be a long term solution - but so far we're enjoying getting to see our little collection out on display.
It's been up nearly two weeks, and Momo has shown no interest in the entire process. Still, to be safe, we rigged it up with a jingle bell on nearly every branch. It's not fool proof, but it makes us feel a little better about the kitchen hosting such a huge temptation for his curiosity.
09 December 2013
A Little Holiday Tradition
Both Greg and I grew up with the tradition of getting one new ornament each winter - which means that we both have rather eclectic collections to someday bring to the table (so far the collections are still with our folks, but we hope to have enough storage to remedy that in the next year or so). When we got married, it only seemed like the obvious choice to continue buying one ornament per winter, whether something to indicate how the year went, where we spent our holidays, or simply one we thought was interesting.
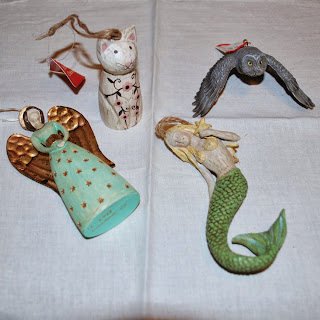
Year 1 - the mermaid. California. Christmas Eve on the beach.
Year 2 - the owl. Colorado. The year of Harry Potter (I finished reading the series and we watched all the movies for the first time).
Year 3 - the cat. Colorado. Sure, it looks nothing like Momo, but it's all about him.
Year 4 - the angel. Colorado. Honestly, we walked past it and both stopped. It just felt right.
Since this year they are finally coming out of their tissue paper homes, I picked up a gold permanent marker and labeled each of them as discretely as possible with the year they represent. I would have loved to include more, but there wasn't always room. I should have looked for a finer tipped marker - or asked someone with better handwriting to handle that part of the project.
Still, I hope the writing is permanent enough to last - and legible enough to work. Someday that information probably won't be quite so easily recalled and I hope that at least a little information will help me remember all the things these little ornaments represent for each year.
 |
| Tags still on - never been put up. Soon to change! |
Year 2 - the owl. Colorado. The year of Harry Potter (I finished reading the series and we watched all the movies for the first time).
Year 3 - the cat. Colorado. Sure, it looks nothing like Momo, but it's all about him.
Year 4 - the angel. Colorado. Honestly, we walked past it and both stopped. It just felt right.
Since this year they are finally coming out of their tissue paper homes, I picked up a gold permanent marker and labeled each of them as discretely as possible with the year they represent. I would have loved to include more, but there wasn't always room. I should have looked for a finer tipped marker - or asked someone with better handwriting to handle that part of the project.
Still, I hope the writing is permanent enough to last - and legible enough to work. Someday that information probably won't be quite so easily recalled and I hope that at least a little information will help me remember all the things these little ornaments represent for each year.
05 December 2013
Fashion Challenges
The Goal: To use different fashion looks from my Pinterest Fashion Stuff, Shoes, or the accessories on my Window Shopping boards as inspiration in creating a look for me to wear in November or December.
The Budget: $10 (specifically for tights)
The Inspirations:
1) Dress + Shirt
2) Dress + Cardigan 1, 2, 3, 4,
3) Shorts + tights 1,
4) Statement shoes 1, 2, 3, 4,
5) Accessories - I'm thinking even with jeans and a tee or something. Otherwise I know I'll dress up on Saturdays, and do nothing different the other six days of the week. This way... maybe I'll try to stretch myself a little more.
Looking at everything I've chosen to try, I think the overall challenge here is to use more layers and accessories. I'm not sure I can accomplish it... but I suppose it wouldn't be a true challenge if I weren't feeling some apprehension!
04 December 2013
Pinterest Challenge: Lace Trees
Whoops - this was supposed to get shared in November, but I went on vacation instead! Oh well, it makes more sense in December anyway!
Ever since lace began taking over my house, I spend one hour a week looking through Pinterest (and the rest of the internet, just in case...) for ideas of what to do with it. It hasn't been particularly fruitful searching, but one of the ideas that turned up early on was a photo linking to this Lace Christmas Tree Forest tutorial at Mitzi's Miscellany.
Edit: Also, apparently I had pinned (and misplaced) these gorgeous trees, which look more like what I attempted than the picture I set out to use as inspiration.
Inspired by the idea - though admittedly, not following the tutorial at all - I picked up three foam cones and went to town with some of my least favorite pieces of lace and trim, and some glue.
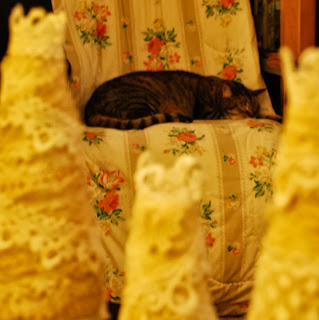
It took about two episodes of Law & Order: Criminal Intent* to end up with these three happy little trees:
Yes, two of the three are resting on other things while the glue sets up a little more - but I couldn't wait to take photos. And yes, I did use a combination of different cream/ecru tones with white. For the first few pieces I thought the combination of off-white with white wasn't going to work (just like the combination of matte vs. shiny), but I pushed through and in the end I really like the combination.
I think my favorite one is the larger of the three - mostly because I do like the largest single piece of trim passing around the center of it, the one with the long lines of 'droplets' hanging from it. The only reason it wound up in the 'craft/dislike' pile instead of the 'hang on/do like' pile is that this is the only piece I had - not enough to use in any of the usual ways like trimming an outfit, quilt, or bag. I think that sorting worked out though; it looks great on my biggest little tree.
For the moment, all three have little 'crowns' at the top - but after taking another look at the tutorial, I'm toying with finding a little something more to top them off. Two of the trees shown in the tutorial have silver balls at the top, and I really like that finishing touch. I haven't pulled out the rest of the holiday decorations yet, but when I do I am going to see if I still have some little silver bulbs or something else I could use to finish them off just a little more.
I'm going to give them a couple days to dry before I mess with them again (since I used a tacky kind of glue instead of hot glue). I suspect I'll want to come back and give them permanent bases (the canning jar lid is working well, I might just look for a few more spares of those) before calling them finished. I'm also searching the house for the perfect location - fortunately, I have several options to tryand a few weeks before I'll be feeling obligated to get some more decor up around here and a couple more days to figure something out...
*The television in the living room gets one channel, so on the rare occasion we have it on, we watch whatever it shows - mostly reruns of lots of other detective/cop type shows. And the same four movies all weekend long, all year long. Not my favorite thing, but I was already gluey fingered before I thought to change over to a movie. Next time I'll be more prepared.
Ever since lace began taking over my house, I spend one hour a week looking through Pinterest (and the rest of the internet, just in case...) for ideas of what to do with it. It hasn't been particularly fruitful searching, but one of the ideas that turned up early on was a photo linking to this Lace Christmas Tree Forest tutorial at Mitzi's Miscellany.
Edit: Also, apparently I had pinned (and misplaced) these gorgeous trees, which look more like what I attempted than the picture I set out to use as inspiration.
Inspired by the idea - though admittedly, not following the tutorial at all - I picked up three foam cones and went to town with some of my least favorite pieces of lace and trim, and some glue.
It took about two episodes of Law & Order: Criminal Intent* to end up with these three happy little trees:
Yes, two of the three are resting on other things while the glue sets up a little more - but I couldn't wait to take photos. And yes, I did use a combination of different cream/ecru tones with white. For the first few pieces I thought the combination of off-white with white wasn't going to work (just like the combination of matte vs. shiny), but I pushed through and in the end I really like the combination.
I think my favorite one is the larger of the three - mostly because I do like the largest single piece of trim passing around the center of it, the one with the long lines of 'droplets' hanging from it. The only reason it wound up in the 'craft/dislike' pile instead of the 'hang on/do like' pile is that this is the only piece I had - not enough to use in any of the usual ways like trimming an outfit, quilt, or bag. I think that sorting worked out though; it looks great on my biggest little tree.
For the moment, all three have little 'crowns' at the top - but after taking another look at the tutorial, I'm toying with finding a little something more to top them off. Two of the trees shown in the tutorial have silver balls at the top, and I really like that finishing touch. I haven't pulled out the rest of the holiday decorations yet, but when I do I am going to see if I still have some little silver bulbs or something else I could use to finish them off just a little more.
I'm going to give them a couple days to dry before I mess with them again (since I used a tacky kind of glue instead of hot glue). I suspect I'll want to come back and give them permanent bases (the canning jar lid is working well, I might just look for a few more spares of those) before calling them finished. I'm also searching the house for the perfect location - fortunately, I have several options to try
*The television in the living room gets one channel, so on the rare occasion we have it on, we watch whatever it shows - mostly reruns of lots of other detective/cop type shows. And the same four movies all weekend long, all year long. Not my favorite thing, but I was already gluey fingered before I thought to change over to a movie. Next time I'll be more prepared.
03 December 2013
Semi-Sampler Bound
In attempting to reprogram my brain for being awake earlier for vacation driving, I wound up gaining some extra hours to my day today - and I spent almost all of them working on finishing the binding on my Semi-Sampler quilt.
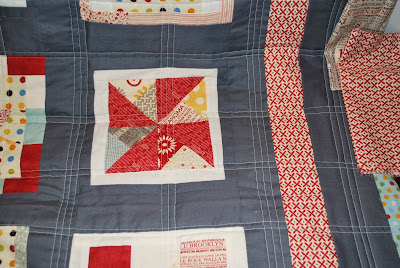
Despite being my usual size, about 2.5 flat, the binding seems a little scant. Still, I think I'm glad I went with the blue. The top (above) really needed a break from all that red (my other option for binding).
It really matches the back - being the same fabric as much of the back - but I think that works out alright.
I've got a few loose ends to trim before I throw it in the wash - and I'm still seeing if it has a chance of going to a home right away or if it'll become home decor. I have to say, I didn't intend to give it away, but ever since I picked up feelers on this possible home I've been feeling like that's where it was meant to be. Spending the last several months of backing and quilting thinking of it as going away has really helped me be ready to part with the top blocks (even though I love them and kind of want to keep them as proof that I can do complicated blocks). So, either way, I think I'll feel like I win.
02 December 2013
December Goals
December Goals:
Read 5+ books
Cut sash for our quilts
Wash Semi-Sampler
Deep Clean: Office, Living Room, and Kitchen
Start on 2013 cross stitch portrait
Holiday Stuff:
Decorate for Christmas
Ship 2 packages ASAP!
Finish stocking shopping by 20th
Orchestra rehearsal (2) and performance (1)
Pinterest Challenges
1+ non-food (new - not counting any from November)
1+ food
2+ outfits for the fashion challenge (more on this soon)
November Wrap Up
November Goals
Read 5+ books:
Trip:
Christmas Cantata Rehearsals (at least 2)
Start on a couple Christmas-ish crafts
Attempt 3+ non-food Pinterest ideas
1+ food related Pinterest idea
Cut sash for our quilts - I need to make this a priority for either December or January. I'd love to actually work on it in December but it's looking like it'll be the week of Christmas before I have much time to sit down with this one. So much for my tentative hope of having these on the beds for Christmas! At the rate I'm going, it might be next Christmas!
Finish Semi-Sampler quilt
- "Mastiff" Tamora Pierce
- "The Sum of All Kisses" Julia Quinn
- "Circle of Magic: Sandry's Book" Tamora Pierce
- "Circle of Magic: Tris's Book" Tamora Pierce
- "Protector of the Small: First Test" Tamora Pierce
- "Protector of the Small: Page" Tamora Pierce
- "Protector of the Small: Squire" Tamora Pierce
Check tiresPick up rental carSpare key for house sitterFind/make a purse for the tripPack etc.Find a new toy for Momo (and the sitter?)Accomplished this, but convinced him to play with it? Not so much. Apparently it is terrifying. If I so much as touch it, he runs for the hills. So, not exactly a success...
Finish Christmas shopping (except stockings) - So close. Only one more thing to pick out, but I'm close. Heading to the post office tomorrow to start shipping the first packages. At least, that's the plan....
Lace Christmas Trees(coming soon)Cleaned the KurigFashion Challenge #1(coming soon)
Cut sash for our quilts - I need to make this a priority for either December or January. I'd love to actually work on it in December but it's looking like it'll be the week of Christmas before I have much time to sit down with this one. So much for my tentative hope of having these on the beds for Christmas! At the rate I'm going, it might be next Christmas!
01 December 2013
Imagination Needed
Well, I've been trying to find ways to test drive the possible binding options for the Semi-Sampler quilt without actually turning the fabric choices into binding.
This is the best I've got so far:
It doesn't give a very good idea, but it gives a little bit of one...
Enough for me to feel like neither of the red prints are going to be the right finishing touch. If I had enough of the print to do it alone, I would consider pressing through using it - but I don't, and the other is too much with the border. So... unless something perfect pops up in the next few days, I'm really leaning towards using the blue/multi dots from the back side. I'm not sure it's what I'd choose if I had every fabric in the world at my disposal, but I'd like to get this one done without another trip to the store for it! And yes, I do like the idea of bringing the backing fabric to the front by using the matching binding... So, that's probably a 'yes' then.
I'm following a couple leads about this quilt possibly going to live with someone else, but so far it's still looking like it'll be staying with me for a while. I'm going to have to invest in a bigger storage area - or figure out how to hang them on the walls. Which would require having wall space. Hmm...
29 November 2013
Progress
Happy Go Lucky Quilt - DONE! (NEEDS NEW PHOTO)
Progress:add additional border?, make a back, baste, quilt, bind, wash
Pansy Patch Project
No recent progress.
Yet to Do: finish piecing tops together, make back, baste, quilt, bind
Our Bedroom Quilts
Yet to do:
Yet to Do: determine if this is going to go on my chair (the plan) or as a wall hanging instead.
Waiting to Start:
Progress:
Pansy Patch Project
No recent progress.
Yet to Do: finish piecing tops together, make back, baste, quilt, bind
Our Bedroom Quilts
Yet to do:
Cut Reunion fabrics for tops- Cut sash
- Piece each top
- Pre-wash fabrics for the backs
- Piece each back (choose more fabric?)
- Baste both
Choose thread/buy thread- Quilt
- Make binding
- Bind
- Wash
Yet to Do: determine if this is going to go on my chair (the plan) or as a wall hanging instead.
Waiting to Start:
- Something with vintage sheets
Subscribe to:
Comments (Atom)
