Will have to wait.
My camera went to the Grand Canyon with a friend, so I've been relying on my phone this week. It's worked to get a few photos, but either I haven't remembered the photo a day challenge or the photos haven't turned out due to lighting/setting problems. I should get the real camera back tomorrow and I'll either crank them out on Sunday/Monday (if I don't work) or I'll do two pictures a day throughout the week (if I do have work). I'm not sure I've gained any skill with the camera yet, but I've missed having it at hand.
24 March 2012

23 March 2012
New Capris
This is the story of my new capris:
- Notice three or four tiny holes* in current jeans - while at work.
- Borrow a car.
- Drive to the store.
- Try on every pair of jeans, capris, and shorts within a four size range.
- Decide against spending $50 on the single pair of shorts that fit.
- Purchase the only pair of jeans that fit around the waist - despite being 3 inches too short - for a bargain $12
- Bring them home.
- Try them on again. Decide the high water look isn't working.
- Pull out a pair of last year's worn out capris and the sharpest shears in the house.
- Lay the capris on top of the jeans.
- Cut the jeans to about 2 inches longer than the capris.
- Figure if this doesn't work, they can be shorts.
- Turn the raw edge up 1/2 inch.
- Remove the cat from the measuring tape.
- Remove the cat from the new jeans.
- Turn one leg up an additional inch.
- Remove the cat from the measuring tape.
- Turn the other leg up an additional inch.
- Try on new capris.
- Put them in the wash.
- Hope they don't shrink too much in the drier.
- Wear them to band practice the next day.
- Take a terrible phone picture.

* Not the kind of holes I can ignore. Do they sell jeans with reinforced thighs?
22 March 2012
Pansy Patch
Nothing like jumping into the deep end without really looking, right?
I'm a very beginner level quilter. But that doesn't stop me from taking on projects way beyond beginner level.
A few months ago my husband and I were walking through JoAnn Fabrics. He suggested I take a look at some of the quilting magazines. I figured it couldn't hurt. I was wrong.
I fell in love with a quilt. Not only that, but I was certain it would make the perfect gift. I ignored the fact that it was smaller pieces than I've ever attempted to sew. I've done a couple log cabin blocks before, but I've never done any complicated piecing or triangle work.
So, I bought the magazine, brought it home, and attempted a practice block.
I suppose it could have been worse.
.jpg)
Ouch.
Worse? That took me nearly 5 hours.
A few months later, I tried again. This time, armed with a rotary cutter, some better measuring tools, and a bit more knowledge.
.jpg)
It's better. Especially if you ignore the dual pink petals where I ran out of the right pink fabric. Most of my petal seams lined up this time, and two of the four green leaf diamonds turned out pretty close to square. I thought this one was close enough for a quick turn so I could practice that other thing I've never done before: hand quilting.In over my head? Why do you ask?
It's better, but still not the quality I want to give.
I mentioned my frustrations to a relative who quilts. In a matter of minutes she whipped this up:

Her square's back is prettier than either of my pansy fronts.
A few weeks later, she told me she had another version and a few tips.
.jpg)
In theory, I'm still working on it. In reality, I haven't had the hours in a row to dedicate to it, so maybe it'll be a Christmas gift. Or a Christmas 2015 gift.
I'm not giving up on it,but I am feeling a little beaten by it I just wanted to concentrate on some things more my skill level first. Also, I got distracted by another project. One I hope to talk about in a few days.
I'm a very beginner level quilter. But that doesn't stop me from taking on projects way beyond beginner level.
A few months ago my husband and I were walking through JoAnn Fabrics. He suggested I take a look at some of the quilting magazines. I figured it couldn't hurt. I was wrong.
I fell in love with a quilt. Not only that, but I was certain it would make the perfect gift. I ignored the fact that it was smaller pieces than I've ever attempted to sew. I've done a couple log cabin blocks before, but I've never done any complicated piecing or triangle work.
So, I bought the magazine, brought it home, and attempted a practice block.
I suppose it could have been worse.
.jpg)
Ouch.
Worse? That took me nearly 5 hours.
A few months later, I tried again. This time, armed with a rotary cutter, some better measuring tools, and a bit more knowledge.
.jpg)
It's better. Especially if you ignore the dual pink petals where I ran out of the right pink fabric. Most of my petal seams lined up this time, and two of the four green leaf diamonds turned out pretty close to square. I thought this one was close enough for a quick turn so I could practice that other thing I've never done before: hand quilting.
It's better, but still not the quality I want to give.
I mentioned my frustrations to a relative who quilts. In a matter of minutes she whipped this up:

Her square's back is prettier than either of my pansy fronts.
A few weeks later, she told me she had another version and a few tips.
.jpg)
In theory, I'm still working on it. In reality, I haven't had the hours in a row to dedicate to it, so maybe it'll be a Christmas gift. Or a Christmas 2015 gift.
I'm not giving up on it,
21 March 2012
Almost Successful Pumpkin Brownies
Did you know you can make cookies or muffins with only a can of pumpkin and a box of cake mix? I didn't, until Pinterest taught me this wicked trick. Since then, chocolate chip pumpkin cookies have become my go-to treat.
This morning I was craving something sweet, but I didn't have a box of cake mix. I did have brownie mix. So I thought I'd get a little experimental.
 I like my brownies a little spicy, so in addition to the cinnamon, I added chili powder, ginger, and nutmeg.
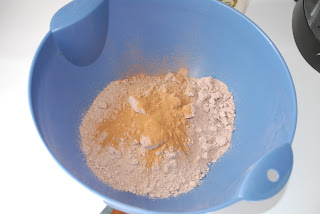.jpg) No measuring, I just throw it in until it smells good.
No measuring, I just throw it in until it smells good.
Then add the can of pumpkin (about 15 oz) and stir until well combined.
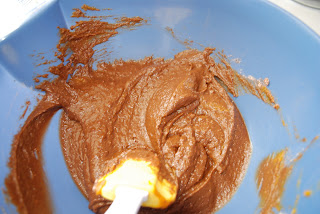.jpg)
And then, because it seemed a little unfinished, a handful of chocolate chips.
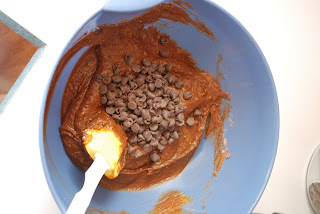.jpg)
Mix again, then pour into a baking pan.
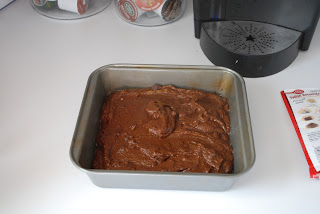.jpg) Looks good enough to eat already - at least to me!
Looks good enough to eat already - at least to me!
Pop it in the oven according to the directions on the back of the brownie mix.
Now is when I hit my first bump in the road. After 15 minutes, it wasn't anywhere near done. After 30, the edges were done, but the center was still a little soft. At this point, I gave up and pulled it out.
 The edges were delicious. The pumpkin flavor came through, as did the cinnamon and chili. The center was a little gooey. That didn't diminish the flavor, but even knowing there isn't any egg in the brownie, it was still difficult to eat that texture.
Lesson learned? Next time I'll try it in a muffin tin or as drop cookies instead.
This morning I was craving something sweet, but I didn't have a box of cake mix. I did have brownie mix. So I thought I'd get a little experimental.

.jpg)
Then add the can of pumpkin (about 15 oz) and stir until well combined.
.jpg)
And then, because it seemed a little unfinished, a handful of chocolate chips.
.jpg)
Mix again, then pour into a baking pan.
.jpg)
Pop it in the oven according to the directions on the back of the brownie mix.
Now is when I hit my first bump in the road. After 15 minutes, it wasn't anywhere near done. After 30, the edges were done, but the center was still a little soft. At this point, I gave up and pulled it out.

Lesson learned? Next time I'll try it in a muffin tin or as drop cookies instead.
20 March 2012
Wonky Stacked Coin: Bound
After flying through making the front and back for the Wonky Stacked Coin quilt, I took a long break to look for binding. Even once I found the right fabric, it took me a while to start on it. Part of that is because I procrastinate, part of that is because I fall in love with my current work and I'm convinced each step will ruin it. I'm working on that.
After pulling up some bias tape tutorials from my bookmarks bar, I jumped into a bias tape adventure inspired by this tutorial. A little math (the diameter of the quilt to be bound) convinced me I wanted to make a more than the yield of a fat quarter, so I started with a rectangle of fabric about 23 by 48.
 When it came to pinning together my parallelogram so the lines matched up, I must have walked back to the office to check the instructions five times in ten minutes. I could not get my head wrapped around what I was supposed to do. But it is exactly as it sounds - pin the lines together. The trick is that you are pinning them to create a spiral with your lines.
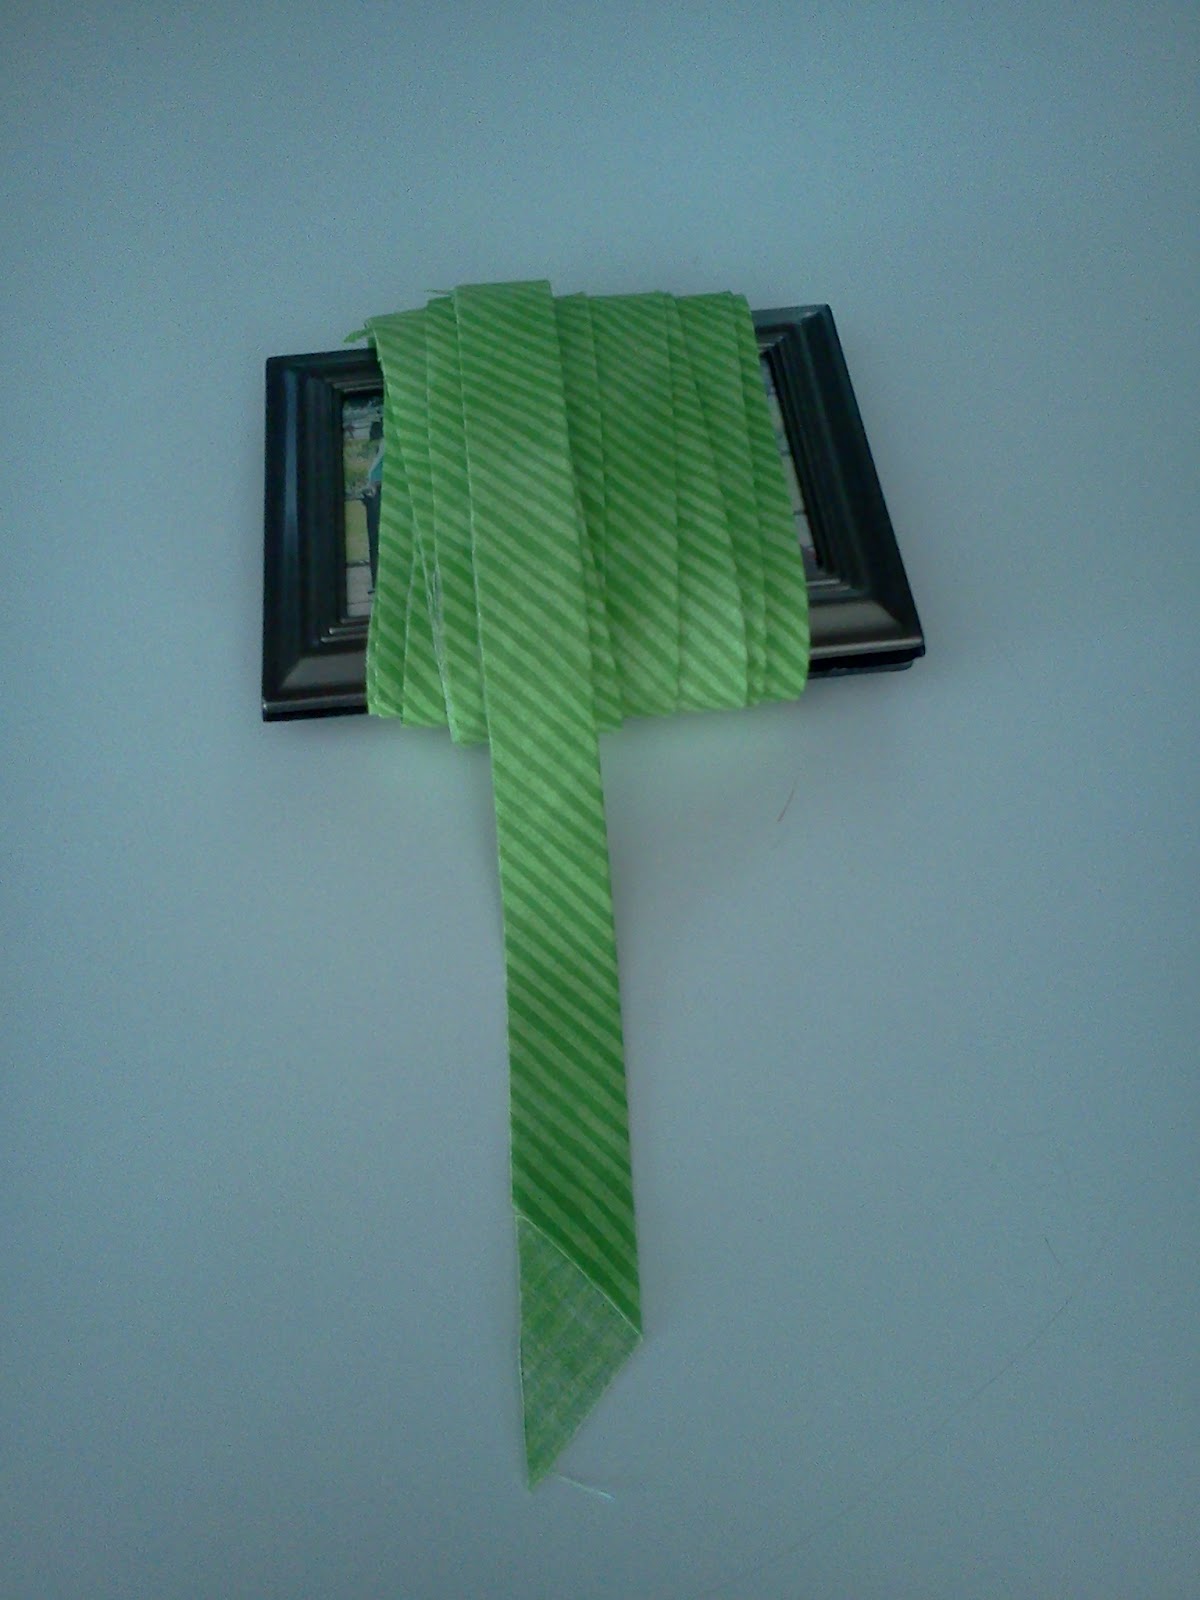
Pinning the parallelogram might have taken a little extra time, but once pinned and stitched, the bias tape comes to life quickly. Almost before I knew it I had more bias tape than I knew what to do with! I wrapped it around a free picture frame for easier transportation and went to get my quilt.
 Pinned it to the top and stitched it on, one side at a time to allow room for mitered corners.
 Turning the binding around the side of the quilt and attaching it on the reverse side was a little more difficult. I wish I'd gone a little larger than 2 inches for the bias tape width - I could have used a little bit more on the corners. Eventually I got it pinned and sewed down. I had hoped to be sewing on the quilt top on one side of the quilt and on the binding on the other, so I used variant color brown thread (my quilting thread) on one side and variant color green thread on the other.
Things didn't stay quite as square as they should have, so I do have a few spots where the brown thread wandered into the bias. While these areas are noticeable, they all occurred on the back of the quilt, so I'm not terribly concerned by them.
 Of course I wish it was perfect. I'm tempted to pick out the truly obvious browns on the binding, but I'm not sure how I would truly fix it without removing the binding and starting over. For the moment, I'm going to live with it and see how I feel in a few days.
Now that it'sprobably done, I can't believe I put this off for so long. Making my own bias tape wasn't as difficult as I'd feared, and even with the wandering brown thread, this method of attaching the binding yielded much smoother results than the previous method I've used.
There's really only one more step - washing it. This is the most worrisome step of all. There are so many ways this could fall apart in the wash. But if it's going to fall apart, I'd rather it do it on me than the recipients. Plus I like to think I can get some of the cat hair out if I wash it.
My camera is currently headed to the Grand Canyon with a friend, so it'll be a week before I can get any better pictures of the quilt as a whole - but there's no rush. Even though it's my third finish (I'm still working on squeezing the giant star through my machine), Iprobably won't reveal this quilt in whole until after I've given it to the parents-to-be.
After pulling up some bias tape tutorials from my bookmarks bar, I jumped into a bias tape adventure inspired by this tutorial. A little math (the diameter of the quilt to be bound) convinced me I wanted to make a more than the yield of a fat quarter, so I started with a rectangle of fabric about 23 by 48.

Pinning the parallelogram might have taken a little extra time, but once pinned and stitched, the bias tape comes to life quickly. Almost before I knew it I had more bias tape than I knew what to do with! I wrapped it around a free picture frame for easier transportation and went to get my quilt.

Things didn't stay quite as square as they should have, so I do have a few spots where the brown thread wandered into the bias. While these areas are noticeable, they all occurred on the back of the quilt, so I'm not terribly concerned by them.

Now that it's
There's really only one more step - washing it. This is the most worrisome step of all. There are so many ways this could fall apart in the wash. But if it's going to fall apart, I'd rather it do it on me than the recipients. Plus I like to think I can get some of the cat hair out if I wash it.
My camera is currently headed to the Grand Canyon with a friend, so it'll be a week before I can get any better pictures of the quilt as a whole - but there's no rush. Even though it's my third finish (I'm still working on squeezing the giant star through my machine), I
19 March 2012
Sneak Peek: Wonky Stacked Coin Quilt
Fresh off my finish of my Agent N's sheep in the hills quilt I started a stacked coin style quilt for a special recipient - one who wasn't yet any more than a wistful thought in the minds of two of my dear friends.
I had a blast picking out fabric. Actually, that part might be more fun than the actual quilting most of the time.
I completed the top and back in a few days (all those straight lines were a breeze after the curves on the hill quilt). In fact, it was basted, quilted, and sitting in a drawer in my dresser the last time these dear friends were at my house.
It sat in that dresser drawer for months while I looked for the perfect binding - which I hadn't thought to look for when I was picking out fabrics.
I finally found a fabric that I hope will be the perfect finishing touch for this slightly wonky stacked coin:
And now that the future recipient is more than thoughts and wishes, I've got the motivation I needed to get back to work. It's past time to wash the binding fabric, attempt to make my own bias tape for the first time, and bind the quilt!
I had a blast picking out fabric. Actually, that part might be more fun than the actual quilting most of the time.
 |
| The initial fabric choices. |
It sat in that dresser drawer for months while I looked for the perfect binding - which I hadn't thought to look for when I was picking out fabrics.
I finally found a fabric that I hope will be the perfect finishing touch for this slightly wonky stacked coin:
.jpg) |
| Bright green stripe binding-to-be? |
18 March 2012
My Second Quilt
My second quilt (and the most time consuming yet) was for my godson, "Agent N."
The idea I had in my head was a bit grander than my abilities and I was forced to make some compromises. While things didn't turn out quite how I'd hoped, I got to use some really great fabric in this one. One benefit of all those curves? I got quite a few scraps large enough to use in other projects, namely, the ticker tape quilt I'm working towards.
I got a little ambitious on the quilting for this one as well. It's just about impossible to see against the star sky fabric, but I attempted some quilted stars.
 The stars are a little easier to see on the simple, brown backing:
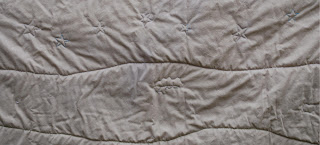.jpg) The stars weren't too hard to do - once I got used to the shape - and I think they added a little extra something. My attempt at clouds (yes, that blob with a line through it is supposed to be a cloud) were not quite so successful.
The stars weren't too hard to do - once I got used to the shape - and I think they added a little extra something. My attempt at clouds (yes, that blob with a line through it is supposed to be a cloud) were not quite so successful.
This one was slightly smaller, and easier to give away, than my first quilt but no less special. I don't think I'll take on something quite like this again any time soon, but there's a special sense of accomplishment in creating something straight out of my imagination.
 |
| Those three blobs are sheep, I promise. |
I got a little ambitious on the quilting for this one as well. It's just about impossible to see against the star sky fabric, but I attempted some quilted stars.

.jpg)
This one was slightly smaller, and easier to give away, than my first quilt but no less special. I don't think I'll take on something quite like this again any time soon, but there's a special sense of accomplishment in creating something straight out of my imagination.
Subscribe to:
Posts (Atom)