31 August 2012

Dressed Up Machine II

I thought I posted this earlier this month, but it looks like I didn't - whoops! 

Both my machines have better fitting covers now!

They don't really coordinate.
Kenmore/Janome Cover Outside
Kenmore/Janome Cover Inside

Singer Cover Outside
Singer Cover Inside
And once again, it was as much about using fabric I had and couldn't envision another use for as it was about making something I wanted to look at every time I come into the office/library/sewing room.

All those things aside, I like them both.

I'll probably make covers again some day - maybe when I've got a slightly better handle on making holes for the handles. Then again, it's more comfortable for me to move them using hand holds other than the little handles, so maybe not.

The new cover is a little small in one direction, and a little long in the other, but compared to what I was using last month, I am thrilled. Not only does it fit better, but these fabrics are a huge improvement over thrifted pink/blue farm animals. Which probably have a place... just not in my view every day!

30 August 2012

Jungle Block Top: Done?

I've been having a blast playing with these jungle blocks (and ignoring some of my other responsibilities).
I've added additional frame fabric - what was supposed to be a sash turned into a frame, which I guess means the blocks really just got larger. Then I worried about whether the two additional pieces of fabric would work together (after completing all the sewing of course). After that, with the help of a square dinner plate, I cut that newly added frame at an intentionally wonky angle.

Which leaves me with this:


(Which again, looks blurry on my previews, but it's quite clear when I look at the image on my computer or in Picasa, so I'm guessing it's just something about the way my blogger preview looks.)

It's safe to say I love it. 

It's also safe to say I'm not convinced it's finished. 

As much as I like the browns, they detract somewhat from the intense colors of the fabrics that started this whole thing. I'm torn between adding a 2-2.5 inch border to the top, in a coordinating peachy/orange or aqua/blue, or simply going for a binding (in an equally coordinating and bright fabric). 


Seeing it drawn out (with my oh so impressive paint skills), I'm leaning toward the top version - which is supposed to represent a bright binding only. The second version is supposed to be a border with a binding.

Since I have no plan for the back - or for where this one is going - there's no real rush on finishing. Except of course for the surge of excitement that comes with each finish. Still, I think I'm going to postpone that finish for a time while I think about which top option to go with and what kind of top to go with. I do still have two fat quarters of coordinating fabric which might go toward the back - though considering I like them so well I couldn't bring myself to cut into them when making the top, I'm not sure I can make them into 'just' a back...

29 August 2012

Our Garden Overflows!

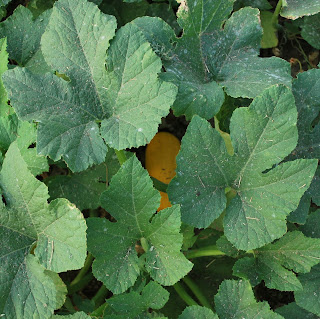
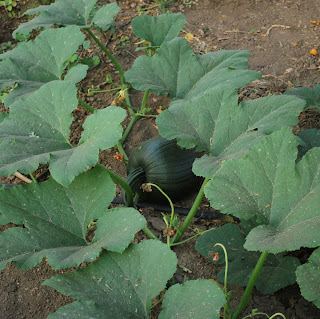
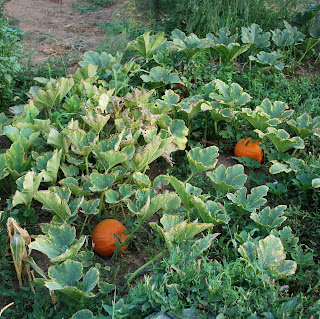
I'm not a gardener - but my parents both have the gift. Every year they manage to put in a wonderful garden, and every year we're blessed with more than we know what to do with! 


It's hard to recognize what's happening in the last picture - but just beyond the raspberries, we've had a bit of a plant explosion. I don't know anyone outside my extended family who eats wonderberries, but we're going to have enough to stock a deep freeze. Maybe more.

I'd better keep working on learning to make pie crusts.


28 August 2012

Sometimes You Swim...

...and sometimes you flail around in the deep end until someone throws you a floating device so you can sheepishly kick back to the shallow end.

Yes. This is about that Jumping in the Deep End Again post.

And the Rainbow Road Quilt.

I spent some of this weekend plotting out when I need to finish each step of the quilt in order to finish it all in time to give it away in time and came to the conclusion that if I want to finish, I have to buy the fabric this month.

So I reworked my sketch to have some dimensions involved:


Then colored it accordingly:

Then started doing math.

And more math.

And a little more math.

And on my fourth attempt at figuring out how to convert everything from square inches to yards, I think I was finally successful in doing the math correctly.

And from that math, I did a little bit more math to come up with how much this is going to cost.

That number is big.

Having been a newlywed not long ago... I would rather have had something I want for a fraction of that number (or, you know, that number, that's good too) than spend that much on a quilt. No matter how lovely I think quilts are, or how special the sentiment behind it.

I know quilting can be (is) an expensive hobby, so I wasn't expecting this to be a cheap project. But I was really not prepared for the cost on this one. Neither was anyone else. I had three people double check my math and they all agree that, while the numbers seem alarmingly high, the math is sound. 

I'm still in love with the idea and the pattern. But I think I should shelve it until I can rework it in a baby quilt size. Or perhaps until more of the needed fabric can come out of my stash.

So... I don't know if I headed back to the sketch book to simplify and see if I can cut costs that way, if I'll look for another design that could work, or if I'm going to walk away from the idea completely and get them something from their registry instead.

Don't mind me, I'll just be doggy paddling my way back to the shallow end for a while.

27 August 2012

Pinterest Challenge: 2-Ingredient Cake

In July, I played with Angel Food Cake + Lemon Cake Filling. While I liked it, and our guests liked it, it wasn't 100% successful in my house. At the beginning of August, I found a pin for Angel Food Cake + Blueberry pie filling. My husband is a much bigger fan of blueberries than lemon, so I figured I'd give it a try.

Except he was shopping with me and picked up a can of raspberries instead.

Which sounds better by me...

Fortunately, the recipe at The Frugal Girls calls for any kind of canned berry pie filling.

Excellent.


Mix the two ingredients, then bake for 30 minutes at 350.


First - what is it about angel food cake mix that immediately takes me back to having an Easy Bake Oven?
Second - I find stirring this tricky. Unless of course I want to wear a good percentage of the cake mix.
Third - I think my favorite part is the cool, mousse-like texture it gets once the two ingredients are combined.


For a few moments, I thought my ungreased 9x13 pan wasn't going to be enough room. I wasn't expecting the cake to rise so much (the lemon version I tried didn't rise at all). It's hard to tell here, but the cake was standing beyond the edges when I pulled it out. It did immediately begin to fall, which was a little bit of a relief.

The directions say to serve it warm, so I cut right into it.


These big pieces are for sharing with the neighbors. Okay, I had a big piece too.


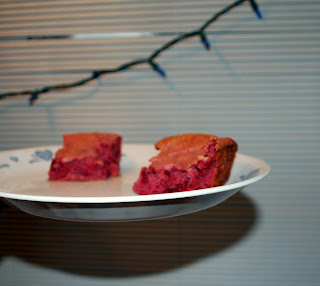
I know this picture is a little blurry, but you can see just how much the cake fell anywhere it wasn't touching the pan.

The flavor is a very strong raspberry, exactly what you'd expect. And the flavor got positive reviews from all my tasters.

The texture, on the other hand, was a little weird. Half the tasters didn't say anything about the texture, even when asked specifically. Half the tasters immediately mentioned a difficult to describe sticky/chewy texture - particularly to the most browned top/edge pieces. To me, these pieces were somewhat like taffy or gum, though not as long lasting. The inner bits, further from the browning, are really good - in both taste and texture. But I'm not sold on the outer bits.

I did let it cook 32 minutes, and I do have a gas oven, so I suppose either of those could play a role in the texture of the outside of the cake.

Overall, I'm still on the fence. It's easy enough, and the flavor is good, but this texture business is throwing me. I'd like to try it again in an electric oven to see if that makes a difference, and I'll try it again in the morning to see if the two textures have gelled into one a little better with some extra time. But based off first impressions? I'll stick with the lemon.

Which raises an interesting question. What happens if you do half lemon, half raspberry? Hmm... I think I'm going to have to try that soon.


I took a lemon version to the family picnic this weekend, this time using only 3/4 the can of lemon pie filling. This time the lemon version fluffed up a little big during baking (not like the raspberry though) and came out a better texture as well. Everyone who tried a piece liked it and asked for the recipe, but compared to french silk pie, wonderberry pie, and Texas sheet cake, not that many people went for lemon bars - and I can't blame them! 

24 August 2012

Intentionally Upping the Wonk

What do plates have to do with quilting?

Lots if you don't have a square large enough for your blocks!

After adding another border to my Jungle Blocks, I wanted to intentionally improve the wonky factor in the quilt top. The easiest way to do that turned out to involve a large glass plate and my rotary cutter.

I suppose any template would work fairly well, but I didn't have a hard plastic template large enough for my blocks - and I haven't had luck using guides that can be cut by the rotary blade (like cardboard). If you've got a steadier hand that I, cardboard might work. I liked the plate - I could see how my interior blocks were lining up, and it gave me a great edge to cut against.

As many wonky things as I've made, this is my first time being super intentional about going for that lopsided factor, and it has me even more excited about seeing how the top turns out.

23 August 2012

Late Summer

I don't care if there are Christmas ornament displays popping up in stores - for me, it's still summer. 

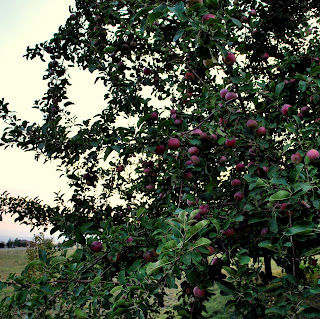
The trees and garden are still going strong - even if it is late enough to be apple season here. 


While most of these apples are too wormy to eat, that makes the air just outside my door smell marvelous.


Not even the birds will touch these cherry-like fruits. They are as sour as anything I've tried.


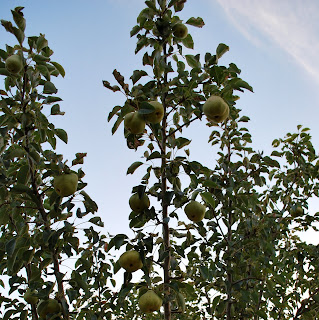
 The pears aren't quite ready yet, but we're keeping an eye on them if we're to save them from the birds.


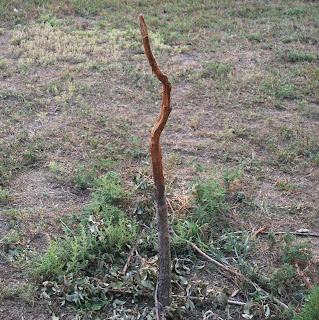
Can you tell we occasionally have elk in the yard? Four years ago, I'd never seen elk this far from the mountains, but we had two young bulls three years ago, and this summer it seems like they've been all over town. It's unusual to go more than a week without a sighting. I'm surprised we haven't had much damage from them before - though I do wonder what it was about this particular baby tree that got their interest so much... The other little fruit trees of similar size/age were left completely alone!


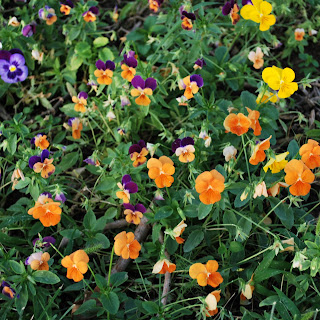
But even if apples should have me thinking about autumn, these colorful little faces keep my thoughts firmly grounded in summer. These were planted for our wedding, and I'm thrilled each time I see them still going strong. Oh, I'm sure they won't always populate that patch of bed, but it still warms my heart and takes me back to our wedding. And yes, some of these little ones bloomed nearly year round last year - so I know they don't really mean summer, or even spring.


Still, even if it seems like everyone else is starting to think about Halloween, Thanksgiving, and Christmas, I'm happy to hold onto summer for a little bit longer.


And...Happy Birth Day to Baby C! That was surprising news to wake up to, but I am so happy to hear that she and her parents are doing well, despite the slightly earlier than expected arrival date. 

22 August 2012

Jungle Blocks Again

Remember these blocks?

They've been hanging out on my desk for the majority of the summer (at least it feels that way) waiting for me to find the right fabric to use around/between them.

Nothing's been quite right. Anything with an orange in it clashes too much with the many oranges in the little blocks. (Even though it looks a little salmon in that picture, I assure you, it's a peachy orange.) Trying to match the aquas, greens, or blues has been just as difficult. Yellow might have been my best option, looking at the picture now, but the only yellow I have in my stash is a buttercup gingham. I didn't even try that.

So, I finally picked a fabric - the brown circles I used in Baby C's Wonky Stacked Coin Quilt. Only to run out of yardage half-way through.

This is the kind of problem when I think a 'real' quilter would attempt to find some of the right fabric. I've heard of people checking all sorts of online shops, even putting out calls to any of their friends who might have some.

I'm not that kind of a quilter.

I picked another brown + circle material from my stash and kept going.

I'm not sure it was the right decision. But sometimes one has to keep working through the creative challenges to get a better idea what the final product will really look like. So at the very least I'm going to finish sewing together the top.

What if I hate it then?

Well, that 'real' quilter I torture myself with would probably rip out one of the two fabrics - maybe even both. But the quilter that I actually am? Probably will cut it off the central jungle blocks, even though it'll make them a little smaller.

I'm hopeful it all works together though.


21 August 2012

Pinterest Challenge: Red Velvet Cheesecake Cookies

Red velvet is one of those things my husband loves. So every time I see a recipe for Red Velvet Something, I  pin it or save it for the next time I need to make something special.

So of course Culinary Couture's Red Velvet Cheesecake Cookies was an instant addition to the pin board.

This weekend I had a few people over - we're making our way through the Harry Potter movies while waiting on Game of Thrones to start up again - and it seemed like the perfect time to start on these. Since the dough and the cheesecake filling both require two hours of time in the fridge and freezer respectively, a movie marathon seemed like a great time (especially since our kitchen looks into the living room, so I didn't have to miss out on a moment).

My movie-watching friends were also perfect test-subjects. They'll try just about anything - which is good, because I was in search of something to bring to a family reunion picnic the next day.

The recipe is fairly easy since it starts with a box of red velvet cake mix. The dough was whipped up and resting in the fridge, wrapped up in some festive red plastic wrap, in about fifteen minutes.

The cream cheese/powdered sugar filling didn't take any longer to mix:
My favorite part of making frosting. 
But spooning it out for freezing took a while:
After freezing for 2+ hours
The recipe called to use a quarter cup of dough for each cookie. I just pinched off what seemed like a decent amount and flattened it to pieces that filled the palm of my hand.

The first three: before baking
I suspect these aren't as big around as the recipe intended them to be. Not only because of their actual size, but because they didn't spread nearly as much as I'd expected them to. Now, that could be the size, and that could be the higher altitude. Either way, I had no unusual spreading and eventually was doing nine of this size on a cookie sheet.

The first three: after baking
The moment they were cool enough to handle, I went ahead and bit in. And yes, the filling inside retains heat a bit better than the outside dough. So, if you're like me and want to try these right away, be prepared. Or let them cool slightly longer than you think you should.

Red Velvet Cheesecake Cookie - with filling
So, each of the first three cookies went out to be taste tested - the weight of the rest of the batch resting on the results. Which were favorable. Very.

I had two cookie sheets lined with parchment paper and waiting to go - and by doing nine cookies per sheet, I was more or less able to put one sheet into the oven, prep the second, pull the first out of the oven, put the second in, put the dough back in the fridge for 3-5 minutes while I wait for the first batch to cook enough to safely transport the cookies to a cooling rack, then start prepping the empty cookie sheet again. Which made it a rather endless project, but it took less than an hour to get them all through, which wasn't bad.

In those few minute breaks, I worked on writing up what I wanted to do differently for the next batch.
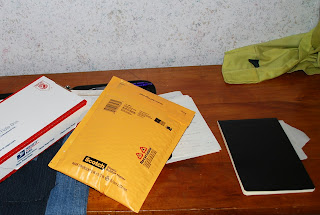
I haven't gotten brave enough to bring my netbook or smart phone into the kitchen - so new recipes always require either a notebook or a post-it with the directions. I love this notebook for it because I can flip the cover closed and still see the writing beneath it - which helps protect my notes a bit when my hands are that greasy! You can kind of see I've already started writing tips and things to try for the second batch.

For the second batch, I used slightly less oil than the recipe called for. Not enough to make a difference though, sadly. I understand the dough needs to be workable, but the most discerning of my tasters first comment was about there being too much oil - and as the cookies cooled off a bit, I began to agree with her.

I also wanted to make the second batch significantly smaller cookies, which called for smaller centers. Rather than spooning them out, I went in a slightly easier (though, more clean up required) direction and used a piping bag.

Not left handed, just posing. 
This worked much better - both for serving out and freezing. But I actually wound up with something like twice the number of frosting/filling dots as I needed.

This time I tried to keep the dough something like quarter or half-dollar size - I wanted much smaller cookies. It's hard to tell - but they are smaller. I did have more cracking through this time, probably because I was rolling the dough so thin. I didn't mind the cracking, but some people might. With the smaller size, I got about 50 cookies out of the batch.

The cookies were a winner with my husband and our friend, mixed reviews from my parents, but popular at the family picnic. Whew.

If I do them again (cue my husband making puppy-dog eyes at that if ) I would still like to cut the oil, or possibly find a substitute. I'm not sure I could sub anything in and still be able to work it/roll it as needed, but I'd be interested in trying.

Piping the frosting dots for freezing worked fairly well - so well I would try skipping the freeze and pipe directly into the rolled out dough. I'll probably also half the frosting recipe, and use a greater cream cheese to powdered sugar ratio. These cookies are sweet enough, I think I could go for just a bit more cream cheese. It'd also be interesting to try these with pre-made 'cheesecake' filling (like I see on the shelves near the cream cheese).

Overall, these were well-received - but I want to try some more tweaks to see if I can make them a little better, or at least feel like they're a little better for me...

18 August 2012

Rocky Mountain Quilt Festival

This weekend I was lucky enough to be able to hit up the Rocky Mountain Quilt Festival. It was my first time stepping out into the great world of quilting. Up until now, I've stuck to blog-stalking and JoAnn's and avoided anywhere too many quilters might hang out. Why? Call it beginner's nerves.

Now that I've been to a quilt festival... I'm feeling much less intimidated. And much more inspired.

There were so many beautiful quilts on display - how could I not be inspired!

"Black and White and Starred All Over" 
Of all the many, many quilts on display there, I think Wenda Lewis's "Black and White and Starred All Over" (above) was not only my favorite, but the one I found most inspirational. I could go on and on about all the things I love about it - from the color choices to the dual color of quilting thread.


I mean, look at those fabric choices! It never would have occurred to me to use some of these prints, but not only does it add to the overall look, but I found myself wanting a closer look at each print.

A close runner-up was the display Ditto quilt, but I didn't get any pictures of it. I'd hoped to find it online in the colors I loved at the Festival, but no luck so far. I actually wound up going back and purchasing the pattern for the Ditto quilt. It'll be my first time actually following a pattern. I've followed a couple tutorials for blocks before, but never a full pattern. I can't wait to get started on it - but I've got other things on my plate to finish before I dare start something new.

I have a feeling that'll be my motto for the next few months - until I'm certain I'm going to finish Rainbow Road on time. 

Here are a few of the other pictures I managed to take. I certainly didn't get a picture of everything I found inspiring, there were too many options - and too many people.

Tracey Barber's "Flamingo Log Cabin"
Couldn't find credit - but is this piping with binding??
Donna Peterson's "Somewhere"

I almost walked out without purchasing anything, but after lunch I just had to go back for the Ditto pattern and this:


I don't know what I'm going to do with it. Yet.

And I'm finishing Rainbow Road first. Yes. First.


Reading through this, it probably sounds like I don't want to work on Rainbow Road. That's not true. I would love to be putting together stars right now. But first I have to do some serious math to figure a fairly accurate estimate of how much fabric I need - at least for the back ground. And since the addition of each full star takes out at least 1.25 inches of fabric (in each direction) for seam allowances (that's what my math tells me so far), I need to know how many full stars, half stars, and quarter stars I'll be using. You can see how doing those maps and calculations might be far less appealing than jumping to something with either of my purchases! 


16 August 2012

Pinterest Challenge: DIY Prairie Point Garland

Before I started planning my wedding, I never gave any extra thought to garland or bunting. Actually, I probably never gave any thought to it. But it doesn't take long looking at wedding planning blogs to get sucked into the garland/bunting loving - and I fell for it all the way. Despite the effort of DIYing some, we had quite a lot at our wedding - both hanging from the edges of the houses and sheds, but also along the fence posts by our country road. Now days, that garland hangs from the ceiling of our little house.

So, it shouldn't be any surprise that the moment I saw this Prairie Points Garland tutorial at Frozen Knickers, I pinned it instantly and knew I wanted to turn my attention to it. $0.99 fat quarters seemed like the perfect opportunity to pick up a few fabrics to make into prairie points.

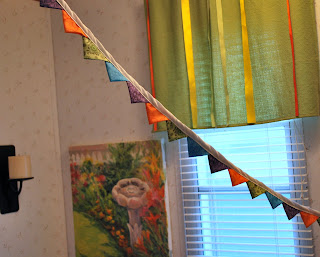
I turned bits of my four fat quarters into twenty 3.25 squares, then turned the squares into prairie points. 

I didn't have any double fold bias tape, so I made my own. For the most part, that worked alright - but the back didn't turn out quite as nicely tucked as the top. Next time I'll try using an iron instead of just finger pressing it. I expect that'll help things look better front and back. 


Twenty points weren't quite enough to hang where I want (see above), but I've relocated this strand to a small blank space on the office wall. For the moment, it's nice to have a bit more color on the wall.

This used less than 1/4 of each fat quarter, so I think I'll make another, longer chain to hang in the bathroom (see above). I'd like to try a chain where the points don't overlap - it might make it easier to drape in the small space I'm trying to decorate. If I find a thick enough ribbon in my bin, I may use a folded over piece of ribbon instead of attempting to make double fold bias tape. If that doesn't work, I may try applying single fold bias tape in a manner more like the way I bind quilts (thus, sewing the points to the tape twice). Either way might yield better results than the back side of the double fold I worked with this time.

I'm happy with it, and can't wait to make a longer version to brighten up my bathroom. With a bit more practice, I'd also love to figure out a way to apply it to a quilt top (in a garland/bunting style). This was a blast to make, and easy enough I don't feel bad for being 'addicted' to the process!

Alright, I'm 'addicted' to the results too.

14 August 2012

Good to Sew?

I've got my Janome/Kenmore machine back and I'm ready to put it to the test!

So, what was wrong?

Well, things inside were "very dry" and a belt needed to be tightened up a little.

That's all?

No.

Turns out I've been using the wrong kind of bobbin.

Normally, I'd be embarrassed about this kind of thing but this is a second hand machine. And it came with more than a dozen bobbins. Bobbins the first owner had used in it for years. All of which are the wrong kind.

It actually turns out that I should be using the same kind of bobbin for both of my machines. Which means I don't even have to buy more any time soon.

While I'm glad that wasn't the only thing needing looked at on the machine, I'm also thrilled that it's an easy 'fix' on my part. And now that the Kenmore's been seen to, it should be good to sew for the next year or two before needing another check-up.

Meanwhile, I've started looking at tickets to a quilt festival near me. So far I've avoided going to any festivals, and I've more or less stayed out of Real Quilt Shops. Why? I'm shy and nervous about being a beginner, but I'm trying to get over that. I've stopped saying I'm a beginning quilter and started just saying 'I quilt'. That's a step. I think the next step might be to start going to these kinds of things and start meeting other people who quilt.


Update:
 After my first stripe of stitching, I lifted my foot off the pedal and immediately was rewarded by the noise that started me thinking I needed to take it to a shop. I tried again the next day with similar results. It seems to happen any time the machine's speed is on the slow side. I'm trying to determine if it's possibly something I did when loading the thread (unlikely) or if I need to take it back.

Sigh.

13 August 2012

Pinterest Challenge: Pie + Crust

I can't remember now how I stumbled across The Militant Baker's site, but I'm so glad I did! Among other things I needed to read that day, I found her recipe for Honey Chamomile Peach Pie. Which sounds absolutely heavenly, doesn't it? I pinned it for later.

Well, this weekend was that later.

I did a lot of wandering from her recipe. I'm not sure where to draw the line between claiming I followed her recipe loosely or claiming this was inspired by her recipe. But it certainly isn't a direct copy of any of her directions...
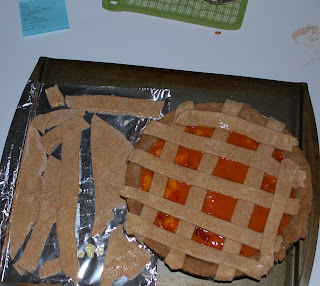
The first step is making a pie crust. Something I've never done before. I didn't have ingredients for the first several pie crusts I looked at. Eventually I found a recipe I had the ingredients for: Perry's Plate's Easy Whole Grain Shortening-Free Pie Crust.
I loved the suggestion of putting the butter through a cheese grater, to get small, easy to work with pieces. Sadly, neither my kitchen nor my mom's kitchen seems to have one anymore. But, my search for one did reveal an onion chopper. It wasn't easy, and it's nothing I recommend (I think my hand is going to be bruised from the effort of pulling the pieces apart after each 'chop') but it worked to get the nearly frozen butter into small cubes.

If you look carefully, you can see a few buttery pieces in the flour-mixture.


Mixing the dough, and rolling it out were both painless processes after the onion chopper business!

After trimming the edges of the crust to fit the pan, I put it in the oven at 375 while I turned my attention to the filling.

I have no idea what kind of fruit I used. My parents bought and planted the tree thinking they had a nectarine tree. This is the first year it's produced enough fruit for us to have any. And we're suddenly not sure if it's nectarines or peaches. Or something else entirely.

For a tiny little tree, it's producing a lot of fruit this year - so I knew we had more than enough for me to experiment with in a pie.

I cut the fruit into bite sized pieces and tossed it in a pot with the called for honey, brown sugar, corn starch, and chamomile tea.


There's also a little vanilla extract in there, since I didn't have any other vanilla.

The little mystery fruits cooked down very quickly, and seemed wetter than what I really wanted to work with. So, I used a slotted spoon to spoon as much fruit as possible into my slightly pre-cooked crust, leaving behind quite a bit of the delicious juice mixture.

Awaiting filling

I had thought to do a whole pie crust across the top, but as I looked at the amount of filling (which seemed a bit scant) and the amount of crust, I changed my mind. This had the added benefit of giving me lots of little pieces to test for done-ness, and to eventually dip in the leftover juices.

I did brush the top pieces, the edges, and all the little pieces with a bit of egg mixture, then sprinkled on just a touch of sugar - mainly for the trimming pieces.

Fifty minutes later, I pulled it out of the oven.


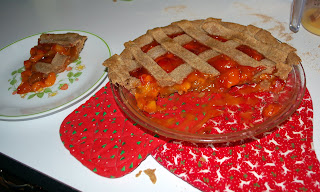
Letting it cool for thirty minutes before cutting into it was the most difficult part. As much as the filling oozed, I should have waited longer. But I was too curious to see how it turned out - and eating the pie crust pieces in the leftover juice was only making me more curious.


The crust is a little nuttier and less flaky that any other pie crusts I've had, more like a graham cracker crust really. Fortunately, the honey + mystery fruit is strong enough that isn't a problem. I was also relieved to find that it was cooked throughout, no gooey pie crust surprise waited at the bottom of the plate. Whew!

I love the filling flavor. Whatever that mystery fruit is, it still worked well with the honey and chamomile, and the cooked down texture was perfect for pie. I'm not quite sure about the crust on top - it certainly makes things more difficult to cut and eat, but I also think the filling needs both layers of crust to have the right balance.

It's a little early to have reviews back from everyone who has tried it - but so far I've heard only positive things. I won't be doing it again tomorrow, though my husband suggested we should, but I'm pretty pleased with my first venture into making pies and pie crusts.

I hope to try this filling again soon, but probably with a different type of crust.