28 February 2013

Small Success

I have finally managed to find what I was beginning to think was the holy grail of shoes:

Blowfish Iris wedge pump 
Closed toe, silver shoes, in my size (or close to).

So, I'm wearing them around the house every evening between now and the wedding weekend until wearing them feels natural and comfortable. Or at least not unnatural.

It's a small victory compared to the things yet to accomplish, but I'm going to celebrate the little things right now - or there'd be nothing to celebrate at all!


Ha! I just realized I pinned these shoes in another color several months ago. I guess that almost makes this count as a Pinterest Challenge - putting something from my 'dream closet' into my real closet? I think that's a challenge!

27 February 2013

Pinterest Challenge: Shirt Refashion

The vast majority of my life right now is lived either in jeans and a t-shirt, or something approaching pj's. So packing for a trip is a major stress. Especially when there's a good chance that trip will involve family photos.

So, along with addressing the pile of scarves, I also got to thinking about some of the tops in my 'too small' or 'rarely wear' piles.

I am not much of a seamstress. And it is not easy to find tutorials for ways to adjust clothing that is too small. But armed with a general idea of what I wanted thanks to this amazing top found (via Pinterest) at Of Dreams and Seams and the protection that if this absolutely failed I wasn't losing anything I was using, I went to work on a too small sweater and an old men's shirt.


Although it's been washed, this poor sweater has never been worn. When it still fit me, the weather where I lived generally wasn't cold enough. Now that it is - and I'm planning a trip to colder weather - it's uncomfortably tight. (It's a size small, which leads me to believe it's from the men's department, but it's been in my drawers for at least 8 years so who knows!)

Cut a line down the middle of the sweater. Fortunately, the weave of the fabric gave me an easy line to follow.

Apply bias tape to the raw edges to contain them. I'm not certain this was the right thing to do, but I didn't know how else to contain the raw edges and I had leftover black bias tape just sitting by the machine begging to be used.

I didn't quite plan for my stitching to be so obvious on the binding, but it was a happy accident because I actually like the little bit of shine the thread gives the bias tape edges. In fact, I top stitched along the bias tape several times to get a little more shine.

At this point, I had a finished-edged cardigan. But cutting it apart made just how small it was even more evident. So on with the plan! I took a quick measurement of about how far the edges were apart, and attacked my second top. Since my measurement said I needed about 9 inches of fabric to make the cardigan a top again, I cut an 11 inch wide piece from the back of the old shirt.

A quick double turn under to give the top a finished edge that's (hopefully) unlikely to unravel, and I was ready to try the pieces on together. And for the first time I began to wish I had a dress form. Holding the 'top' in place under a cardigan that wants to shift - and trying to pin it in place without pinning myself was a bit of a trick. Not impossible though. I managed to get everything pinned where I wanted it - and the whole mess taken off again without injury to me or the top.


I had to hem the bottom of the shirt piece - which was sadly a few inches too long, which meant saying good-bye to some of the interesting button detail I'd hoped to keep, then fed the whole thing through the machine to stitch the sweater to the red top. A little more hemming on the edges of the red piece (which wound up not needing to be as large as what I'd measured) to get the raw edges hidden and I have a fairly finished top.

Gotta take pictures in the daylight next time... 
I'm a little sad to have lost most of the button details on the red part - out of 6 in the original cut of fabric, I was only able to keep 1. I'm debating removing the lost buttons from the scraps of shirt and hand sewing them down the length of the center stripe (under the button that made it). I'm also toying with adding a button to the top/neck edge of each side of the cardigan. That would dress it up just a little more while the hand stitching would reinforce the machine stitches there. I think it's fine without, but the fabric got a little bulky where I had to sew over the collar of the sweater and I might feel a little more secure with a bit more stitching there.

At the moment, it feels a little more school teacher ish than I'd hoped. I don't know if buttons would change that, or if it's just my inexperience with cardigans or layering.

Unlike my incredibly supportive husband, I'm not quite certain I'm happy with this one. I guess I'll wear it a couple times before I judge completely. That said, it's a huge improvement over a sweater I've never worn and a piece of fabric I didn't know what else to do with (the front of the shirt will likely become a quilt type project some day).

This feels like the moment to set it aside and think before I act. I've got a lot of matching red buttons I could add if that's really what it needs, and a little jar of odd buttons, but maybe it's fine and I just need to come at it with fresher eyes.


26 February 2013

Twin Quilts: Beginning

Since my goal is to make two coordinating quilts, my first step was to divide the Noteworthy jelly roll into three piles - Twin A, 'neutrals,' and Twin B.


Since I pulled out the four strips of Bucket List print (cute, but it doesn't feel baby quilt appropriate), each stack wound up being 12 strips. 

The 'neutral' pile was mainly white/cream/multi-color/grey with two peachy oranges and one blue thrown in. Pulling the two peachy oranges over was intentional since my 'solid' stripes will match one of them. The addition of the blue was less planned, but I think it's going be easier to work with three piles of 12 rather than an uneven number. 
Quilt A
Quilt A will add pink/red/blue to the 'neutral' stack. 

Quilt B
Quilt B will add green/orange/yellow to the 'neutral' stack. 

And the over all plan will end up something like this: 

Quilt B                                             Quilt A
Or, at least that's the plan at the moment! We'll see if the fabric has anything to say about that...

25 February 2013

Going on an Adventure

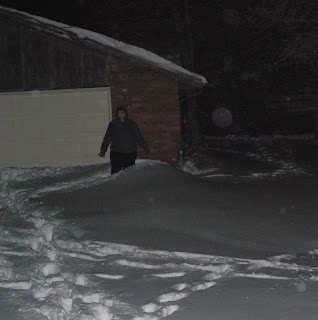
In case you didn't hear, it actually snowed here yesterday. I was beginning to think it was spring - as were the plants and animals - but we got more snow than I think I've seen in years!

Before

After
Yes, I am intentionally standing in the largest drift on the property. Everything averaged out about mid-calf to knee high, but we had a couple drifts that were pretty impressive.

It's been a long time since I've had a snow day, and as you can tell, I spent a couple hours running around. Okay, I was actually scraping off the cars and then using the two ice scrapers to dig into the barn (which had drifted closed - a problem when all the shovels are inside). But it was still fun.

Sadly, the Adventure was not playing in the snow in the daylight. It was going out in multiple cars that have never been used in this kind of snow before. One was surprisingly successful, the other resulted in needing to be pushed through some snow - twice.

20 February 2013

Rolling Along...

This was not the plan. But it turns out, life doesn't go as planned. You would think I would learn that by now. I was going to work with solids and batiks; That was my plan from the moment I began to think about these quilts. Then I went shopping and came home - after hours of debate in the store - with something completely different:


That's a jelly roll of Noteworthy. I have some yardage of two of my favorite prints to go with it too. 

The plan isn't significantly changed, but the look/feel is going to be dramatically different than what I'd planned. And that's okay. Sometimes, I think you have to let the fabric talk to you. Or maybe I just spent too long wandering the rows of my 'local' quit shop! 


On a personal note: I am mostly recovered from yesterday's extra long work day, and related injuries. Today was back to 'normal' (if there's any such thing) though I'm still plagued by an occasional twinge in my shoulder. I'm going to start on this tonight, but if the shoulder keeps complaining, I'm just not going to push it. These quilts do have a due date, but it's far enough out that I can take time to let my muscles recoup without feeling like I'm falling behind. 

19 February 2013

Snooze

I had hoped to come home from work today with enough energy to finish up a little something so I could share it here. Obviously that didn't happen.

Most days I'm running a mobile office for our company, which means I'm with the phone something like 9 a.m. to 6 p.m. Today, was 8:30 a.m. - 9:45 p.m.

And between those hours I was working about two feet ahead of a team of three renovators - and all their tools, and the world's loudest radio. Even with the phone in my pocket, I missed multiple calls simply because I couldn't hear over the noise. We made great progress and all, so I'm not too upset, but that was certainly a new challenge for the whole mobile office aspect...

Oh, and by the time I got home, desperate to drop my 'uniform' in the laundry, I learned I couldn't raise either hand above my head without stabbing pain.

So, rather than spending any time with my sewing machine, the too many things on my to do list, the 'need a new car this week' project, or even the camera, I am crawling into the neighbor's hot tub (with permission). I might even bring a book, if I have the arm strength to hold it up...

I like my job, but days like this are exhausting!

18 February 2013

Monkey Update

Well, it took several hours of seam ripping, over an hour of cutting, and several additional hours of sewing and ironing, but I think it was worth it.

Before:


After:

Not only does it look better, but the additional inches of navy sash really helped the size turn into something I'm happier with.

Now comes the usual fight of trying to come up with a back piece I like. In dream world, I would have enough of any of my textured fabrics for the back. Ideally, either brown or cream. Sadly, in reality, I've dug through my box of scrappy textured pieces before and I know I don't have enough of those pieces. It's unlikely I have enough of any of the others either. It's equally unlikely I'll purchase any new fabric (especially at something like $12-16/yard - something I can't justify just for fun. Now, if I end up with a special recipient before I figure out a different back option, then I might be able to justify it. Might.).

I also figure it needs to be bound in red. Maybe I'm wrong, and I'm going to take it slowly so I can avoid another long date with the seam ripper on this one, but it just feels like it could use another pop of color.


15 February 2013

Progress

Happily Ever After Quilt


Recent Progress: quilted and bound
Yet to Do:  wash (happening now!), and give away (March).

Denim Quilt: 


Recent Progress: none
Yet to Do: back, quilt, wash
Times two actually. More on that later... 

Doodles


No Recent Progress
Yet to Do: baste, quilt, bind, wash


Pansy Patch Project


No recent progress.
Yet to Do: finish piecing tops together, make back, baste, quilt, bind

Monkey Blocks

Yet to Do: Re-complete top, back, baste, quilt, wash

Semi-Sampler (small) Quilt-to-be?

Progress: slowly making a collection of blocks, probably mostly square collections (nine patch, etc.) and wonky stars, we'll see. 

Oddblocks: Floral + Stripes 

Recent Progress: still slowly making blocks with these fat quarters. I'm not sure what the plan is yet.

Waiting to Start:
  • Teddy Bear Blanket II
  • Baby A Quilt
  • Baby B Quilt
  • Welcome Baby SII Package (and Quilt)

14 February 2013

Pinterest Challenge: Bubble Up Pizza

Since I've been running low on creativity and energy the last few weeks, much of my evenings have been dedicated to getting my Pinterest boards more organized. While sorting 'inspiration for future!kid's room' from 'future!kid's future closet (haha)' wasn't exactly inspiring, pulling 'desserts' out of 'not desserts' did bring me back in touch with a lot of recipe ideas I've already forgotten I pinned.

One of those was this: Bubble Up Pizza

Yeah, it's only been online at that location a few days. Which means my memory is shot. Yes, I probably need more sleep. Or something. 

I didn't quite have the ingredients described there, but I made do with the assortment of canned biscuits I had, and since we were additional topping-less, we used only tomato sauce, minced garlic, and cheese.

Before baking
An aside - have you ever been told peppermint oil will help deter mice? I think that's a myth. Or I have something other than mice. This was the day I re-oiled the cotton balls scattered throughout my kitchen (hey, at least it makes it smell nice for me), attempted to use disinfecting wipes on a toaster (which may never be clean enough again), moved all my cooking appliances to the pantry (which thus far has been mouse free), and generally had a truly disgusting day cleaning out the lower cupboards. 

Also, there is some iced tea making going on in the back ground. I've been making it with Celestial Seasonings Bengal Spice tea and drinking nearly 2 quarts a day of the stuff. It's amazing. 

Back to pizza.

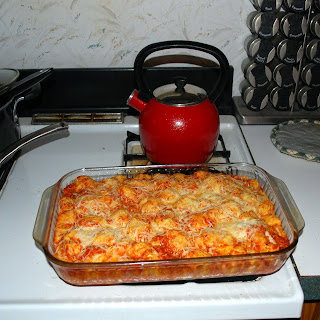
Forty minutes later, we had this
After baking 
My cheese didn't quite melt into that pizza perfect bubbly goodness that I'd hoped for, but it was melted, and I thought the biscuits were done, so we went for it.


Trying to describe it to anyone else, I'd have to say it's like monkey bread, but with pizza sauce instead of cinnamon sugar. Eating it was a very similar process, which resulted in a slightly bigger mess than I like.

Some of the inner most biscuit pieces weren't quite done, so I should have let it bake a little longer. Trying to know when it was done was actually the most difficult part - it's hard to know if the biscuits are done or not.

I liked the taste, and I can see how it might be a fun - but messy - project if you have kids in the kitchen looking for something to do - but I think I could have used the same ingredients differently and come up with something similar in less time. Cutting up the biscuits was time consuming, and really just added more to the 'to wash' stack (I'm particularly sensitive to that right now since the dish washer is on the outs). It seems like I could have just used the whole biscuits more lasagna style as easily, and I know I could have made up a package of 'just add oil and water' pizza crust in less time, and less mess.

My husband was a fan, but he has yet to do his part of the dishes, so I'm not sure we'll try it again.

If I do try it again, it'll either be for a bigger group or we'll try making a scaled down version (maybe single servings in little containers).


13 February 2013

Maybe I'm Making a Sampler Style Quilt?

Once upon a time I accidentally bought a charm pack. I don't mean I didn't realize it was in my hands when I checked out. More like I thought it would match a certain project only to get home and realize I was way off in my memory of the colors.

I'm not really a fabric collector. While I occasionally come across pieces I can't stand to cut into unless it's for the perfect thing - like the two prints I'm holding on to for future!kid? - usually I aim for pieces I can see using right away. So, after a couple weeks of staring at this little unwanted charm pack, I just jumped. 

I pulled the only fabric from my stash that was even close to matching and started cutting. 


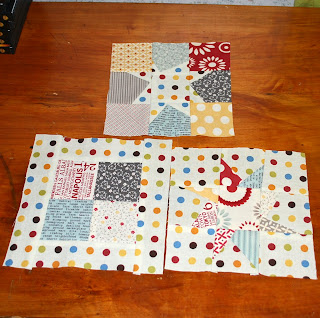
So far it's just these three blocks - but I'm making plans for a few others to coordinate. Probably a nine patch or something similar, maybe a couple different styles of stars.

I'm hoping to include

  • a friendship star
  • a sawtooth star
  • a star in a star
  • a couple more squares (nine patches etc.)
  • maybe a disappearing nine patch 

Squares and stars? Maybe... maybe I'll find something else to throw in as well...

These have been time consuming, but my biggest concern is that I will probably have to come up with a second additional accent fabric, as the stash piece was very small (less than a fourth of a yard). 

I won't really know where this is going until I've got all the blocks made, but I'm thinking a small quilt. 

12 February 2013

Oddblocks

Since I'm still in semi-panic mode over some out of control things, I figure now is as good a time as any to confess to some more of my hidden starts.

My fabric storage area is open to the air - and cat hair. Living between three dirt roads means results in a lot of dust. Those two things don't exactly go well together, but I work with what I've got. Clearing off the shelves to do a little dusting revealed some hidden and forgotten blocks...

For the most part, these are left overs from trying to make a single block to mail in for a family/prayer quilt for the Nephew. These are from very early in my sewing/quilting history - and some of them look way better than others!

My very first attempt at patchwork


It's supposed to be a mushroom and a gnome


While it's kind of nice to see my growth, I don't think the cabins, gnome, or patchwork are anything worth keeping. On the other hand, there's not much to salvage... and I hate to just throw that fabric away - especially the blue swirly sky. I really love that fabric...

The brown almost chevron pattern and the cats are probably worth keeping - if I can figure out something else to go with them. I loved the cat one and very nearly sent it in, but it just didn't seem right for a little boy.

There are a few more oddblocks hanging about my desk. Less forgotten, but with no more direction:


I need to make a few more things that aren't pinwheels! I think I went a little overboard on those!

I have a slightly idea of these coming together in a field of a third fabric, but what it will be, I'm not sure. Maybe a pillow or the exterior of a quilted bag?


11 February 2013

Woah! Weekend....

This was not the relaxing, calm weekend I'd planned.

1) New to us dishwasher, thanks craigslist.

Which meant taking out the old one - and revealing Mouse City. Yuck. Oh, also, turns out the pipes under our sink have been leaking. Strange how the paper towels we store under the sink have been fine... but, guess we'll be getting new pipes soon. Fun. I should get off the computer and load the machine for the first real test run.

2) Finally got an afternoon set aside to go look at a new to me car.

Which means I have about 24 hours to do a massive clean on my old one, just in case I can trade it in. That is a bigger project than it should be. And of course it snowed. Don't get me wrong, we need it. But that did not help my filthy car - hey, I have to drive several dirt roads every week. So, here's to hoping I can still give it a bit of a wash. And crossed fingers that they'll take it!

3) Bridesmaid.

By my age, I'd figured that was an option that had passed me by. And I was okay with that. Surprise! So I have only a couple weeks to find a dress in the right color - not easy, especially not in my size range - and the right shoes - which might be more difficult. I've been searching for black heels for over a year, and have yet to find any that work for me. Chances of finding some in the next few weeks? Slim to nil.

Chances of pulling a dress in the right color and right size off the rack - apparently zero. Which means I've got to find something else. Good thing Mom knows how to sew clothes... Now we're racing to see if the pattern I picked out works. Yikes.

This also means that the idea I've been tossing around about cutting down sugar in my diet is on starting now. I've been feeling over-sugared (Christmas candy followed by conversation hearts will do that to a person), and this is the kick in the butt I need to stop bringing home sugary treats all the time. The goal is to do no candy, no sugary baked goods, and to seriously cut back the soda habit - starting yesterday. So far, that's been easy - but it's only been a few hours, with minimal work and no headaches (why I'm not going zero soda). Things could be more challenging in a few days, but I think my energy level and my skin will thank me for taking in less sugar.


So... I guess I've got a set of new goals to rush through in the next couple weeks. If I'm quiet around here, you'll know why!

08 February 2013

Monkey Blocks

Yeah, yeah, I probably shouldn't have bothered telling myself I wouldn't make quilts just for the fun of it this year - because yet again, here I am starting one with no one to give it to!


Monkey fabric from my stash (from at least two designers, I think, but it kind of works together) in a quick stack and whack kind of pattern.

Of all the things that go with quilting, trying to arrange blocks in a layout might be my least favorite part. It's not exactly hard work - not like pulling a too big quilt through a too small sewing machine - but it's not easy either.

Around here, it usually means taking the blocks to the bedroom and working on the fitted sheet. It also means I drag my husband in to help. He's got a much better eye for color and design than I do.


Since there were really only a few variations in blocks, this came together fairly quickly. My only real goals in the layout process were 1) not to have blocks of the same patterns either side/side or top/bottom, and 2) to rotate the seams of the borders long/short/long/short. Whew! Hope I didn't lose you with those technical terms.

Because I only made 20 blocks, I knew this was a little small for a top. So I did spent a little time playing around with different fabrics that I could possibly add as sash between the blocks. My favorite of the options was this navy dot:


Which seemed too dark for the fun of the prints.

So, I sewed what I had together without any additional fabric and wound up with this:


And I thought I was fairly happy - until I started editing the photos for this post. Now I'm really wondering if I should have gone with the navy after all. I'm going to have to add something to help widen it out. I'd been planning on adding some brown textured fabric to two of the sides, but now I'm really wondering if the right thing to do is to unpick everything (horrors!) and add the navy dots in after all.

So, here are two of my options - as illustrated by paint and a lot of copy/paste action:


Crud.

Just seeing that, I know what the 'right' option is. I don't even see a reason to make an image for the third option (the easy one) because I know it's not going to be nearly as good as either of these.

I guess I'd better go measure the navy dots to see if I have enough.

Any suggestions for something mindless on hulu to listen to while I spend the rest of my life picking these blocks apart?

07 February 2013

Valentine

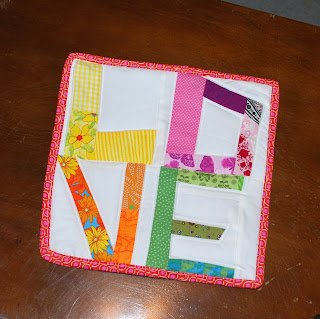
Inspired by a pin of Kelby Sews' little wall hanging, I did a little pre-Valentine's Day sewing/quilting.


The inspiration piece is fairly scrapy, with each letter of the word 'love' in a different color - which I loved. 


I didn't think about the idea of paper piecing - actually, I didn't even click through the pin to the source - I just grabbed a few favorite scraps in favorite colors, my scrap of remaining white material, and went to town improvising. 


I ought to practice this kind of sewing a little more. There were a few too many attempts at angles that turned out to be exactly backwards of what I wanted... That said, eventually I got it all pieced together more or less how I'd envisioned. 


Since it was the perfect size, I backed it with the third piece from my Aunt (here are the other two pieces from her), added a thick scrap batting, and did just a little bit of quilting. 


I debated doing a little more, but ultimately I liked the simplicity of outlining the letters. A little left over binding and it was ready to hang. 


I may have danced around the kitchen squeeing for the next hour or so. Fortunately, my husband (an artist) understands the happiness when it comes to finishing something that turned out 'right.' Unfortunately, Momo didn't quite appreciate my enthusiasm. 

This also signaled the end of my winter themed decorations - I put away the snow flakes and the snowmen, and the last of the Christmas decorations. February will be mostly hearts and love elements (no surprise there). After that I'll be pretending it's spring - although right now it already feels like it is! - with flowers and the like. 


05 February 2013

HEA Progress!

I love working under pressure.

That's probably a little wrong, but I really do. I'll intentionally procrastinate just so I can really cram at the end - and I enjoy it. Not every minute of it - I mean, I do still stress over it - but enough that I keep doing it to myself. At just about every aspect of my life.

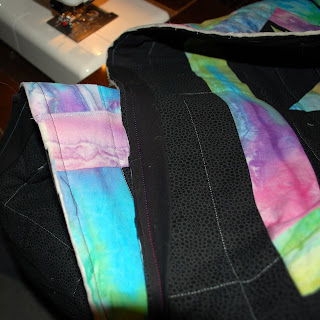
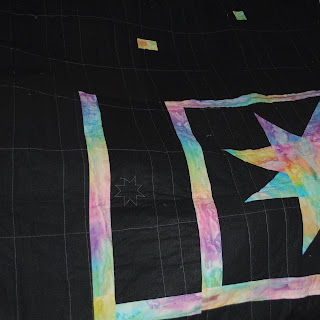
And that is why I'm honestly amazed I've already bound Happily Ever After Quilt. With one month of possible work time left, I'm a wash and a dry away from being completely done (assuming all goes well).

Yes, I wound up buying a solid black for the actual binding. I really wanted to go with the same fabric I used throughout the body, but I just could not convince myself it was sturdy enough even on the bias to be the right call for that.


Pre-wash, it matched a little better. But it smelled so strongly of dye that I knew I had to wash it. And sadly, that did impact the color a little.

Did you notice the pink thread?


It's hard to get a good picture, but I did sew on the binding with a pink/purple/aqua color change thread (the same gray in the bobbin though, so it matches the back quilting). I think it makes it a little more fun without being over the top -  though it disappears a little more than I'd hoped.

And that went so well, I got a little crazy after all...


This was my first of three (so far??) and a little rough, but I think it does add a little something to it - in a good way.


Especially on the back.

I'd still like to go through and do a few more - but it is a difficult process that requires shifting a lot of the quilt around repeatedly. It doesn't take much of that before I start getting sore.

It's amazing how something like a few feet of fabric can wear on you after an hour or two of wrestling with it! It also makes me even more nervous about how I'm going to finish those denim scrap quilts I've been putting off... Those are way heavier than this one. Guess I'm going to have to start stretching and weight lifting a little more! 

Assuming we get some light tomorrow morning, I'll recruit a couple helpers to hold it up so I can take a few pictures of the whole thing before it goes in to the wash. Since weekend plans were put off thanks to the flu (not here, thankfully), I was able to keep the sewing machine in the living room for a few more days, but I'm ready to have life here back to normal. The sooner the quilt goes through a wash/dry cycle and assures me it doesn't need any fixes, the sooner I can rearrange my house to the way it belongs!


It gives me goosebumps in the best possible way. I can't wait to give it away - though I do wish there were a way to just drop it off and run... Guess that's proof I am shy as well as an introvert!